Study Events are critical steps in your lab’s enrollment and study protocol, designed to help you efficiently manage your team and monitor participant progress. They streamline scheduling and coordination for both participants and research staff, ensuring smooth execution of the study.
Key Features of Study Events
-
Participant Progress Tracking:
- Events help track participants' progress through the study protocol, ensuring no steps are missed.
-
Efficient Scheduling:
- Streamline the timing and scheduling of study-related tasks, such as:
- Appointments
- Phone calls
- Other participant milestones
- Streamline the timing and scheduling of study-related tasks, such as:
-
Lab Staff Management:
- Assign tasks to lab staff efficiently, ensuring clear communication and role distribution for study-related activities.
Components of an Event
Events are designed to help you effectively manage participant workflows and automate the scheduling of future study events. Below is an overview of the customizable components and key features available during event creation and participant profile management. Learn more about creating events here.
Event Creation View
When creating an event, you can customize the following components:
-
Event Title:
- A descriptive title that aligns with your study protocol.
- Example: “Baseline Visit” or “Follow-Up Call.”
-
Schedule Relative To:
- Defines the reference event relative to which this event is scheduled.
- Example: Scheduling “Visit 1” two weeks after the “Baseline Visit.”
-
Schedule Event:
- Specify the time interval relative to the Schedule Relative To event:
- Time can be scheduled before or after the reference event.
- Example: “2 weeks after Baseline Visit.”
- Specify the time interval relative to the Schedule Relative To event:
-
Assign to Statuses:
- Assign the event to specific participant statuses (e.g., Enrolled, Active).
- Only participants in the selected statuses will be assigned this event.
NOTE: For additional details, refer to the related documentation on status assignment.
Help Text:
-
- Add general notes or instructions about the event for the research team.
- Example: “Ensure participants bring their completed consent forms.”
Event Creation View

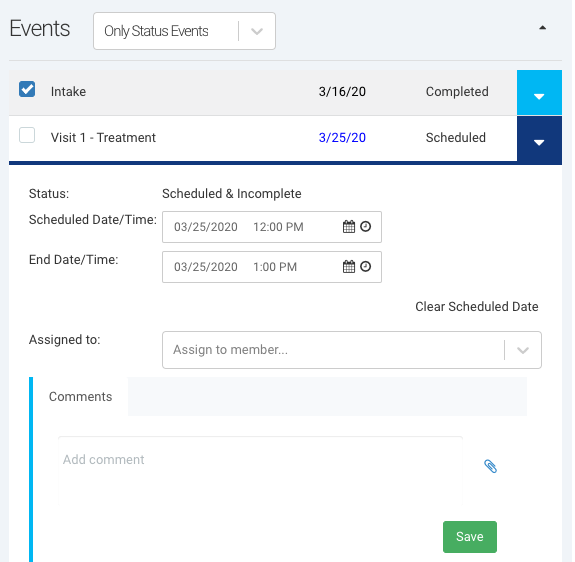
Participant Profile View
Events displayed on a participant’s profile card include the following components:
-
Status:
- Reflects the current scheduling status of the event:
- Unscheduled & Incomplete
- Scheduled & Incomplete
- Complete
- Missed
- Reflects the current scheduling status of the event:
-
Expected Date/Time:
- Automatically calculated based on the Schedule Relative To setting.
- Even after the event is scheduled, this field shows the original expected time.
-
Scheduled Date/Time:
- The actual date and time the event is scheduled to begin.
-
End Date/Time:
- The scheduled time for the event to end.
-
Assigned To:
- The team member(s) assigned to manage the event.
-
Comments:
- An open text field to record notes about the event:
- Before the event (e.g., special participant instructions).
- During the event (e.g., progress updates).
- After the event (e.g., follow-up notes).
- You can also attach relevant documents directly to the comments section.
- An open text field to record notes about the event:
Participant Profile View
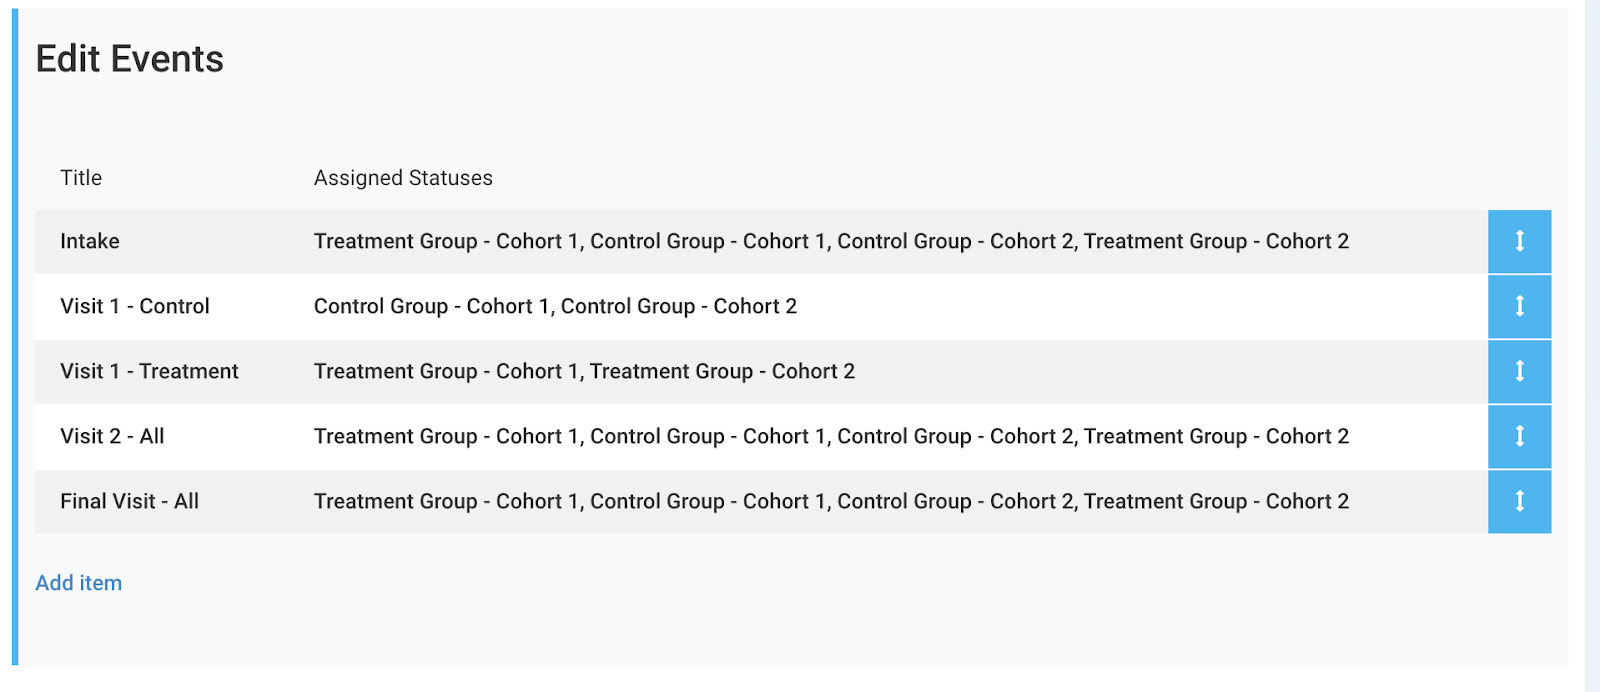
Associating Events with Statuses
In Ripple, you can assign Events to specific Statuses to ensure that participants only see relevant events based on their current status. This feature streamlines event management by avoiding unnecessary assignments and tailoring workflows to a participant’s specific stage in the study.
Benefits of Associating Events with Statuses
- Relevance: Ensures participants only complete events applicable to their current status.
- Protocol Flexibility: Supports protocol branching, making it easier to manage different study arms or workflows (e.g., control vs. treatment groups).
- Efficiency: Reduces confusion by hiding unnecessary events for participants who don’t require them.
For more information on how to associate events with statuses, refer to the documentation linked here.
Integrating Events with Your Google Calendar
Ripple allows you to connect study events to an external Google Calendar account, making it easier to schedule and track participant appointments. This integration ensures that event dates remain synchronized, whether edited in Ripple or Google Calendar.
Requirements for Google Calendar Integration
To use the integration, you’ll need the following:
-
A Google Account:
- The Google account should be used to create study calendars and shared with all team members managing events and appointments.
- This can be:
- An individual account (e.g., PI or Site Administrator).
- A dedicated account for the study.
-
Custom IDs for Participants:
- Use Custom IDs to uniquely identify study participants.
- Learn more about Custom IDs here.
-
A Compatible Web Browser:
- Use a browser compatible with Google Calendar and 3rd-party authorizations (e.g., Chrome, Edge, Firefox).
Benefits of Google Calendar Integration
- Simplified Scheduling: Easily schedule and manage appointments for study participants.
- Two-Way Sync: Keep event dates synchronized whether edited in Ripple or Google Calendar.
- Team Collaboration: Share calendars across your study team for seamless coordination.
For detailed instructions on setting up Google Calendar integration, refer to the step-by-step guide linked here.