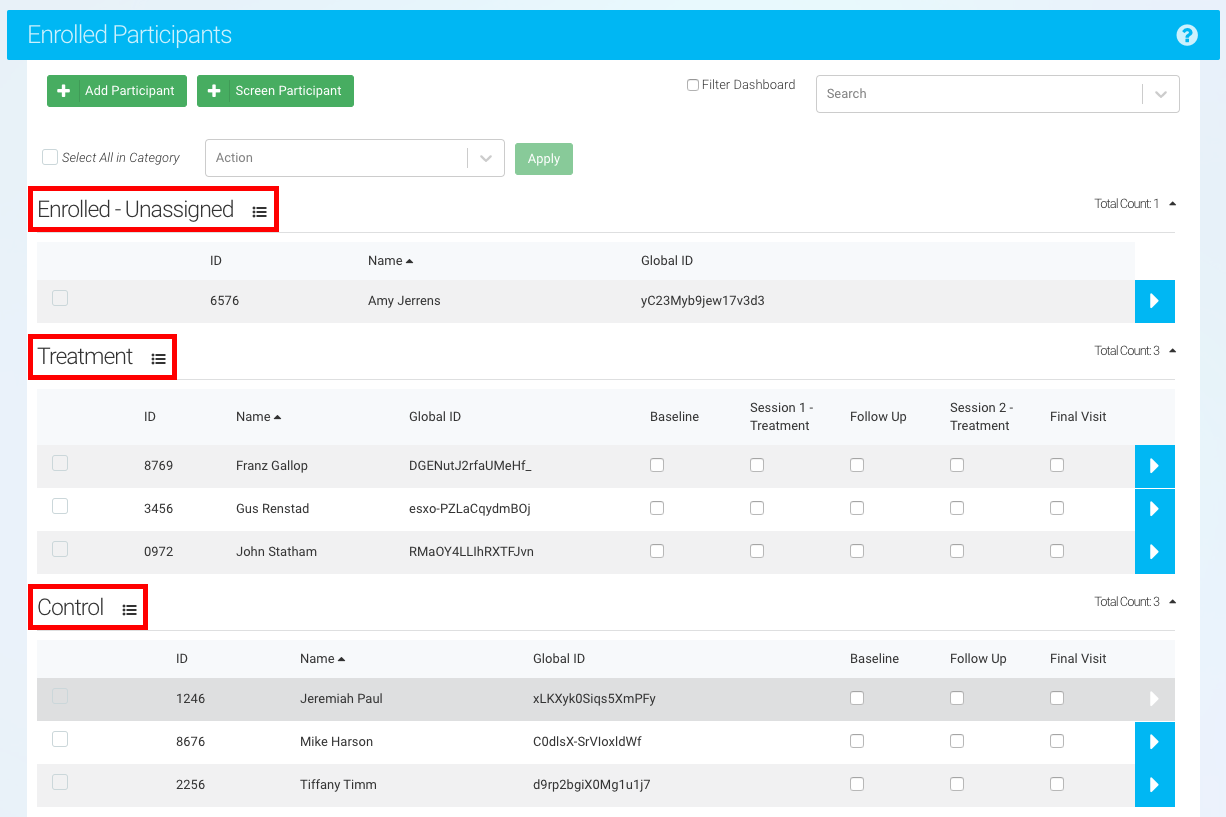
Study Statuses enable you to organize participants into custom groups as they move through the screening, enrollment, and event protocol stages of your study. These statuses serve as flexible categories to visually distinguish participants on the Study Dashboard, as well as the Potential and Enrolled Participant pages.
Creating and Editing Statuses
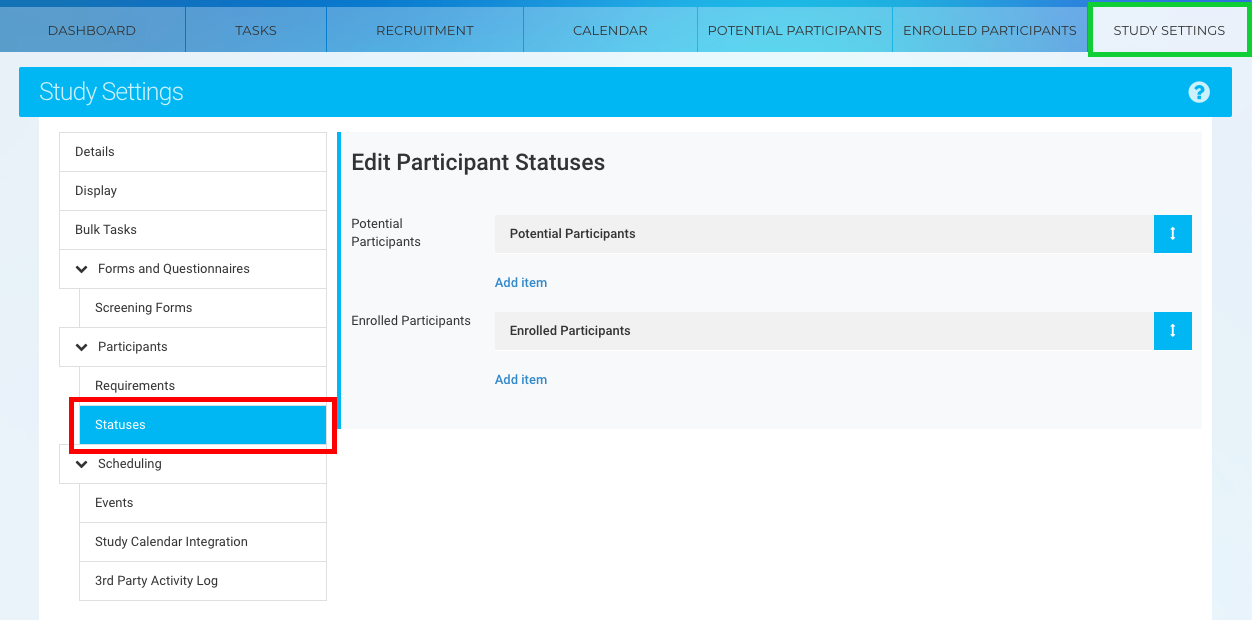
Customizing Statuses is crucial for effectively managing your study's workflow. To add or edit Statuses:
- Navigate to the Study Settings tab (green).
- Click on the Statuses section (red).
By default, a new study includes two Statuses: Potential Participants and Enrolled Participants. When creating a new Status, you can specify whether it will appear under the Potential Participants or Enrolled Participants tab.
Status Limit Recommendation
To ensure smooth performance, avoid adding more than 15 Statuses per page. This includes a maximum of 15 Statuses on the Potential Participants page and 15 on the Enrolled Participants page. Exceeding this limit may cause pages to load slowly.
Creating and Managing Statuses
To Create a New Status:
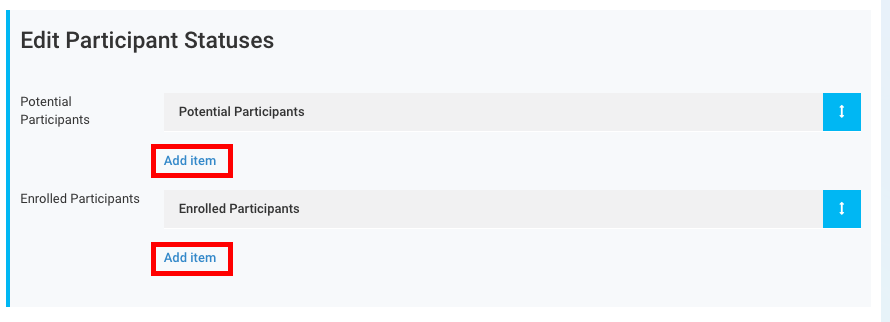
- Add a New Status: Click the "Add Item" button under the tab where the new Status will appear (either Potential Participants or Enrolled Participants).
- Name the Status: Set the Title and choose whether it is Active or Inactive. Optionally, add Help Text to describe the Status. (This Help Text is viewable by hovering over the Status name on the tabs.)
- Save: Once all fields are complete, click Save.
 To Edit or Delete a Status:
- Click on the Status to open the Edit Status window.
- Make changes or delete the selected Status.
Important: Remove all participants assigned to a Status before deleting it in the Study Settings.
To Reorder Statuses:
- Click the Reorder button (blue).
- Drag and drop Statuses into the desired order for your study protocol.
Moving Participants Between Statuses
Participants can be moved between Statuses using one of three methods:
- Drag and Drop: Click and drag a participant's profile card to a new Status.
- Profile Card Drop-Down: Use the drop-down menu on the participant's profile card to select a new Status.
- Select Multiple Participant Profiles: Move one or many participants simultaneously by selecting their profiles and assigning them to a new Status.
Drag and Drop
.
Profile card drop-down.
Select Single or Multiple Participant Profiles
Single Participants
Multiple Participants
Status groups
Potential or Enrolled Participants tab
Associating Events with Statuses
In Ripple, you can assign Events to specific participant Statuses, simplifying the process of managing study workflows. This feature helps users identify which Events should be completed or scheduled based on a participant’s current Status.
This capability supports:
- Protocol Branching: Tailor workflows to match different paths within the study.
- Study Conditions: Assign Events based on specific study groups or conditions.
- Custom Study Needs: Adapt event scheduling to meet unique requirements.
For detailed guidance on associating Events with Statuses, refer to the additional resources or documentation available within Ripple Here .
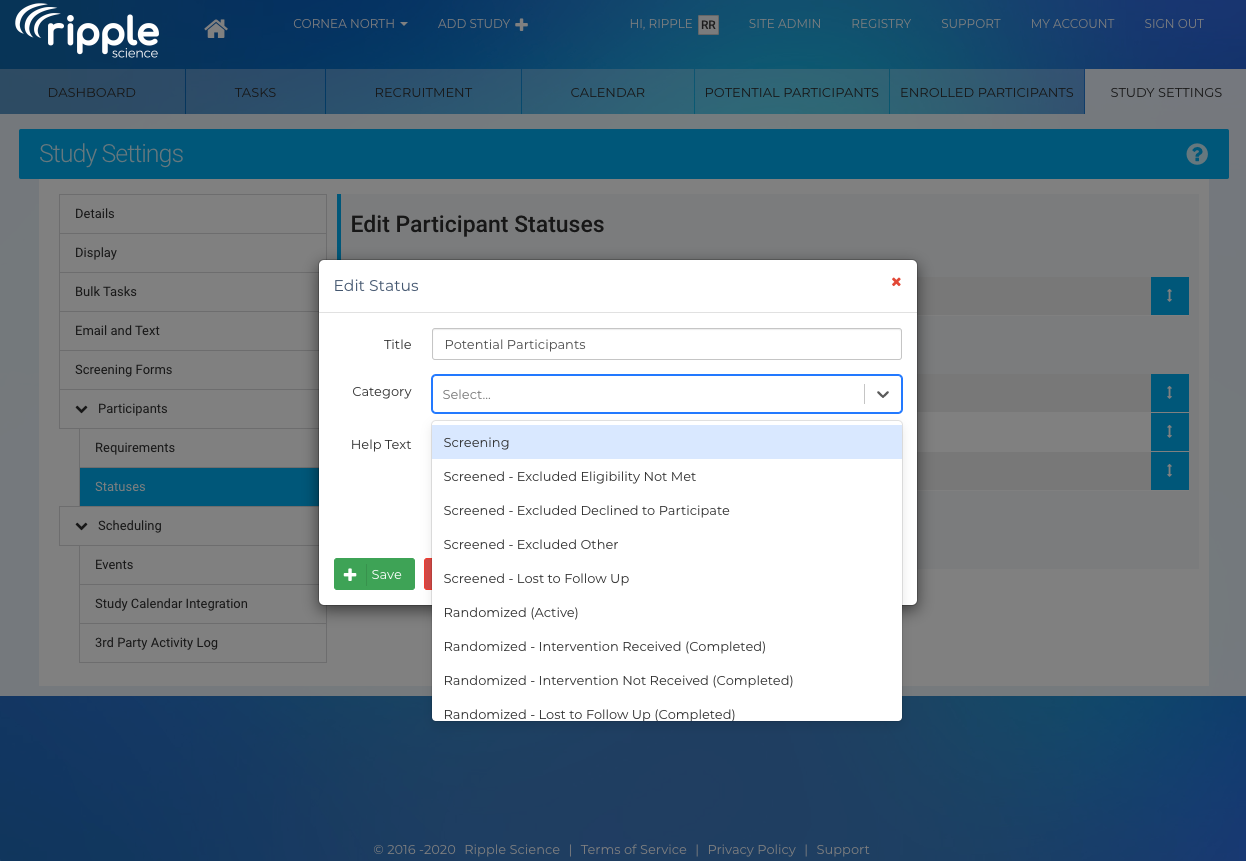
Status Categories
When creating or editing a Status, you can assign it to one of several pre-set Status Categories (e.g., Screening - Lost to Follow Up, Randomized (Active), Completed). These categories help you:
- Use customized Status names specific to your study.
- Accurately group similar statuses across multiple studies for consistency and reporting.
Active vs. Inactive Statuses
Ripple allows you to designate a Status as either Active or Inactive, based on the participant’s involvement in the study:
- Active: Indicates participants currently engaged in the study (e.g., enrolled, assigned).
- Inactive: Indicates participants no longer actively involved in the study (e.g., completed, withdrawn, ineligible).