Study Admins have the ability to create and manage Events on the Study Settings page. Events help streamline participant workflows and improve scheduling efficiency.
Steps to Create a New Event
-
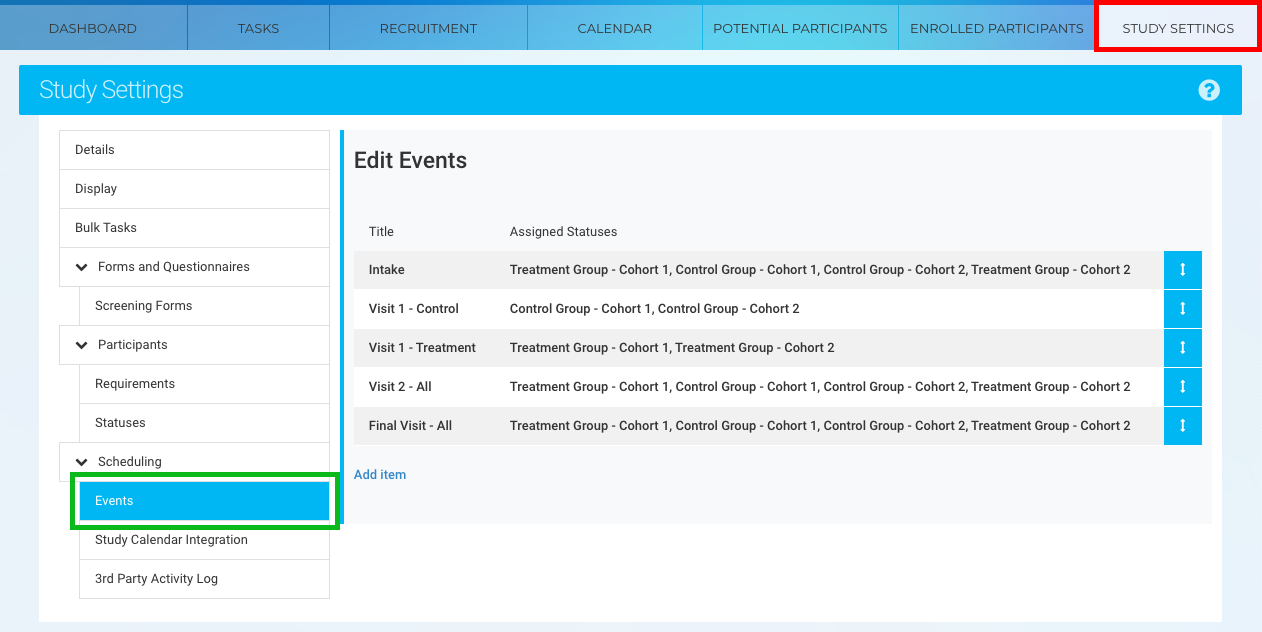
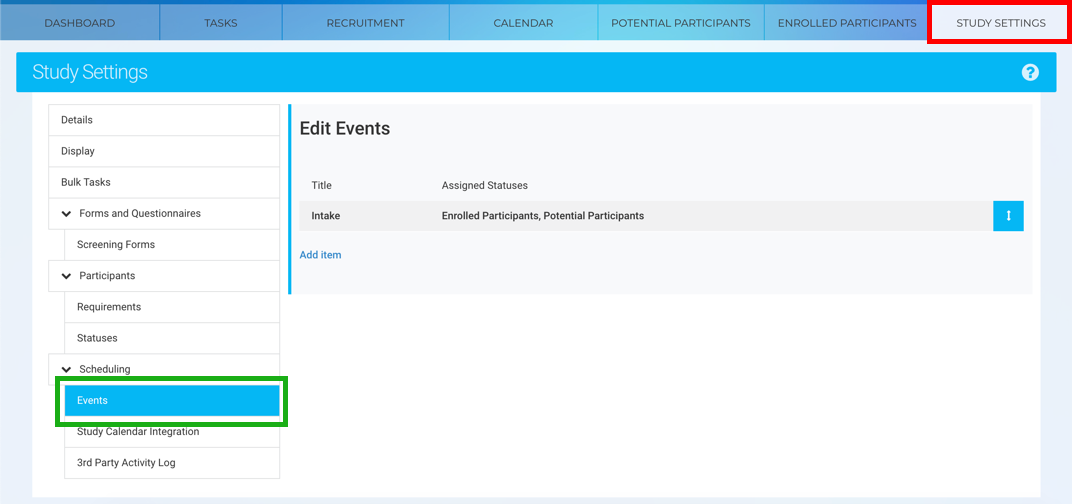
Navigate to the Events Tab:
- Go to the Study Settings tab (red).
- Select the Events section (green).
2. Add a New Event:
-
- Click the Add Item button to open the Add/Edit Event window.
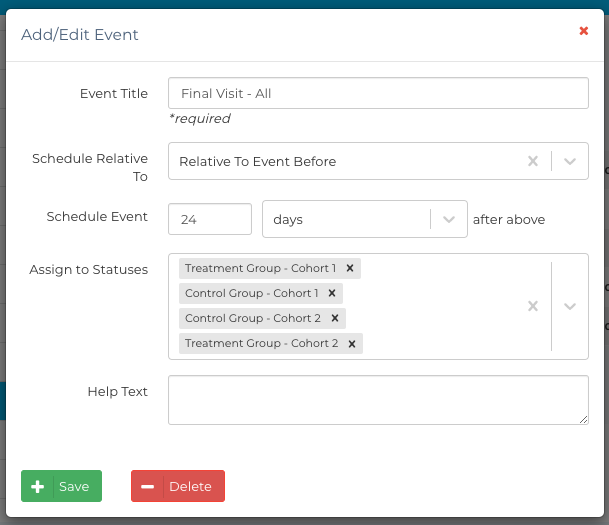
3. Enter Event Details:
Fill in the following fields:-
-
- Event Title: Provide a descriptive name for the event.
- Schedule Relative To: Specify the event relative to another event (e.g., Baseline Visit).
- Schedule Event After: Define the time interval before or after the reference event.
- Assigned Statuses: Select the statuses for participants to whom this event applies.
- Help Text: Add general notes or instructions for the event.
- Note: Detailed information about these components can be found here
-
4. Save Changes:
-
- Click the Save button to save the new event.

- Click the Save button to save the new event.
Understanding Expected Window
In Ripple, the "Expected Window" for an event refers to the range of dates during which a particular event is expected to occur based on the participant’s timeline or a reference date (such as enrollment, birth date, or another key milestone in the study).
Here's what it typically means:
-
Start of Expected Window: The earliest date the event should occur.
-
End of Expected Window: The latest date the event should occur and still be considered "on time."
Purpose:
The expected window helps research teams:
-
Track whether an event is on schedule, overdue, or upcoming.
-
Schedule visits or send reminders based on the ideal time frame.
-
Ensure that data collection is occurring in accordance with the study protocol (e.g., visit should occur within 30–60 days after enrollment).
Example:
If a study visit is expected to take place 30–45 days after enrollment:
-
A participant enrolled on June 1 would have an Expected Window for that visit from July 1 to July 16.
-
Visits outside of that range might be flagged as early or late.
- This article has more details on how to set an expected window.
Steps to Edit an Existing Event
Editing an event is similar to creating a new one:
-
Open the Event:
- Click on the event you want to edit in the Events section.
- The Add/Edit Event window will open.
-
Modify Event Details:
- Update fields like the title, scheduling settings, assigned statuses, or help text as needed.
-
Save Changes:
- Click the Save button to apply your edits.
Reordering Events
-
Reorder Events:
- Click the Reorder button (blue) in the Events section.
- Drag and drop events into the desired order to align with your study protocol.
-
Save the New Order:
- Ensure you save your changes to maintain the new event order.