Functionality of Outlook Calendar
Ripple integrates with Outlook Calendar, enabling seamless syncing of scheduled events. Participant scheduling and event updates managed in Outlook automatically reflect in Ripple’s Events and study calendars, ensuring consistent and efficient coordination. Ripple's Outlook Calendar integration enables you to fully utilize Outlook Calendar features while linking appointments directly to scheduled events in Ripple. This eliminates the need for separate study calendars, ensuring seamless coordination and keeping appointments on track. Learn more about Outlook Calendar functions, here.
Setting Up Your Integration
Before Integrating Ripple with Outlook Calendar
To set up the Outlook Calendar integration for Ripple, ensure your team has the following:
- Compatible Web Browser:
Use a browser that supports Outlook Calendar and third-party authorizations. Common options include Chrome, Edge, and Firefox. - Designated Outlook Account:
An Outlook account must be set up to create study calendars shared with all users managing events and appointments.- This can be an individual account (e.g., PI or Site Administrator) or an account dedicated entirely to the study.
- Custom IDs for Participants:
Ensure you have unique Custom IDs to identify study participants. Learn more about Custom IDs by following this link. - Separate Calendars for Each Study:
Create a distinct calendar within the designated Outlook account for every study in Ripple.
How to Create a New Calendar:
- Go to the Outlook Calendar tab.
- Click the New Items button in the top-left corner.
- Select Add Folder (when in the calendar tab, this will create a new calendar instead of a mail folder).
NOTE: Calendar integration must be set up by a Study Admin with login access to the associated Outlook account.
Setting Up the Outlook Calendar Integration for Ripple
To set-up your Outlook Calendar integration we recommend that you follow these steps:
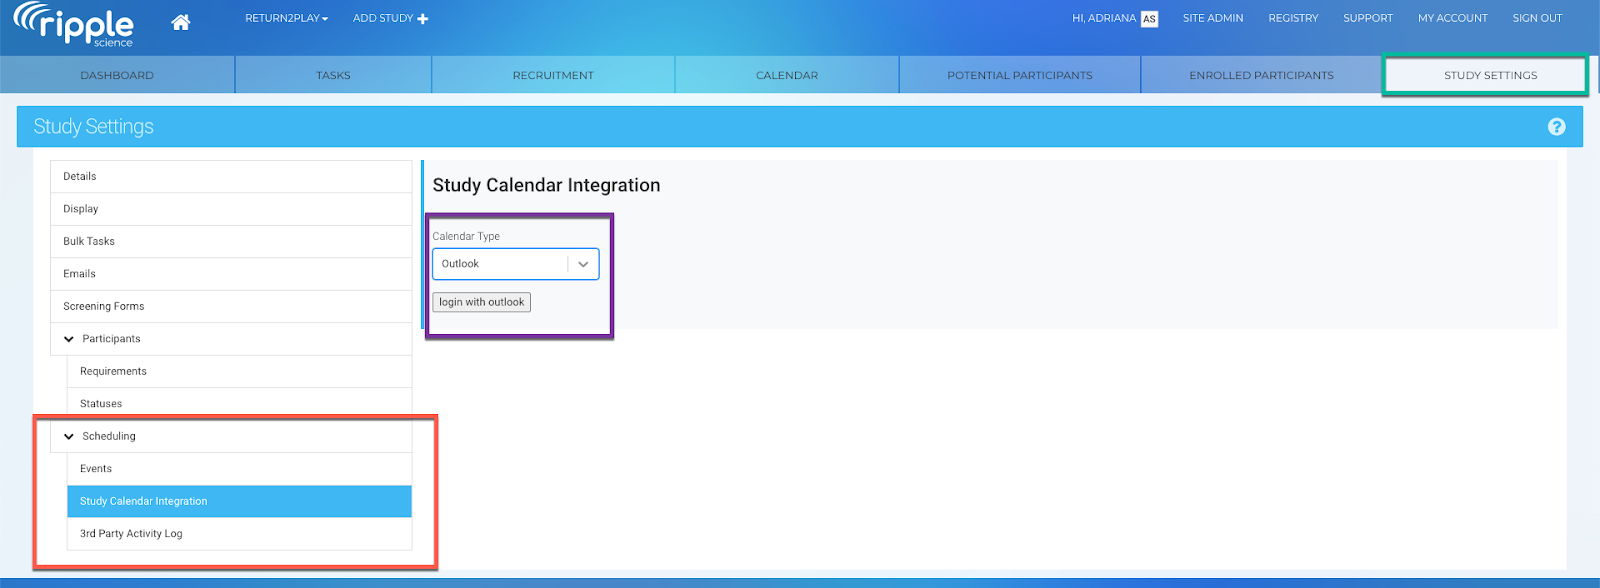
1. Link the Selected Outlook Account- Navigate to the Study Settings tab (green).
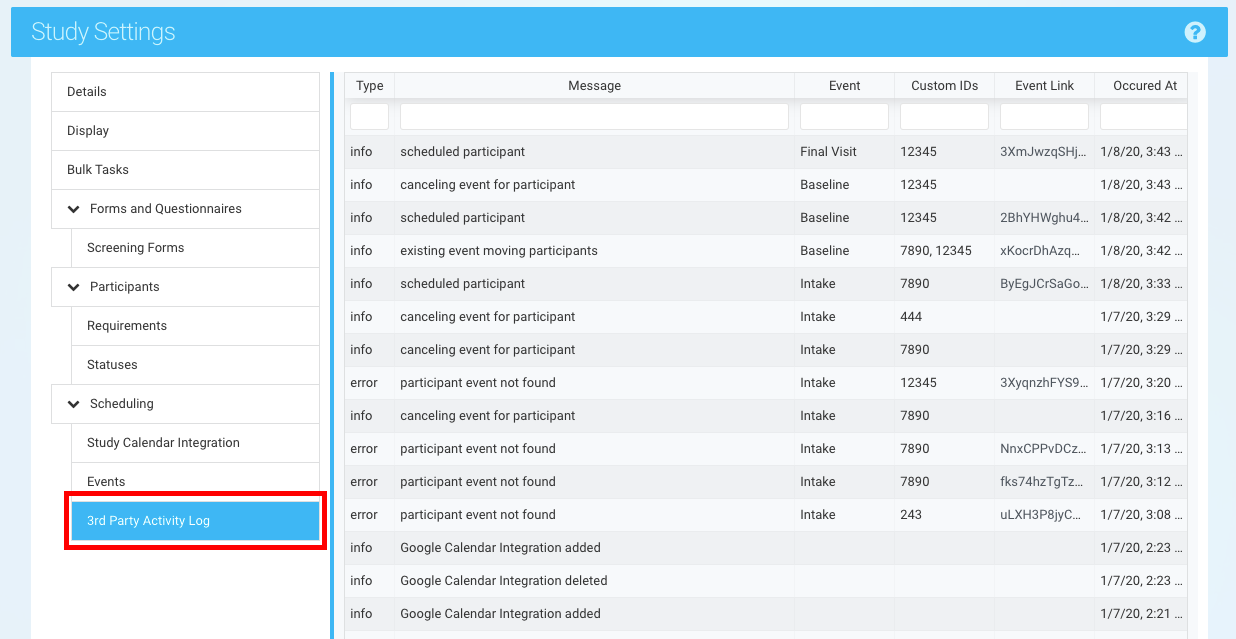
- Go to the Scheduling section (red) and find the Study Calendar Integration page.
- From the dropdown menu (purple), select Outlook.
 2. Authorize Access
- You will be prompted to log in to your Outlook account via its login portal.
- Grant Ripple permission to access your calendar.
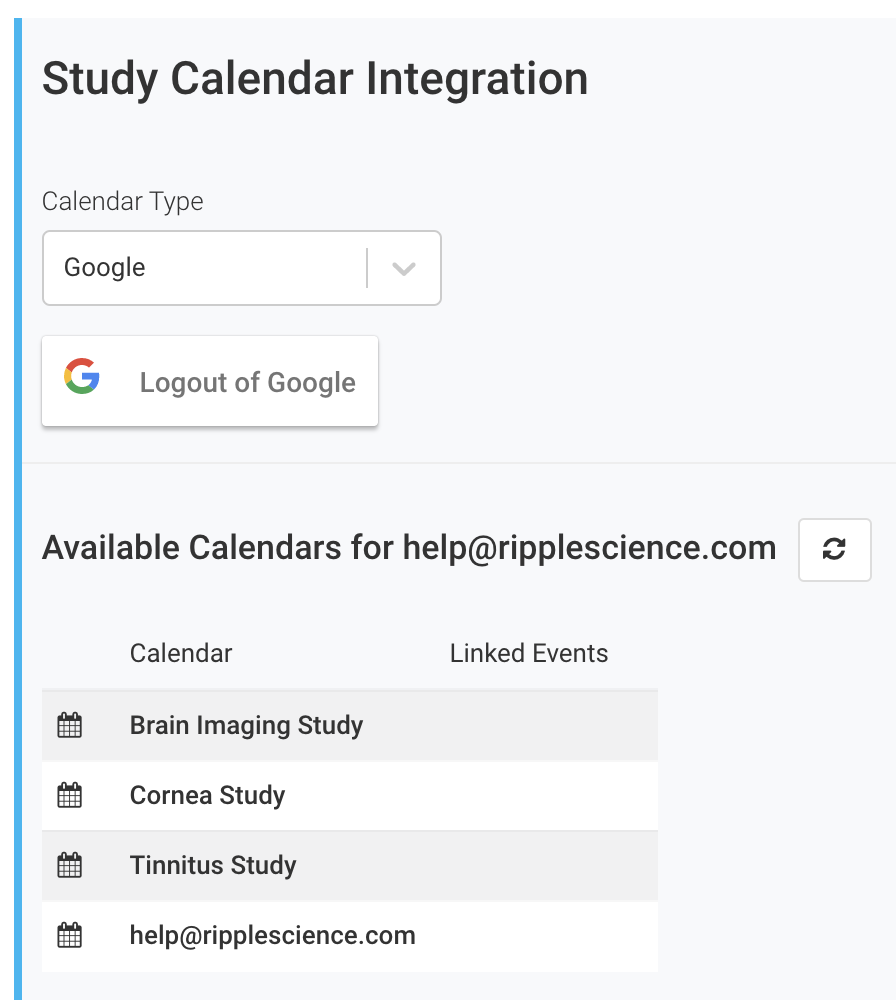
3. Confirm Study Calendar Integration
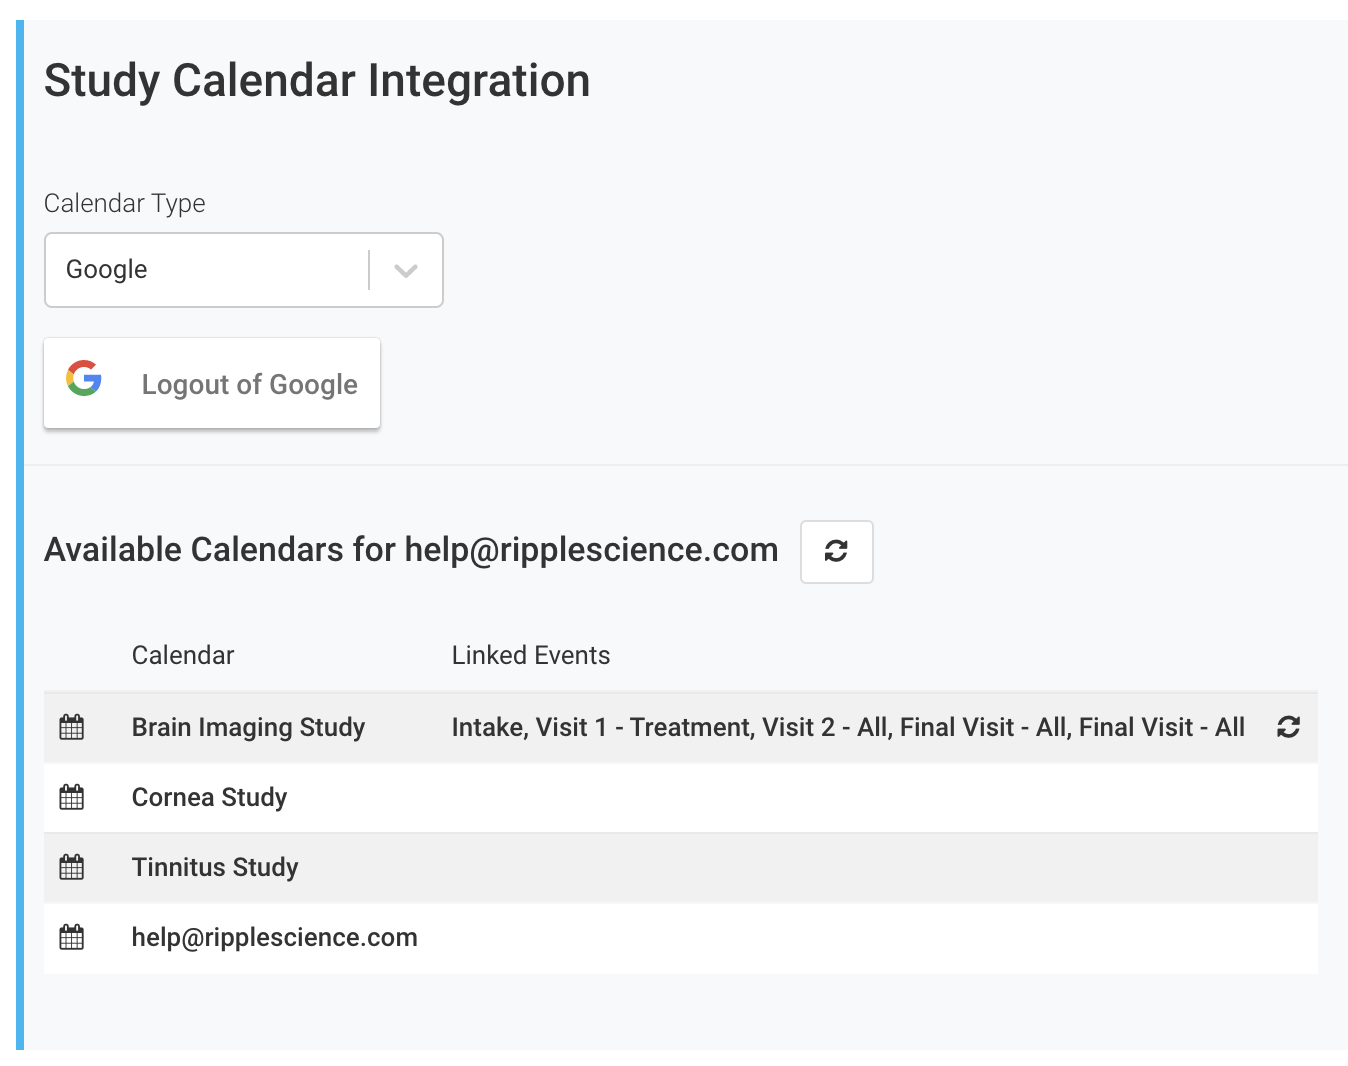
- Once Ripple and Outlook are connected, you will see a list of all available Outlook Calendars within Ripple.
- This list includes study calendars and any other calendars associated with your Outlook account.
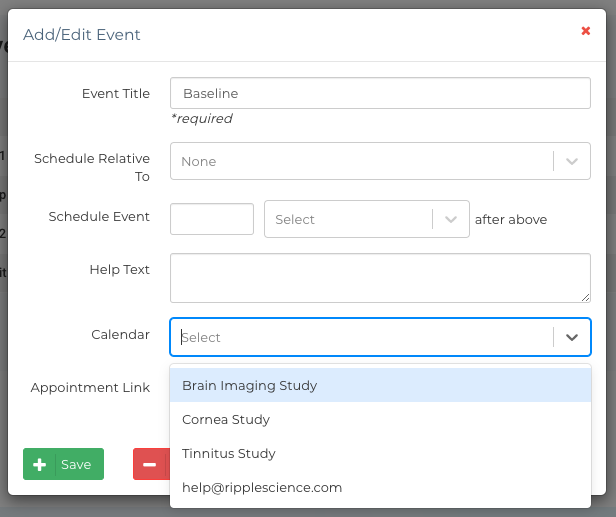
4. Link Outlook Calendars to Ripple Events
- Go to the Events Setup section in the Study Settings page.
- If Events are not yet set up for the study, pause the calendar integration and create the study Events first. Learn more about how to set-up and use Events by following this link.
- Select the appropriate study calendar corresponding to the study’s Events (e.g., "Brain Imaging Calendar" from the dropdown menu).
5. Verify Linked Events
- Return to the Study Calendar Integration section.
- You should see the names of all study Events linked to the study calendar.
Using Event Identifiers in Outlook for Ripple Integration
To ensure proper linking between Outlook Calendar events and Ripple:
-
Unique Event Identifier
- Every Outlook Calendar event must include a unique event identifier within brackets in either the title or description.
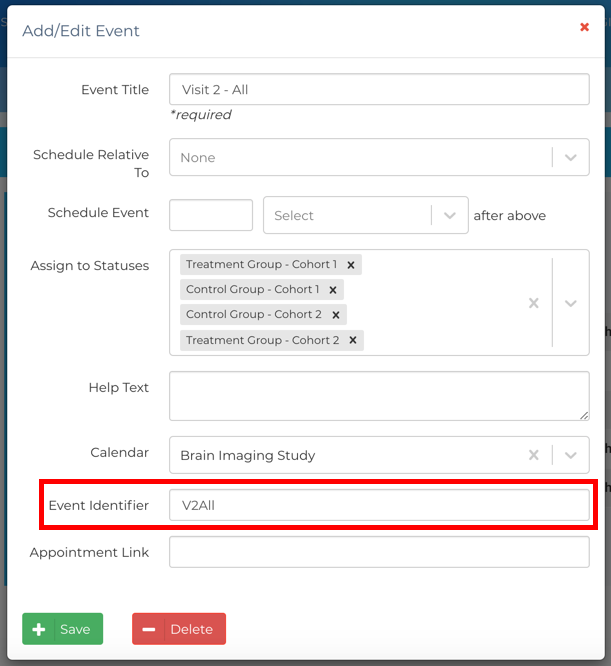
- The event identifier is customizable in the Ripple event settings.
-
Correct Format
- Use the following format:
[event identifier]. - For example, if the Ripple event identifier is
V2Allfor the event "Visit 2 - All," the title or description in Outlook should include[V2All].
- Use the following format:
-
No Extra Characters or Spaces
- Ensure there are no additional characters, spaces, or formatting variations within the brackets.
- Incorrect:
[ V2All ],V2All, or[V2 All]. - Correct:
[V2All].
Following this format allows Ripple to recognize and link the event type to the participant’s profile card accurately. Follow this link to read more about how to schedule linked events.
Using Custom IDs in Outlook for Ripple Integration
To link Outlook Calendar events to specific participants' profiles in Ripple, follow these guidelines:
-
Include the Custom ID
- Every Outlook Calendar event must include a pound/hashtag sign (#) followed by the participant’s Custom ID in either the title or description.
-
Correct Format
- Use the following format:
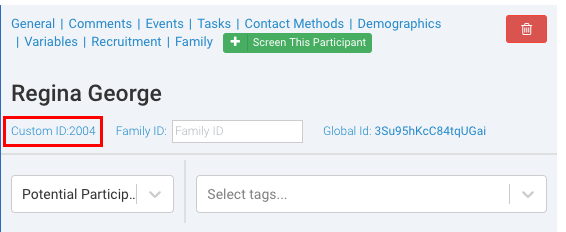
#CustomIDwith no spaces. - Example: If the participant’s Custom ID is
2004, include#2004in the event title or description.
- Use the following format:
-
Avoid Formatting Errors
- Ensure no extra spaces or characters are present.
- Incorrect:
# 2004,#2004, or#20 04. - Correct:
#2004.
-
Custom IDs Are Mandatory
- All participants must have a Custom ID assigned in Ripple to schedule events for them.
Following this format ensures proper linking of Outlook Calendar events to participants' profiles in Ripple. Follow this link to read more about how to schedule linked events.
Third-Party Activity Log in Ripple
The Third-Party Activity Log in Ripple tracks all changes to Ripple Events made through Outlook Calendar integration. This log is essential for monitoring and troubleshooting event syncing.
Activities Logged
-
New Events
- Records when new events are created through Outlook.
-
Rescheduled or Canceled Events
- Logs any changes to event dates or cancellations.
-
Error Messages
- Captures issues when events fail to sync properly.
 Common 3rd Party Activity Log Error Messages and Scheduling Mistakes
Error Messages
-
CustomId/Attendee Not Found
- The event title or description lacks a valid Custom ID, and no attendee email is present.
-
Participant Not Found
- The Custom ID or attendee exists but doesn’t match any participant in the study.
-
Participant Event Not Found
- The participant exists but doesn’t have a matching event type for the study.
-
Event Not Found for CalendarId: {XYZ}
- No matching event exists for the specified calendar and study, potentially due to syncing issues after a calendar is removed.
-
Participant Has Multiple Events of the Same Type
- Two events of the same type are scheduled for the same participant, indicating a double booking.
-
All-Day Events Are Not Supported
- Events must have specific start and end times; all-day events are not allowed.
Common Scheduling Mistakes
-
Missing or Invalid Custom ID
- Events without a properly formatted Custom ID will not sync to Ripple and will only appear in Outlook.
-
Multiple Custom IDs in an Event
- Only the first Custom ID in the title is used. The event remains tied to this participant until their Custom ID is removed, even if the title is updated. Only one participant can be scheduled per event.
-
Duplicate Events for the Same Participant
- Only the first event created is reflected in Ripple, regardless of when the events occur.
-
All-Day Events
- Events without specific start and end times are not supported.
-
Identical Events
- If duplicate events of the same type are created, the most recently updated one will appear in Ripple.
Resolving Syncing Errors in Ripple
If Outlook Calendar and Ripple Events are not syncing and the issue is not due to common errors, follow these steps to refresh the integration:
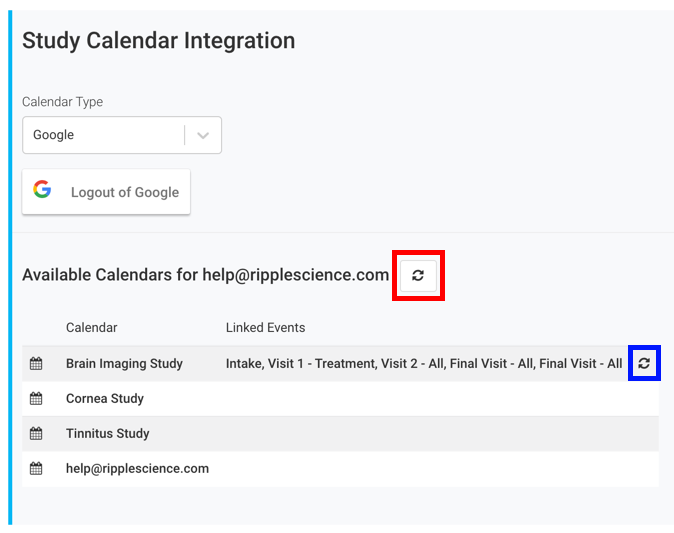
1. Manually Sync Specific Calendars
- Locate the calendar associated with the error.
- Click the sync icon (blue) next to the specific calendar link to refresh and sync all events in that calendar.
2. Manually Sync All Calendars
- Locate the email address associated with the Outlook Calendar account.
- Click the sync icon (red) next to the email to refresh and sync all calendars linked to the integration.
- This step is essential when adding or removing Outlook Calendars.
NOTE:
On Scheduling Events Over 365 Days Away
Ripple does not sync events scheduled in Outlook more than 365 days from the current date. To ensure these events are pulled into Ripple, follow one of these methods:
-
Wait for the Date to Fall Within the 365-Day Window
- Once the event date is within the 365-day range, manually sync the calendar to pull the event into Ripple.
-
Schedule the Event Within the 365-Day Range
- Initially, schedule the event within the supported date range in Outlook.
- After the event is synced, move it to its correct date outside the 365-day window.