Contact Cards Recap
Ripple's participant cards include a section to manage contact information for the participant and their relevant contacts, such as family members or partners. Each contact card tracks:
- Name
- Relationship/Title (if not the participant)
- Phone numbers
- Email addresses
- Street addresses
Users can also:
- Specify if voicemail messages can be left
- Mark a preferred contact for the participant
- Archive the contact or specific information
- Delete contacts or specific information
For further details, refer to the full Contact Cards documentation Here.

Importing Contact Cards
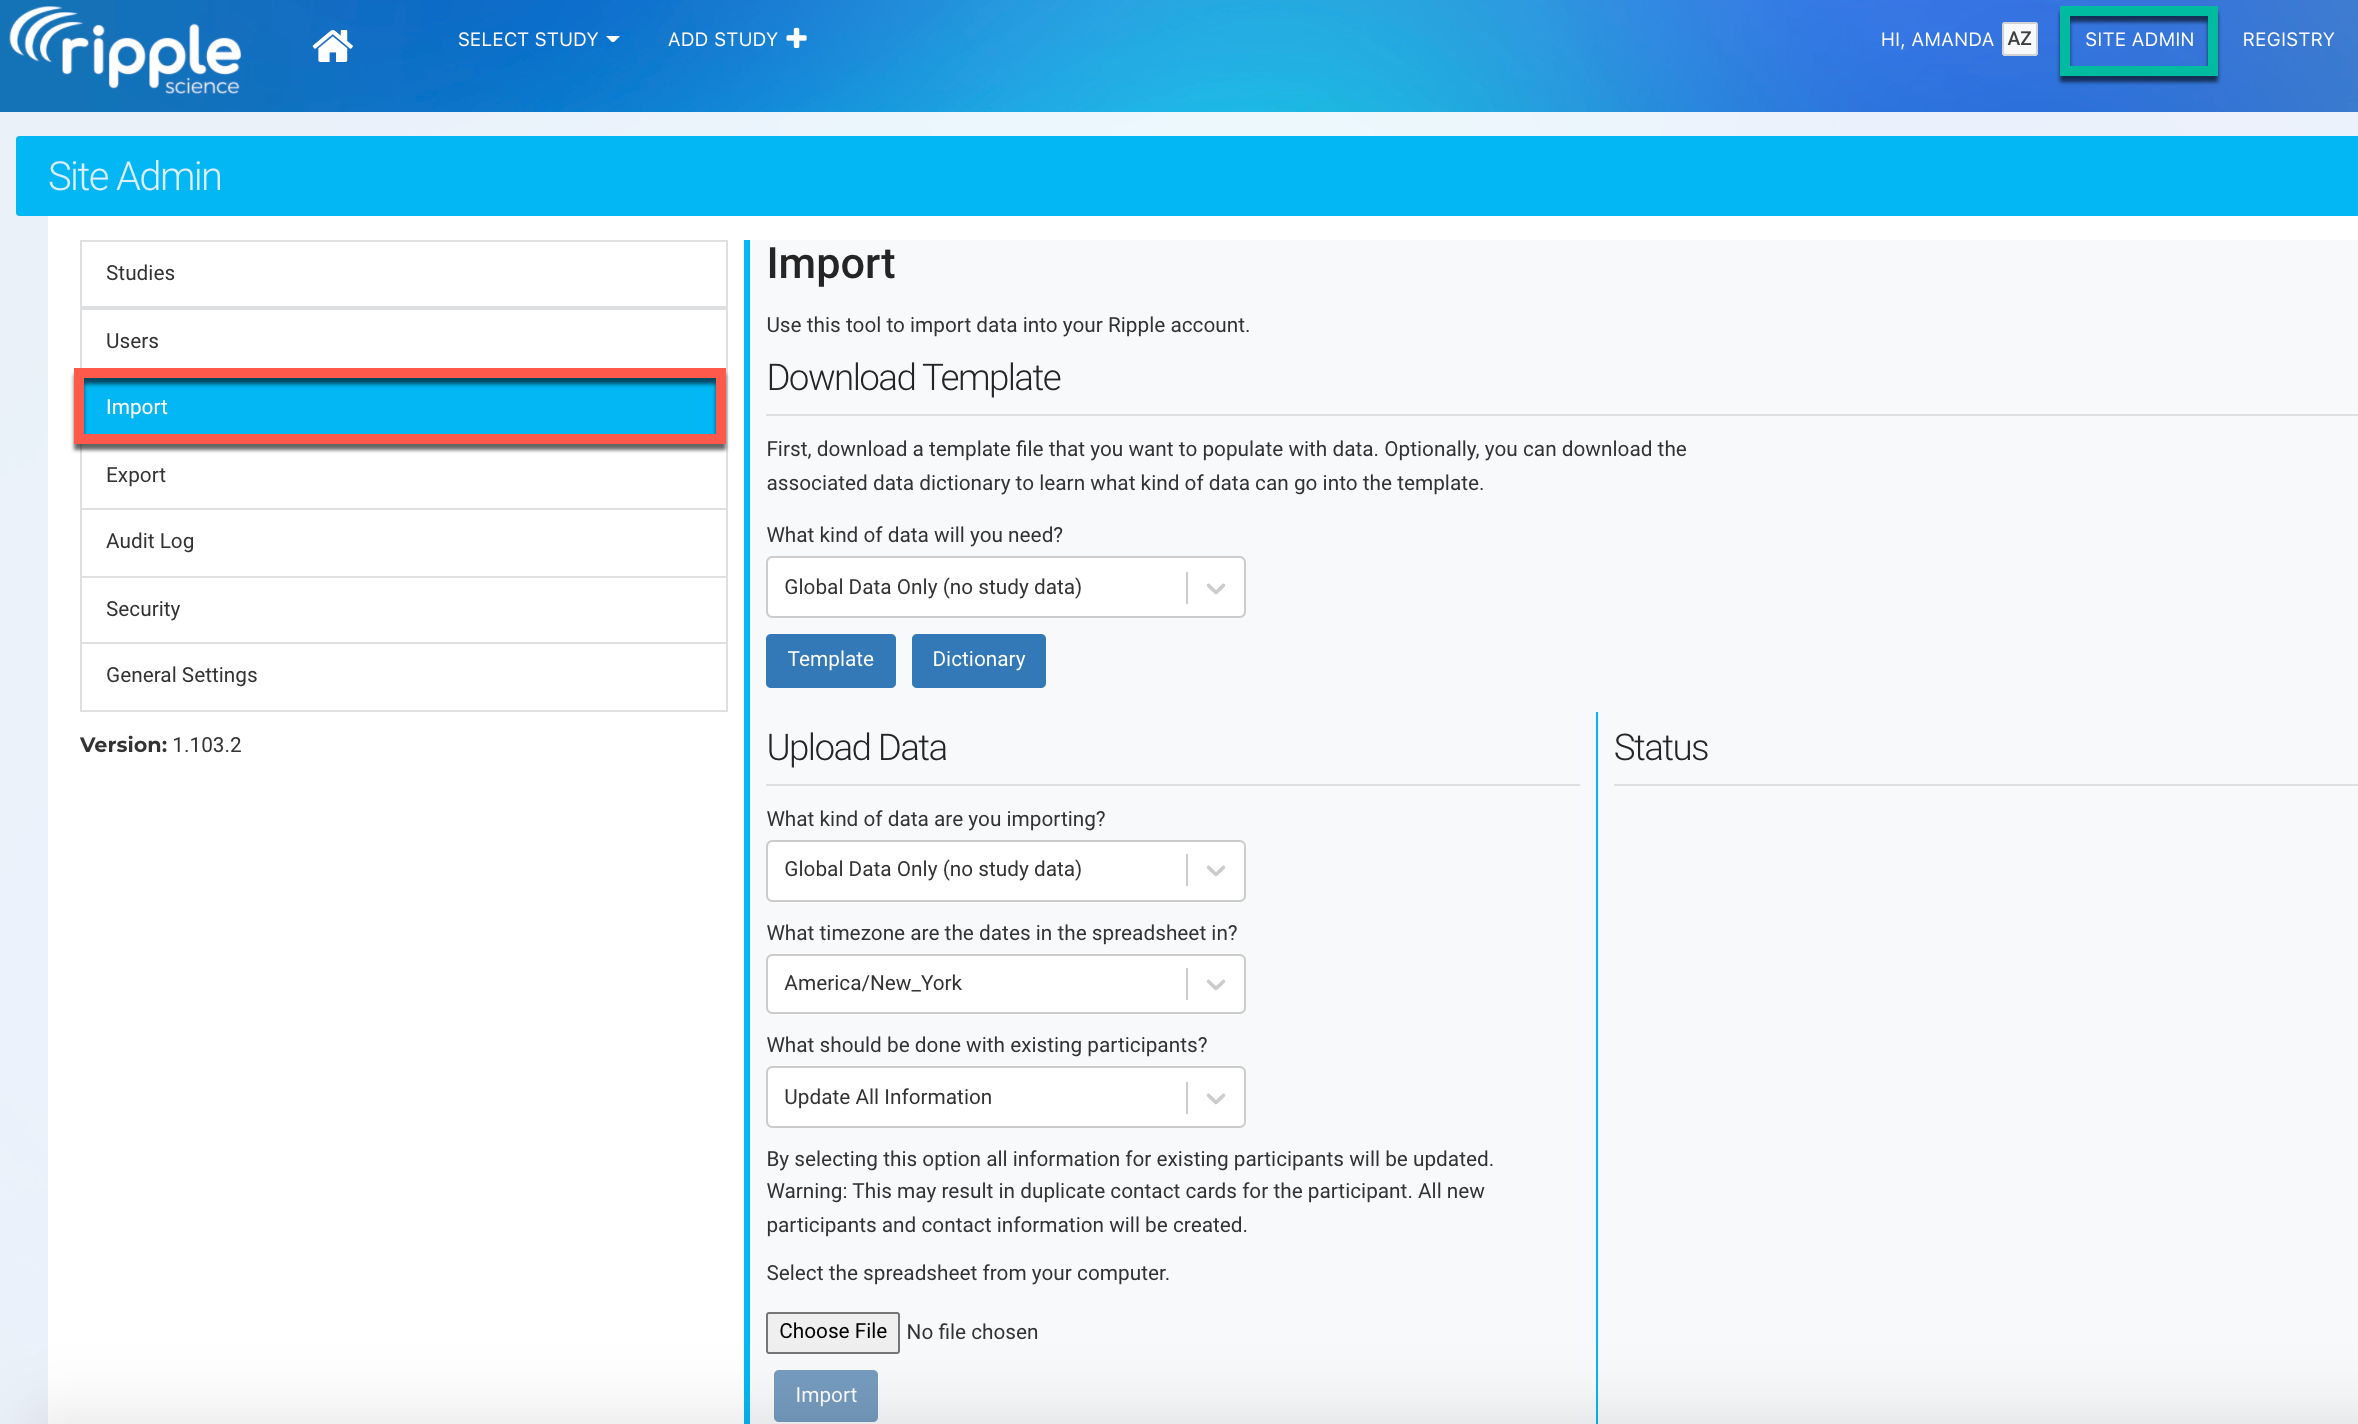
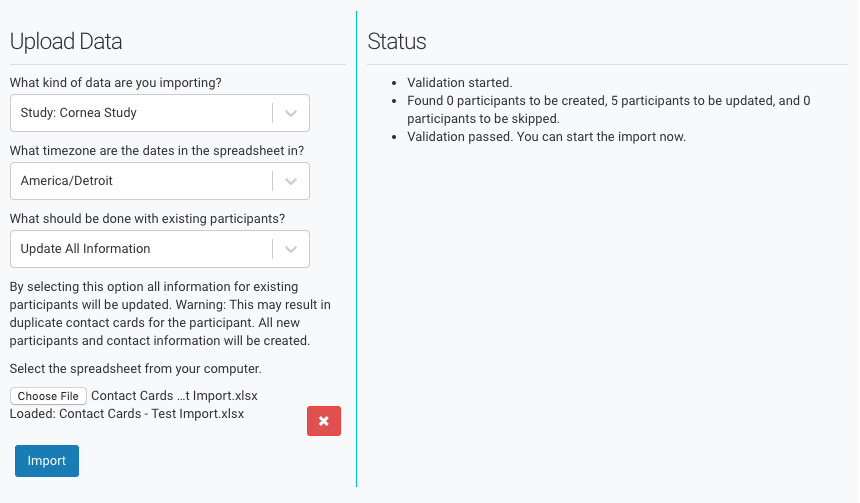
To import a participant’s contact card in Ripple:
- Navigate to the Site Admin tab (green) and select Import in the left sidebar (red).
- Follow these steps:
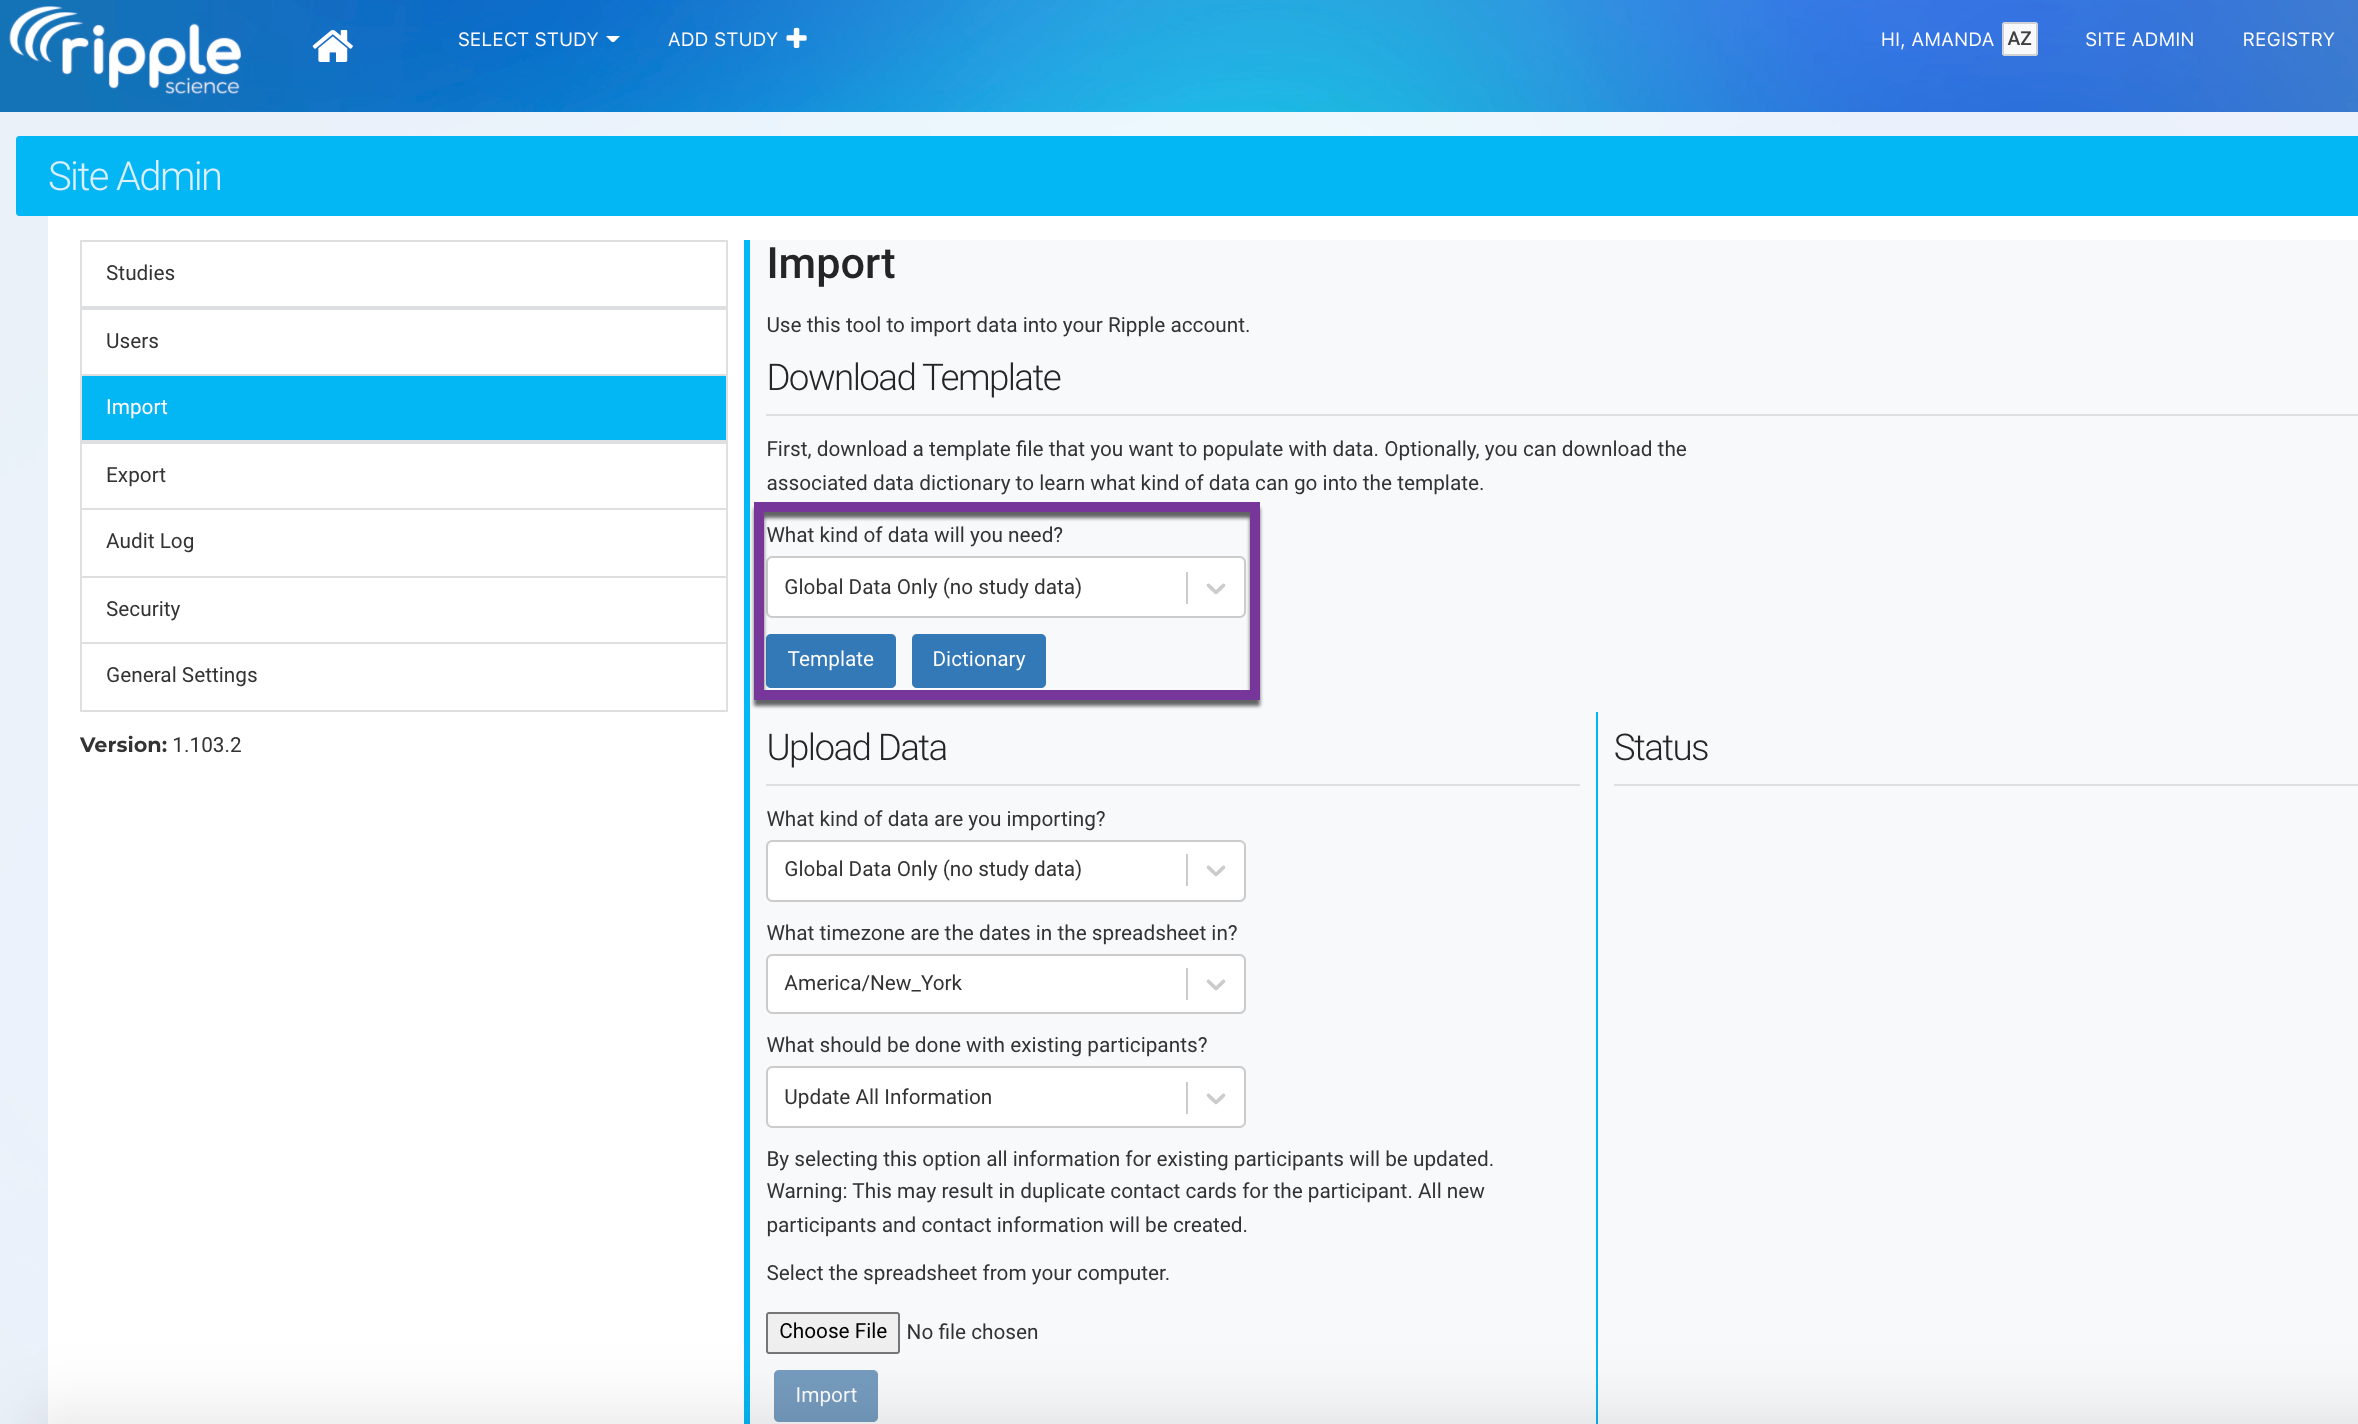
- Choose the type of data to import.
- Download the Template and Data Dictionary (purple).
- Fill in the template with participant information.
- Specify the data type and actions for existing participants.
- Select your file and import the data.
This ensures smooth integration of participant contact information into Ripple.
Note
You can find more instructions on importing in the Importing Participants article.
Filling in the Template
When completing the template to import participant contact cards:
-
Participant Information:
- Each participant has their own row in the template.
-
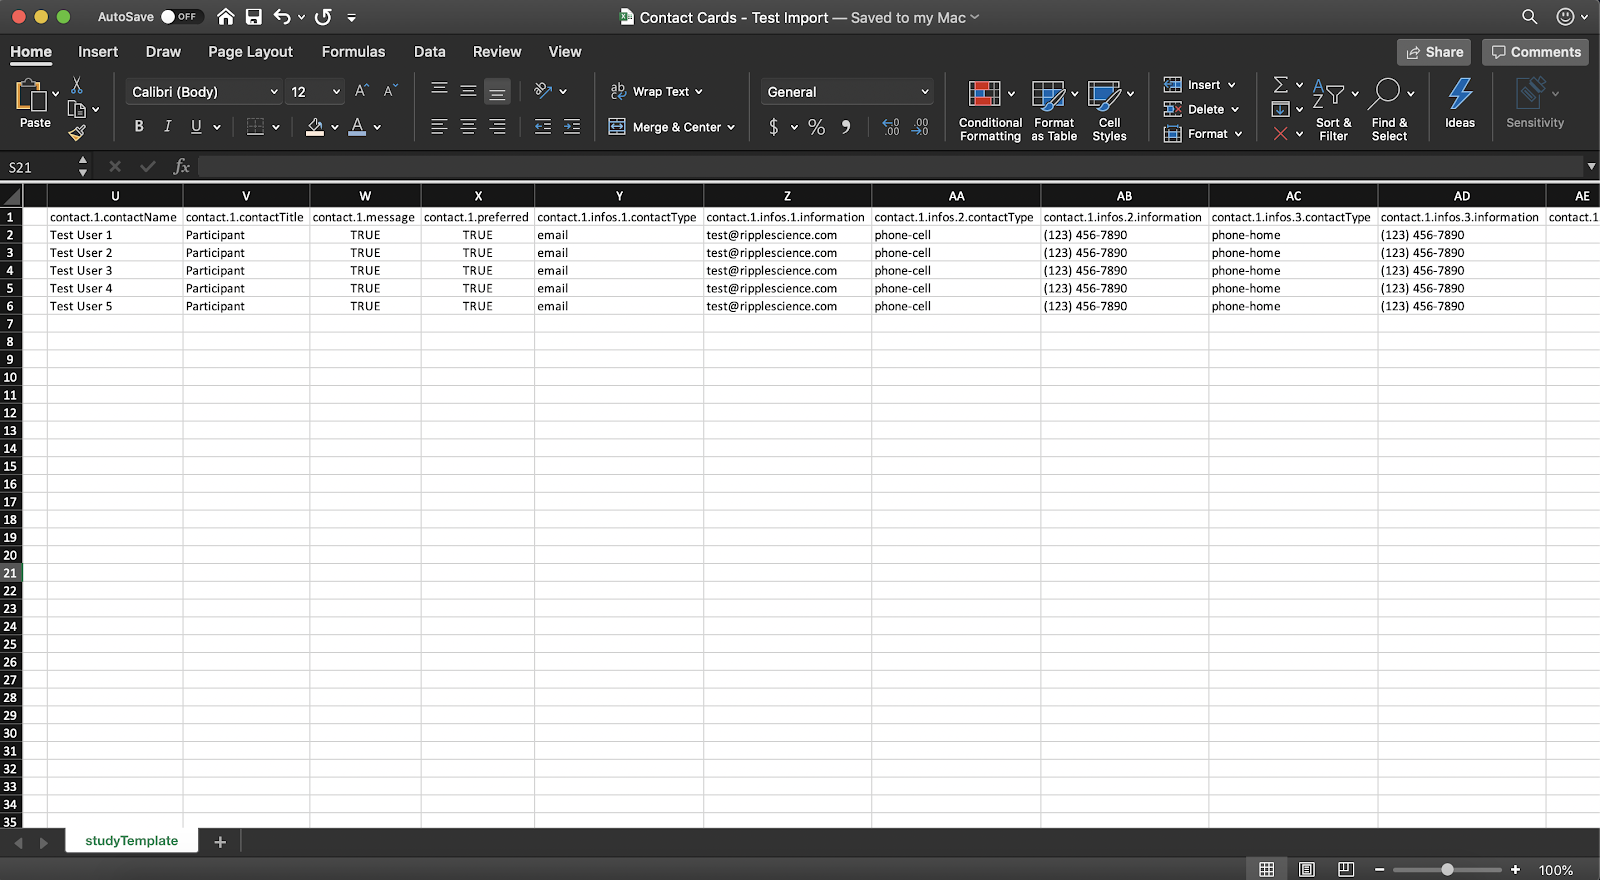
Contact Information (Up to 4 Contacts per Participant):
- Contact Name: Name of the contact (leave blank if it's the participant).
- Contact Title: Relationship to the participant (leave blank for the participant).
- Message: Indicate if the contact can receive messages.
- Preferred: Indicate if this is the preferred contact.
- Contact Type: Specify whether the contact info is a phone number or email.
- Contact Information: Provide the phone number or email address.
- Contacts for participants(Up to 4 contacts):
- Use Contact.1 for the first contact person or participant, Contact.2 for the second person to contact, and so on.
- Contacts can include family members, emergency contacts, doctors, etc.
- Contact Methods (Up to 5 Methods per Contact):
- Infos.1–Infos.5: Infos.1 refers to the first contact method, Infos.2 second contact method, and so on. Input different contact methods for the same person (e.g., email, mobile, work phone).
- Final Steps:
- Save the completed file.
- Upload it into the Import tool to import your contact cards.
Phone Number Formatting Guidelines
When entering phone numbers in the template:
- Avoid including letters in the phone number.
- Do not use a country code and "+" sign inside parentheses.
- Correct: +1-555-123-4567
- Incorrect: (+1)-555-123-4567
- Ensure there are no spaces after a hyphen or period.
- Correct: 555-123-4567 or 555.123.4567
- Incorrect: 555- 123-4567 or 555. 123.4567
Proper formatting helps ensure successful import into the system.
Avoiding Duplicate Contact Cards
To prevent duplicate contact cards when importing:
-
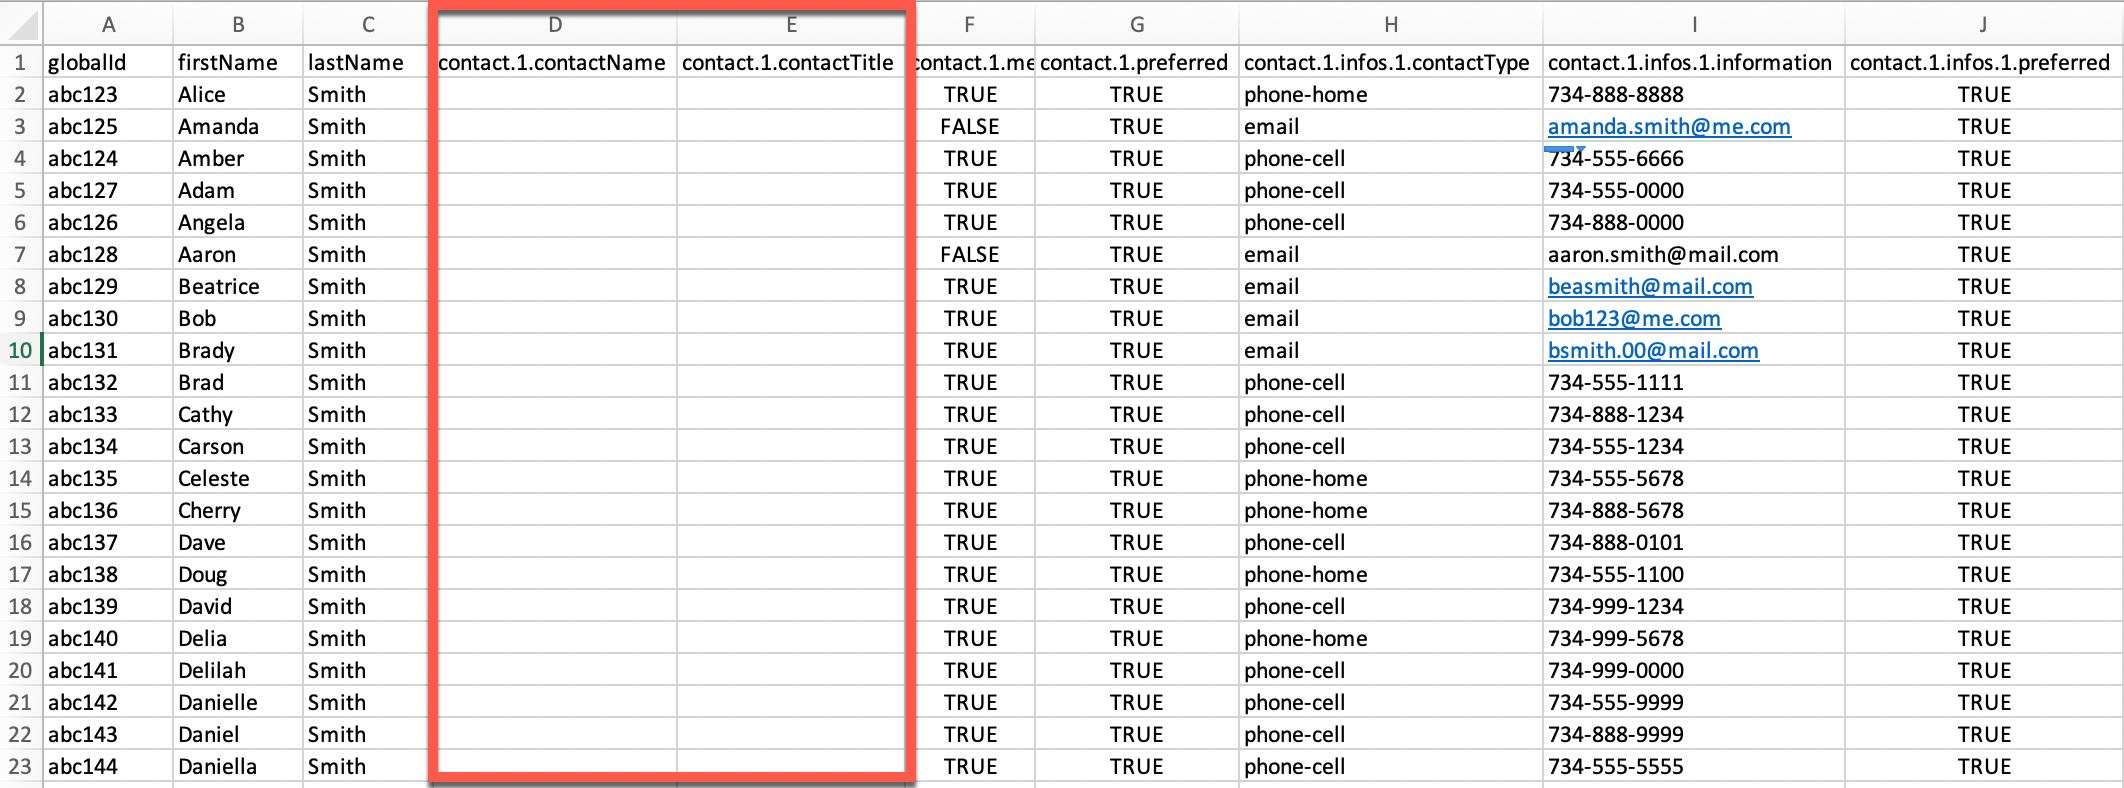
If the participant will be the first contact method:
- Leave the contact.1.contactName and contact.1.contactTitle columns blank (red).
-
Ripple will automatically pull the participant’s name and title into the card as the Participant.
This ensures accurate data entry and prevents duplicate information in the system.
WARNING
To prevent creating unnecessary contact cards:
- Leave Blank: If the participant is the first contact method, leave the contact.1.contactName and contact.1.contactTitle columns blank.
- Do Not Re-enter Details: If you re-enter the participant’s name and title, Ripple will assume contact.1 is a different person and create an additional contact card.
Adding New Contact Methods with the Import Tool
The import tool allows you to add new contact methods (e.g., phone numbers, emails, addresses) to existing contacts within a participant’s contact section.
Steps to Add New Contact Methods
-
Match Existing Contact Information:
- The import data must match the existing contact card in the following fields:
- Participant's Global ID OR First Name, Last Name, and Date of Birth
- Contact Person's Name (leave blank if it's the participant)
- Contact Person's Title (leave blank if it's the participant)
- The import data must match the existing contact card in the following fields:
-
New Contact Method:
- Once matched, the new phone number, email, or address will be added to the contact card.
-
Prevent Duplicates:
- Ensure the name and title match the existing contact card in Ripple for alternate contacts.
- For participant-specific contact cards, leave Contact Name and Contact Title blank.
REMINDER: Accurate matching of fields ensures the new method is added to the correct contact card instead of creating a duplicate.
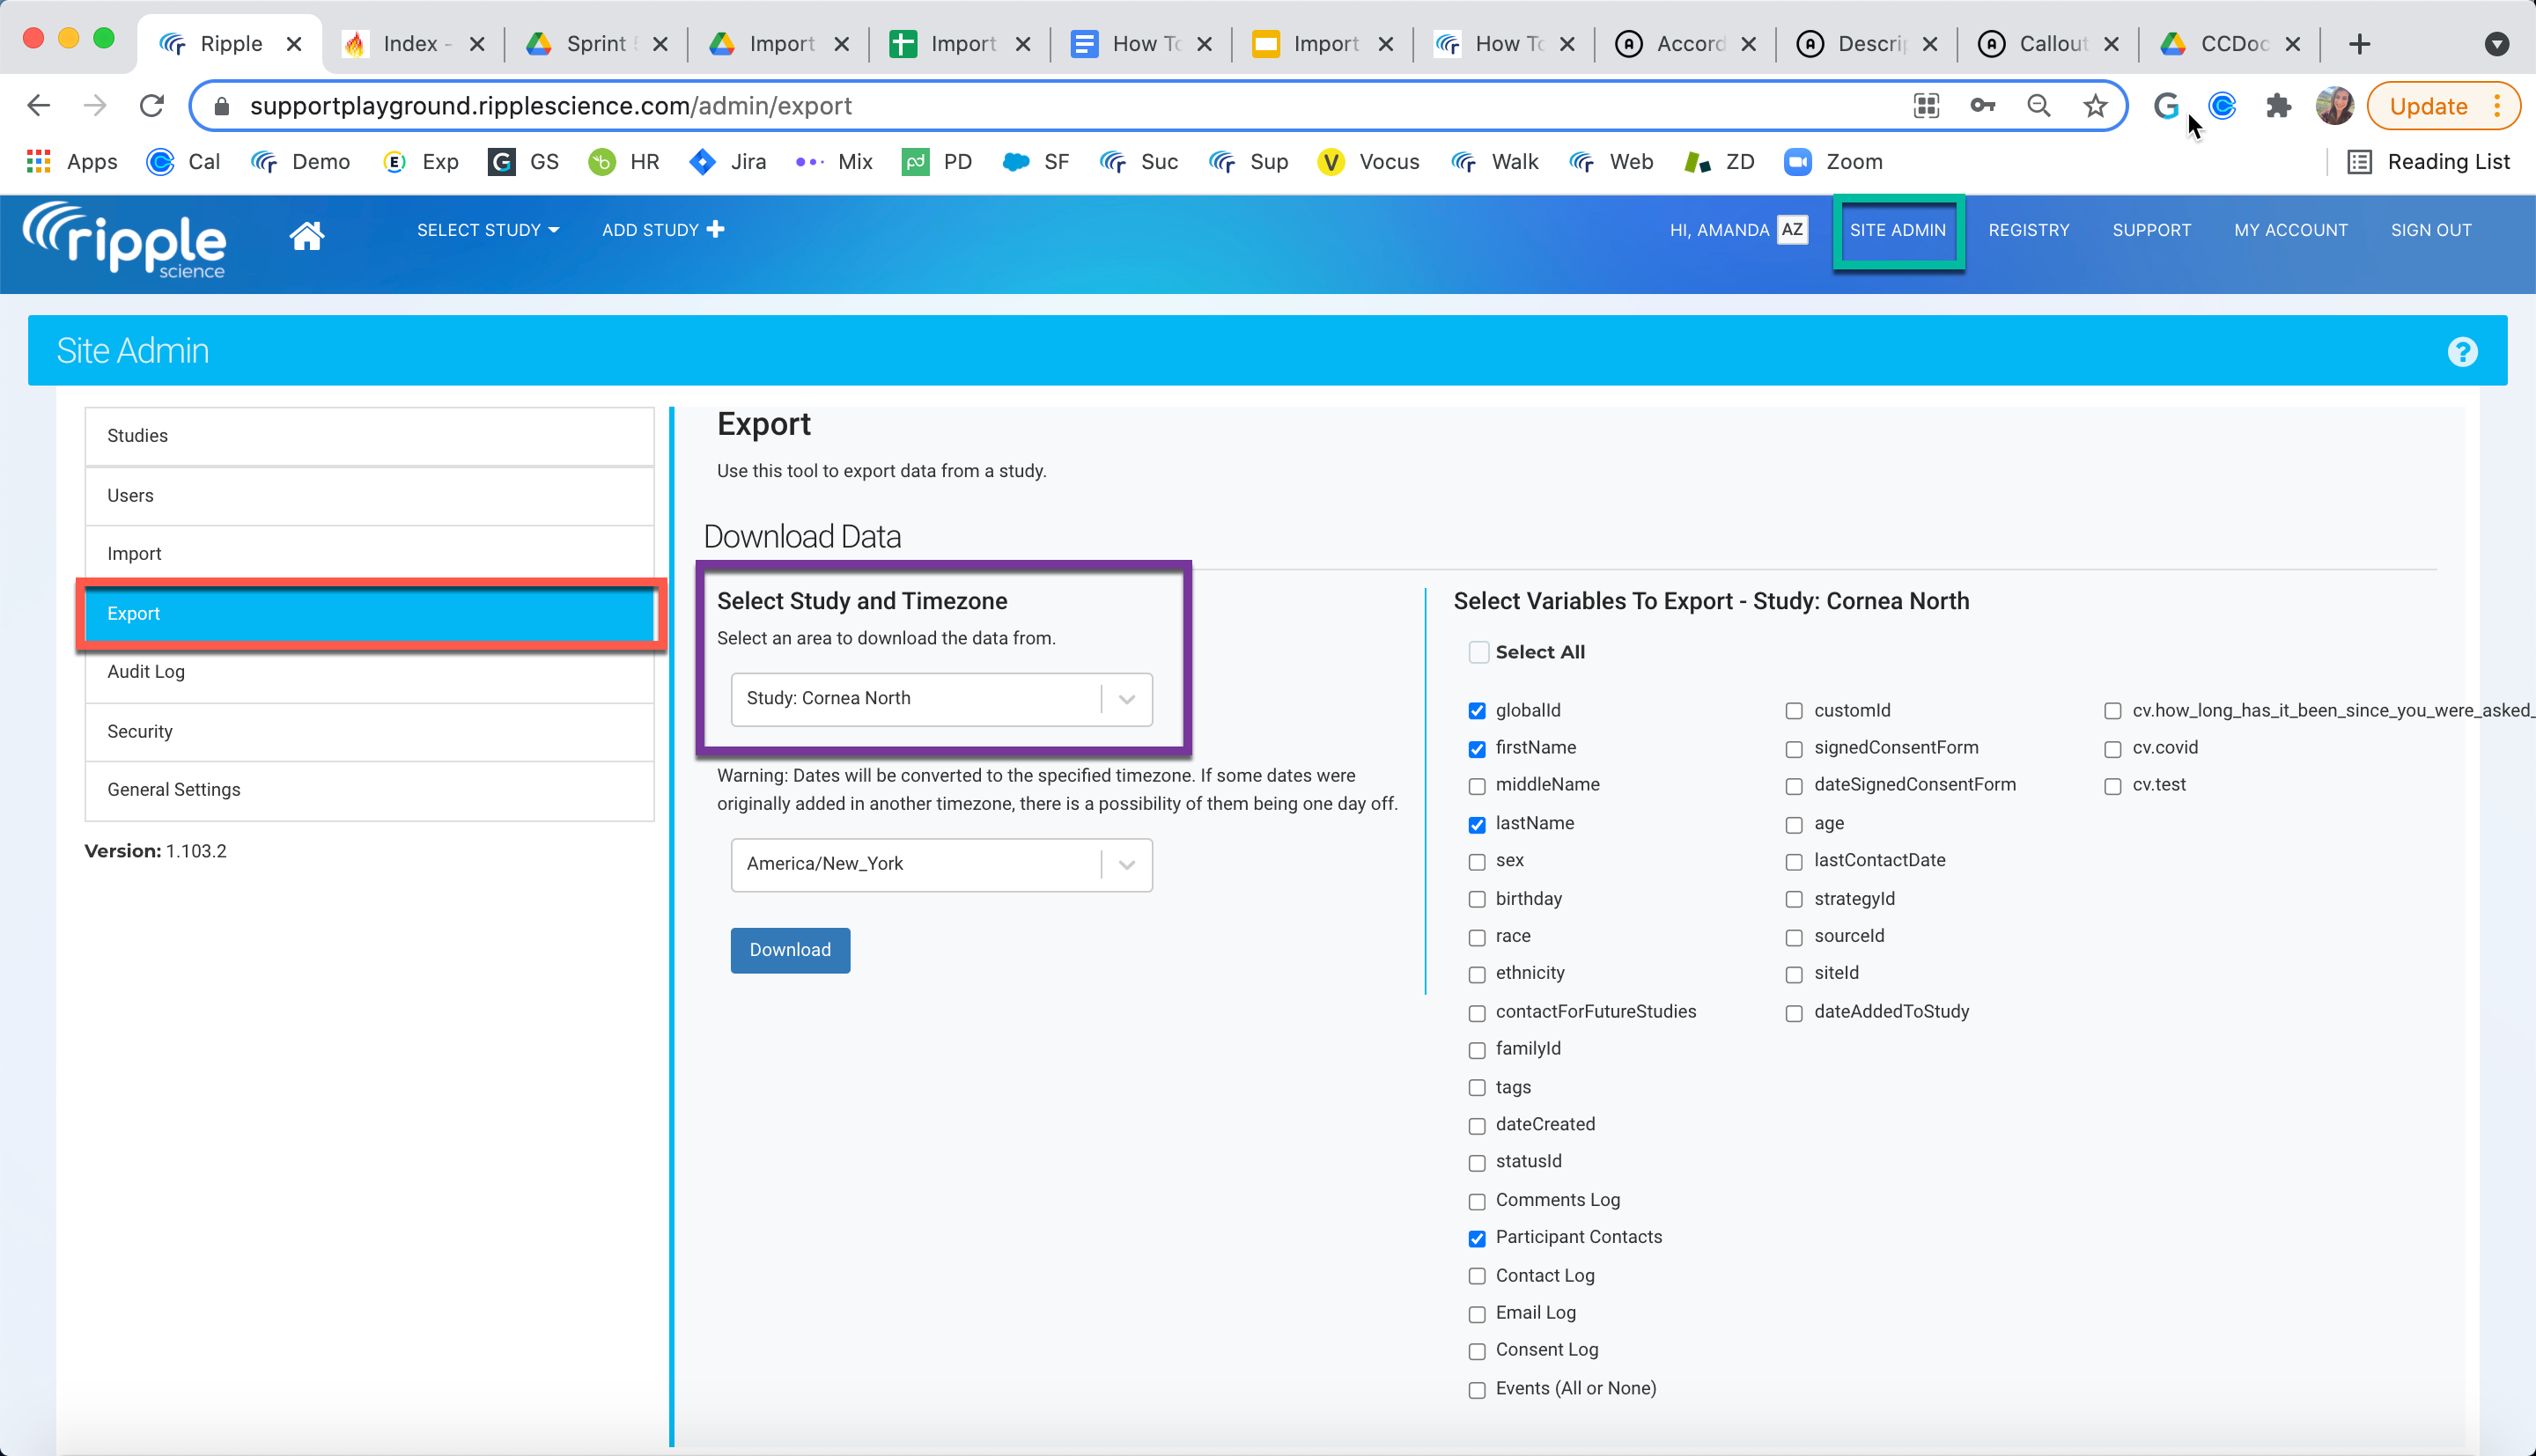
Exporting Contact Cards
To export a participant’s contact cards:
- Navigate to the Site Admin tab (green).
- Go to the Export section in the left sidebar (red).
- Select the study you wish to export data from (purple).
- To export all contact cards for all participants in the study:
- Check the Participant Contacts box.
This will generate an export containing all participant contact cards for the selected study.