Ripple provides a centralized contact management system within each participant’s profile card, allowing users to efficiently store, update, and manage participant contact information and related individuals (e.g., parents, partners).
Contacts Section
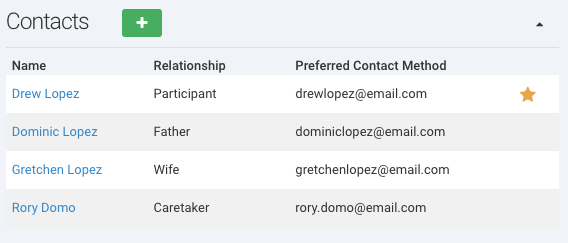
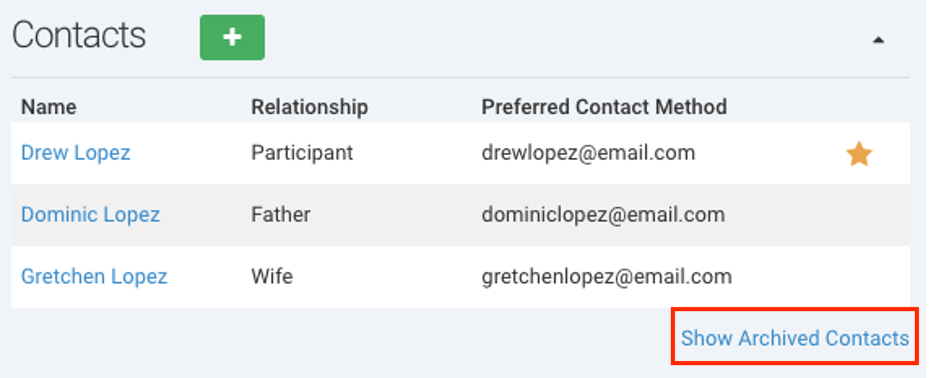
- Each participant profile includes a Contacts section that organizes and displays all relevant contacts.
- Contact information is presented in an organized table for quick access and editing.
- The table is sorted alphabetically by default, with one exception.
- The Preferred Contact always appears at the top, flagged with a star icon ⭐.
Key Features of the Contacts Section
- Stores Multiple Contacts Per Participant – Track the participant’s contact details as well as related individuals.
- Preferred Contact Flagging – Ensures that the primary contact remains easy to locate.
- Alphabetical Sorting – All contacts are listed in alphabetical order, with the preferred contact pinned at the top.
- Quick Editing – Users can update contact details directly from the table.
Managing Contact Details in Ripple
Ripple allows users to store and manage detailed contact information for participants and their associated contacts. This feature ensures that research teams can effectively communicate while respecting participant preferences.
How to Add a New Contact Detail
- To create a new contact detail, click the green Plus (+) icon in the Contacts section of a participant’s profile.
- The system allows users to store multiple contact details per participant.
Contact Detail Fields
When adding or updating a contact, the following fields are available:
A. General Contact Information
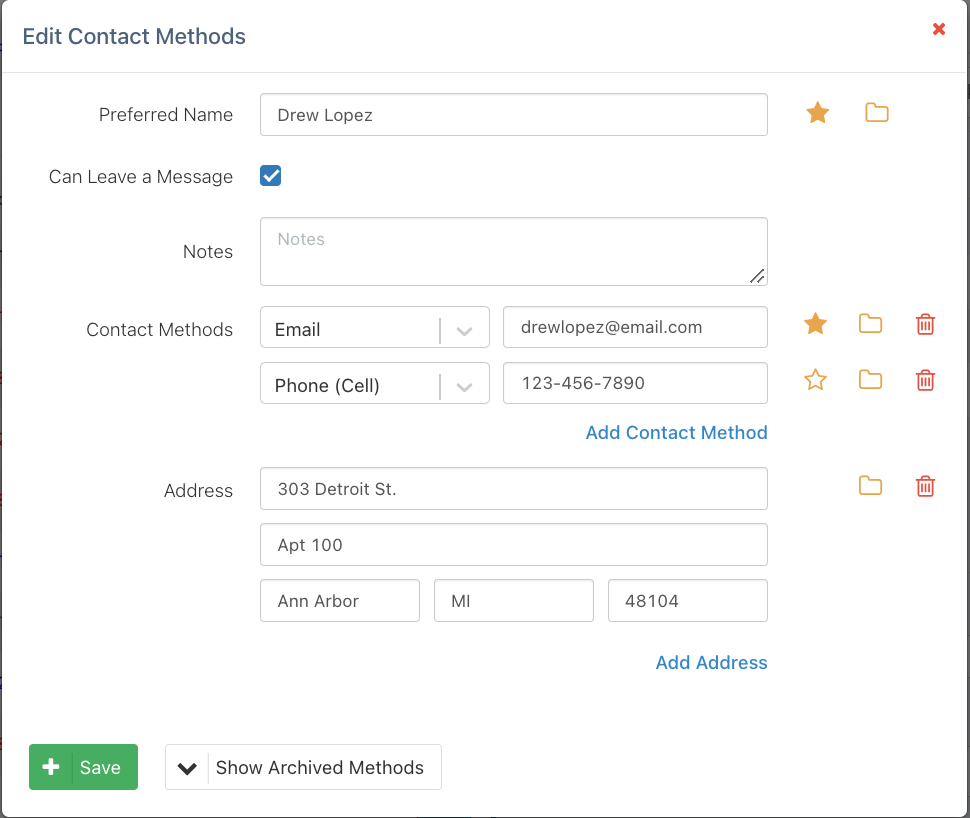
- Preferred Name – The contact’s name as they prefer to be addressed.
- Relationship to Participant – Defines if the contact is a parent, partner, guardian, caregiver, etc.
- Can Leave a Message Checkbox – Indicates if the participant has consented to voicemail or text messages being left for this contact.
B. Notes Section
- Free-text field for additional information about the contact (e.g., "Best time to call: evenings").
C. Contact Methods
Ripple allows users to store multiple contact methods, including:
📧 Email
📱 Phone (Cell)
☎ Phone (Home)
🏢 Phone (Work)
📞 Phone (Other)
Each contact method can be designated with a label to help teams know how to best reach a participant.
D. Address Information
📍 Multiple addresses can be stored for each contact (e.g., home address, work address).
Managing Archived Contacts and Contact Methods in Ripple
Ripple allows users to archive outdated contact information instead of deleting it. This feature helps keep contact details organized while preserving historical information for potential future use. Archived contacts and methods can be retrieved anytime.
Archiving a Contact Person
When a contact person is no longer relevant, you can archive their information without permanently deleting it.
Steps to Archive a Contact Person:
1️⃣ Navigate to the Contacts section in the participant’s profile.
2️⃣ Open the contact detail that needs to be archived.

3️⃣ Click the Archive Contact icon.
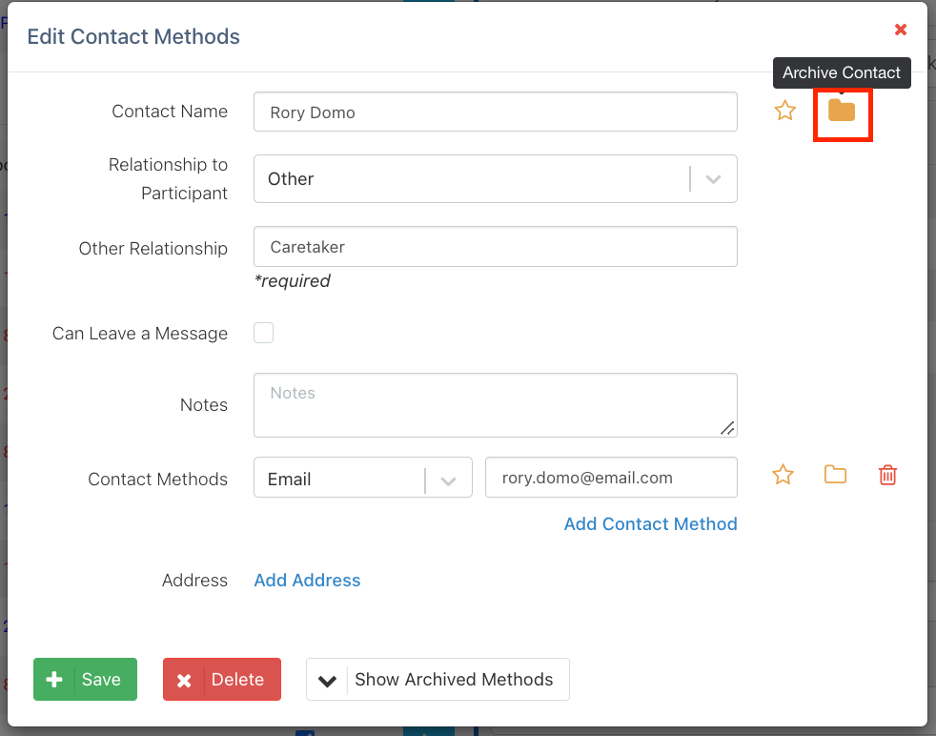
4️⃣ Click Save to finalize the change.
Viewing & Unarchiving Contacts:
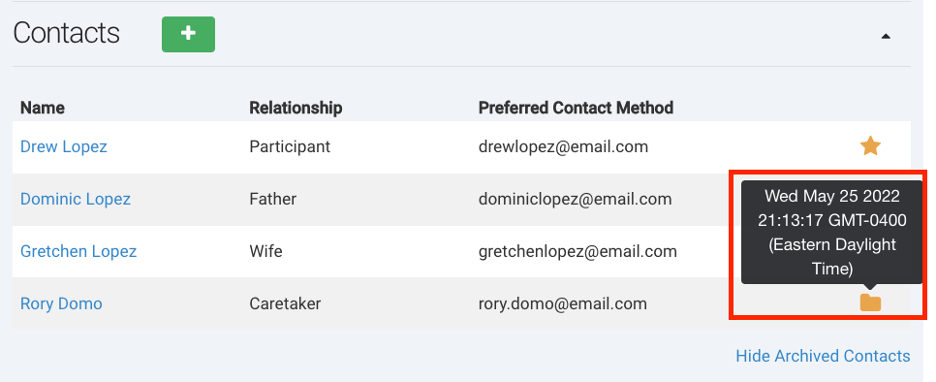
- To view archived contacts, click "Show Archived Contacts".
- A yellow folder icon 📂 will appear next to archived contacts.
- Hover over the yellow folder to see the date and time the contact was archived.
- To unarchive a contact, click the yellow folder icon.
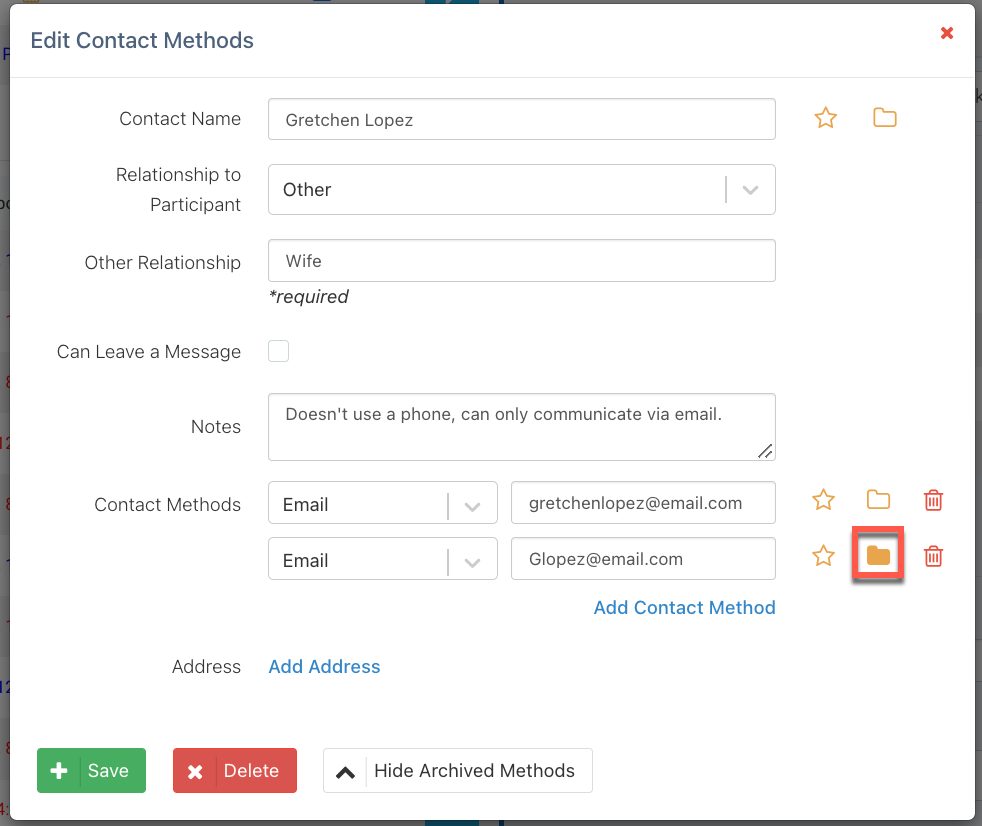
Archiving a Contact Method
When a contact method (email, phone number, address) is no longer in use, it can be archived separately while keeping the contact person active.
Steps to Archive a Contact Method:
1️⃣ Open the Contact that contains the outdated contact method.

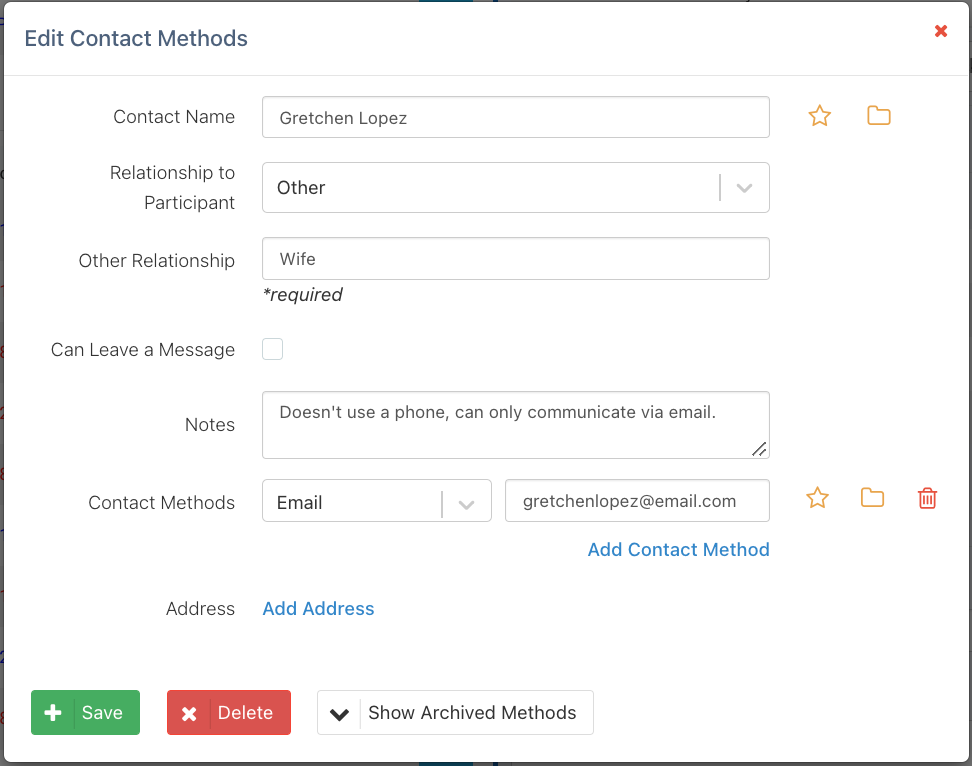
2️⃣ Click the Archive Contact Method icon next to the method you want to archive.
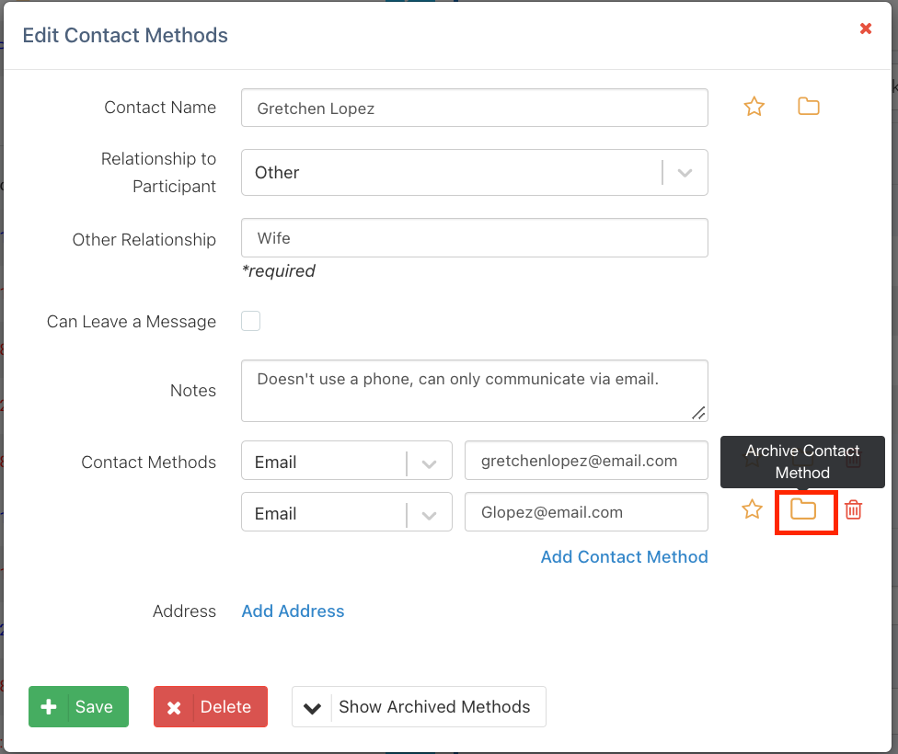
3️⃣ The contact method will move to the Archived Methods section.
Viewing & Unarchiving Contact Methods:
✅ Click "Show Archived Methods" to display archived contact methods.

✅ Click the yellow folder icon next to the archived method to restore it.
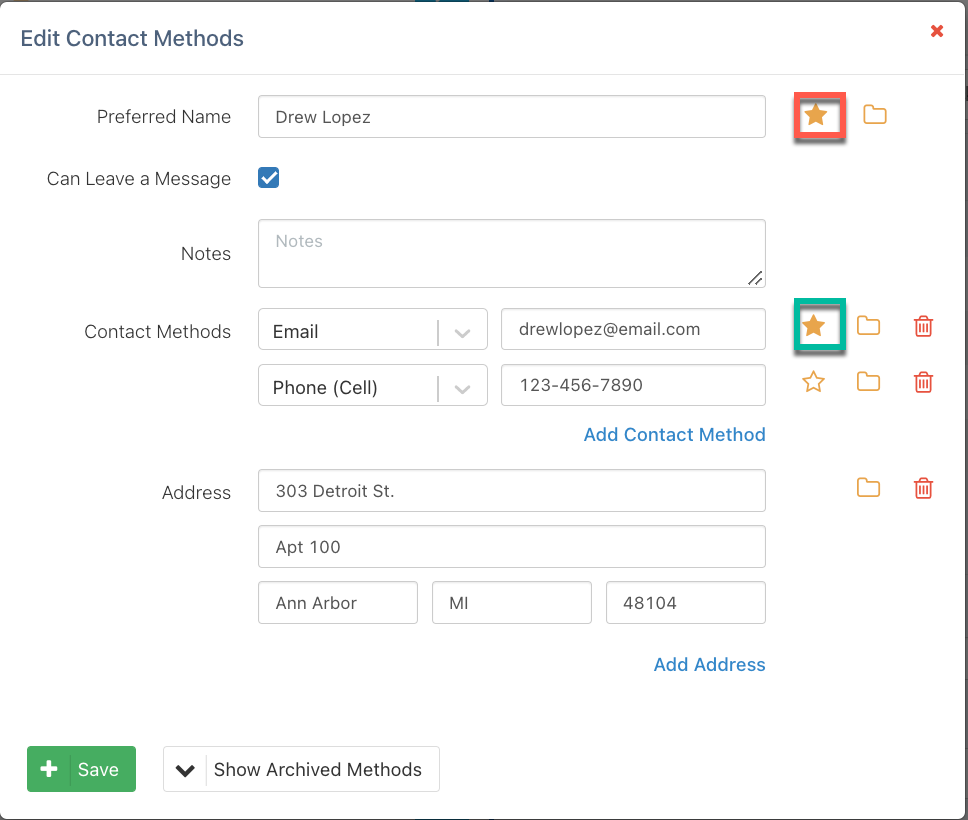
Managing Preferred Contact Information in Ripple
Ripple allows users to designate a preferred contact person and preferred contact method using the star icon ⭐. This ensures that study teams consistently use the best contact information when reaching out to participants.
Setting a Preferred Contact Person
The Preferred Contact is the primary person who should be contacted regarding the participant.
How to Set a Preferred Contact Person:
1️⃣ Open the participant’s Contacts section.
2️⃣ Click on the contact you want to set as preferred.
3️⃣ Click the star icon ⭐ to flag them as the Preferred Contact(red).
4️⃣ Click Save to update the record.
Setting a Preferred Contact Method
The Preferred Contact Method determines the primary way a participant should be contacted (e.g., email, phone).
How to Set a Preferred Contact Method:
1️⃣ Open the participant’s Contact Details.
2️⃣ Locate the list of available contact methods (Email, Phone, etc.).
3️⃣ Click the star icon ⭐ next to the contact method you want to set as preferred.
4️⃣ Click Save to confirm changes.
NOTE:
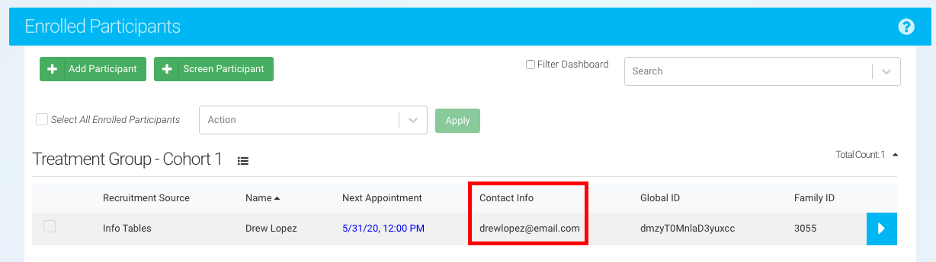
- The Preferred Contact will always appear at the top of the Contacts table and in the Contact info column on the Potential and Enrolled Participants pages, flagged with a star icon ⭐.
- If no contact method is marked as preferred, Ripple will default to the first contact method in the list.