Panel Question Type in Surveys
The Panel question type allows users to group related survey questions, making it easier to differentiate between different themes within a survey.
Key Benefits of Using Panels:
- Improves Organization: Helps participants clearly see sections or themes in the survey.
- Enhances Survey Logic: If multiple questions are displayed based on a previous answer, placing them in a panel allows for one logic statement to control the entire group instead of setting logic for each individual question.
- Streamlines Survey Design: Reduces redundancy and simplifies the setup process.
Using panels is an effective way to create structured, logical, and user-friendly surveys.
Example: Using a Panel for Questions About Children
A Panel question type is especially useful when asking follow-up questions based on a participant’s response.
Scenario:
- You have a question: "Do you have children?" (Yes/No).
- If the participant selects "Yes," you want to ask additional questions:
- How many children do you have?
- What are their names?
- What are their ages?
- What are their genders?
Instead of applying separate logic to each of these follow-up questions, you can place them inside a panel and apply a single logic condition to the panel.
How It Works:
- If the participant selects "Yes" → The entire panel appears, showing all related questions.
- If the participant selects "No" → The panel remains hidden, preventing unnecessary questions.
This approach simplifies survey logic, improves organization, and enhances the participant experience by only displaying relevant questions.
Step 1: Create Your Conditional Question to Define the Condition
To set up a conditional question that determines whether follow-up questions about children should be displayed, follow these steps:
1. Access the Survey Creator
-
-
Open the Survey Creator tool.
-
Navigate to the “Survey Designer” tab.
-
2. Create the Conditional Question
-
-
In the Toolbox bar, select the "Radiogroup" question type and add it to your survey.
-
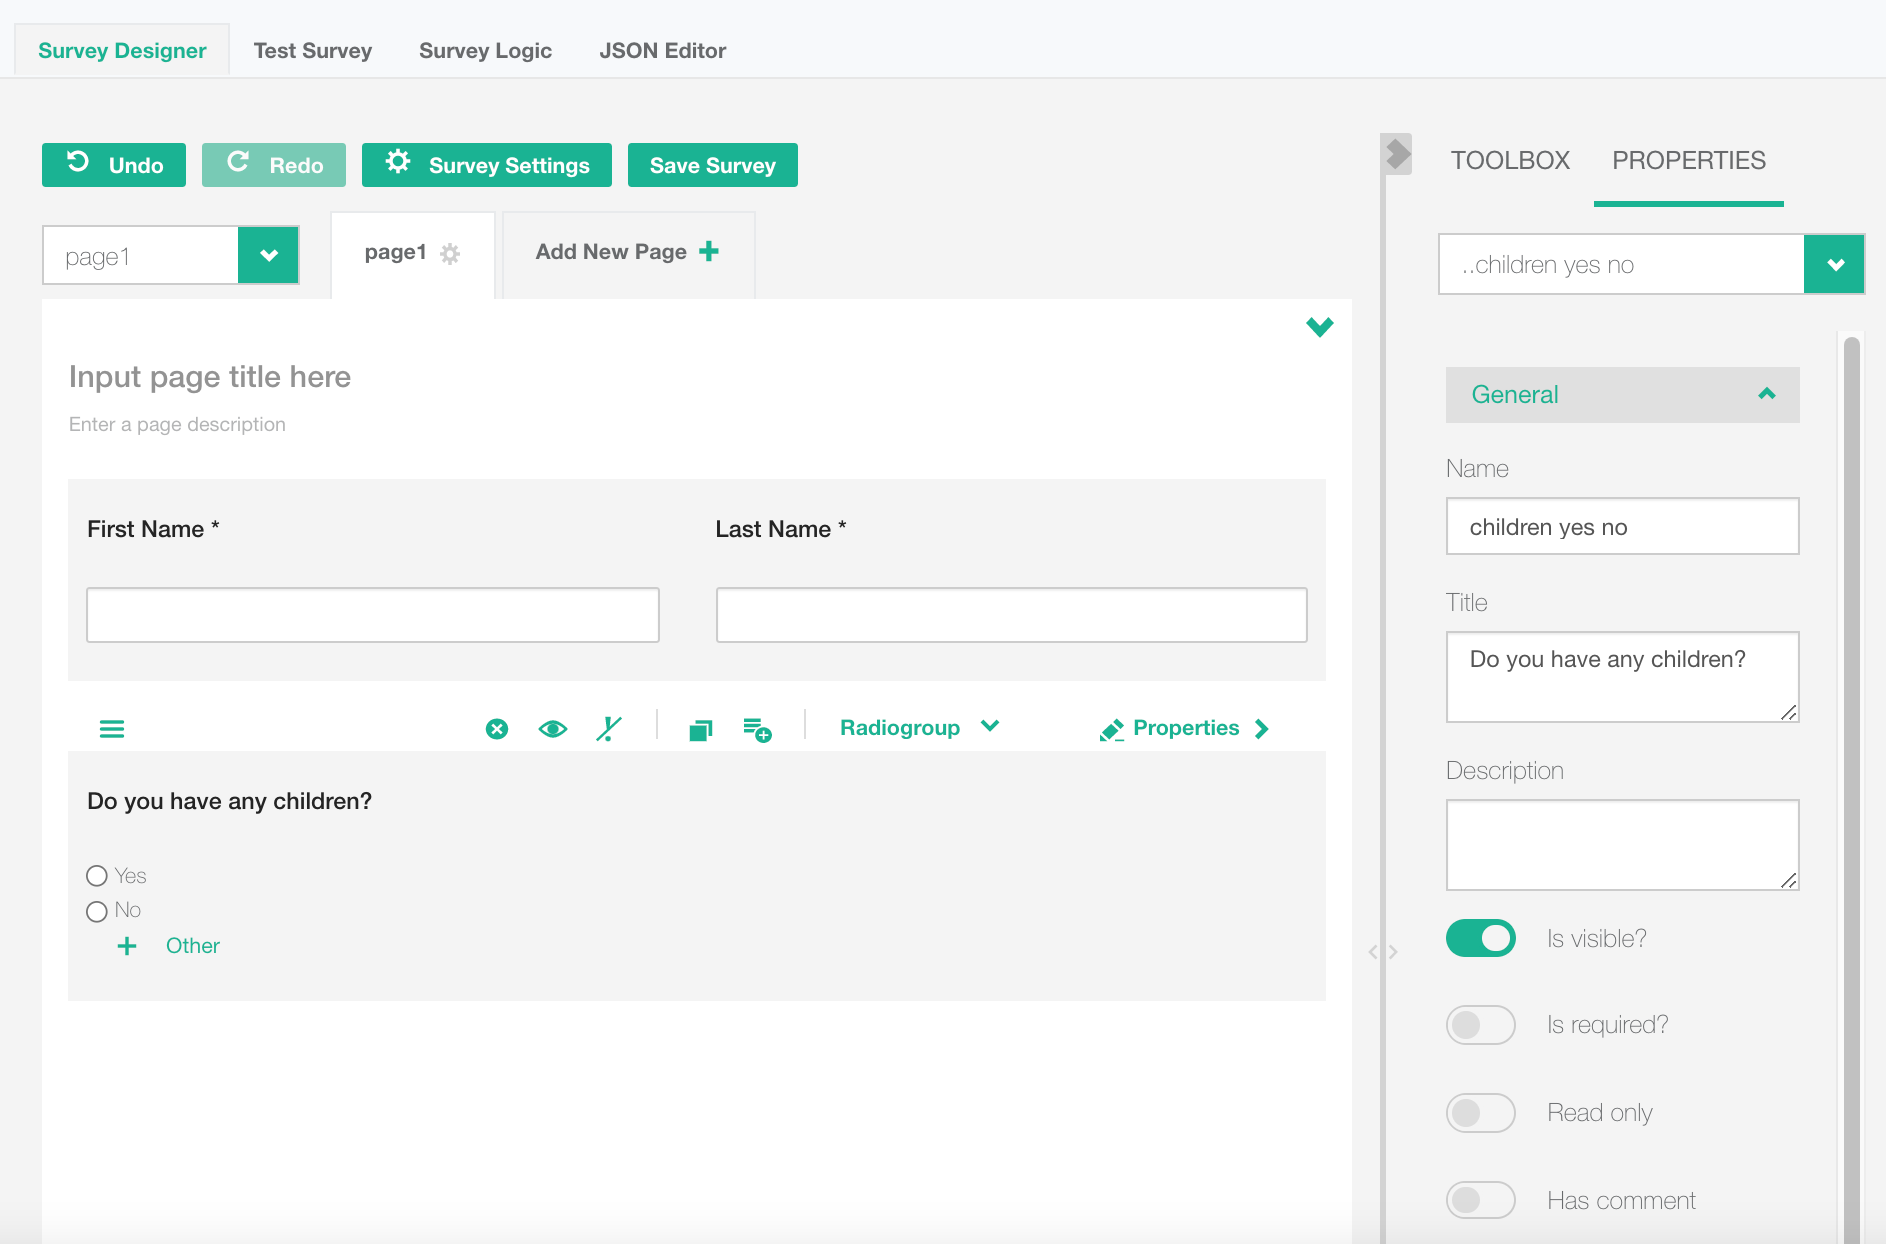
3. Configure the Question Properties
-
-
Open the "Properties" panel.
-
Under the "General" section:
-
Set the "Name" field to
"children_yes_or_no". -
Set the "Title" to: "Do you have any children?" (This will be the displayed question).
-
-
4. Define Answer Choices
-
-
Under the "Choices" section:
-
In the Value column, change
item1to "Yes". -
In the Value column, change
item2to "No". -
Click the X button next to
item3to remove any extra options.
-
-
Step 2: Create Your Panel
To group related questions about children and apply conditional logic, follow these steps:
1. Add a Panel to Your Survey
-
Click the "Toolbox" bar.
-
Select the "Panel" question type and add it to your survey.
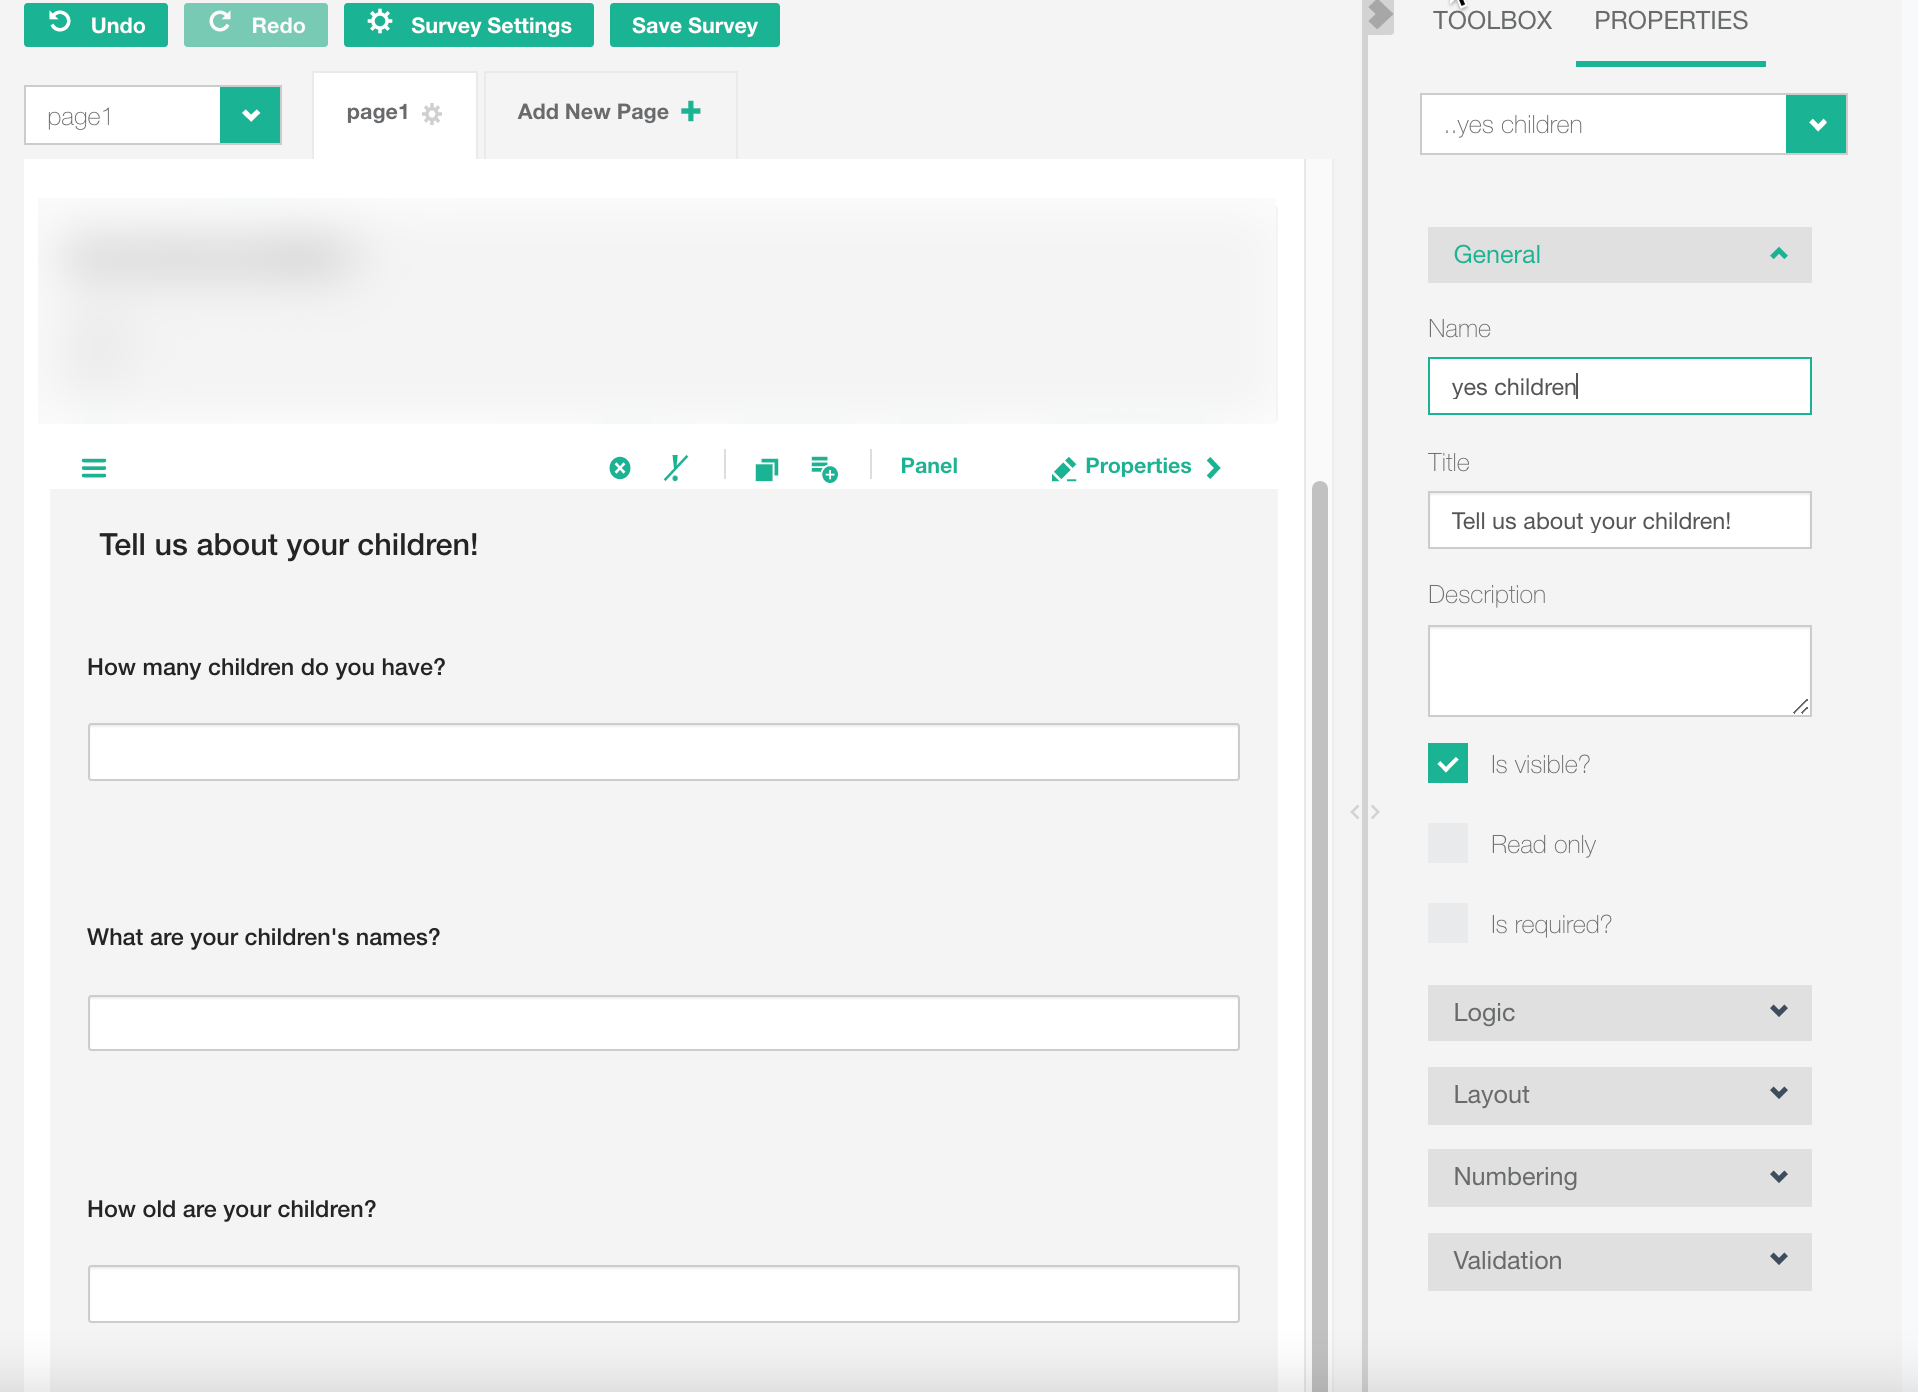
2. Configure the Panel Properties
-
Open the "Properties" panel for the panel.
-
Under the "General" section:
-
Set the "Name" field to "yes_children" (to indicate that this panel is shown only if the participant has children).
-
3. Add Questions to the Panel
-
Return to the "Toolbox" and create the follow-up questions you want to ask about the participant’s children (e.g., "How many children do you have?", "What are their names?", "What are their ages?", etc.).
-
Use the drag-and-drop
icon to move each of these questions inside the "yes_children" panel.
At this stage, your panel contains all relevant child-related questions but is still visible to all participants. The next step is to apply conditional logic so that the panel only appears if the participant selects "Yes" to the question "Do you have any children?".
Step 3: Set Up Your Survey Logic
To ensure that the "yes_children" panel only appears when a participant selects "Yes" to the question "Do you have any children?", follow these steps:
1. Navigate to the Survey Logic Settings
-
Go to the "Survey Logic" tab.
-
Click the "Add New" button.
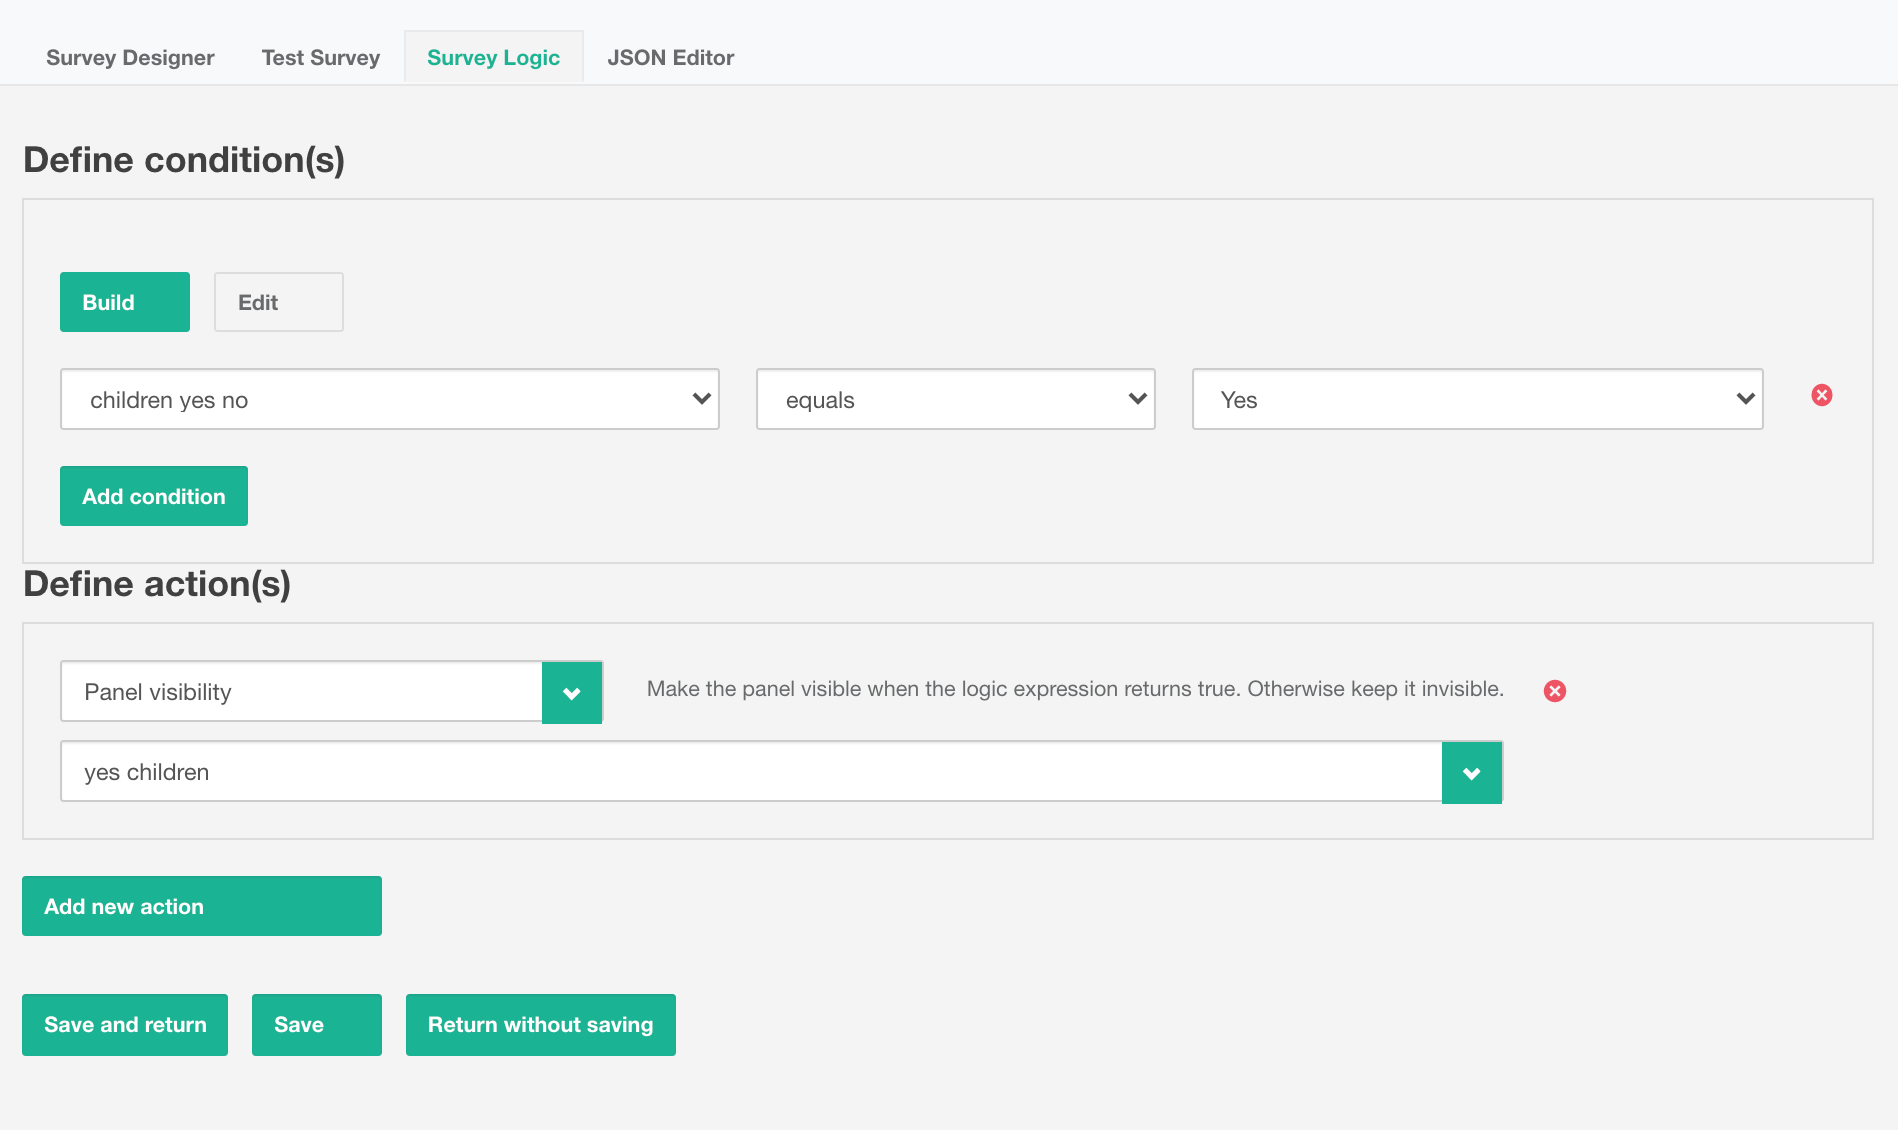
2. Define the Condition
-
In the "Define condition(s)" section:
-
Click the "Select question..." dropdown and select "children_yes_or_no" (your conditional question).
-
Leave the "equals" dropdown unchanged.
-
In the dropdown on the right labeled "Choose...", select "Yes".
-
3. Define the Action
-
In the "Define action(s)" section:
-
Click the "Select an action to add..." dropdown and choose "Panel visibility".
-
In the "Select panel..." dropdown, select "yes_children" (the panel containing the child-related questions).
-
4. Save the Logic Rule
-
Click the "Save and Return" button.
Final Outcome:
-
If a participant selects "Yes" → The "yes_children" panel will appear, displaying the follow-up questions.
-
If a participant selects "No" → The panel remains hidden, skipping unnecessary questions.
This ensures a streamlined and user-friendly survey experience while minimizing unnecessary inputs.
Step 4: Save and Test Your Survey
Now that your survey logic is set up, follow these steps to ensure it functions correctly:
1. Save Your Survey
-
Navigate back to the "Survey Designer" tab.
-
Click the "Save Survey" button to store all changes.
2. Test Your Survey
-
Go to the "Test Survey" tab.
-
Complete the questionnaire as a test participant.
-
When you reach the question "Do you have any children?", select "Yes".
-
Observe that the "yes_children" panel appears, displaying the follow-up questions.
By testing the survey, you can confirm that the logic works correctly before deploying it to actual participants. If needed, you can return to the Survey Logic tab to make adjustments.