Surveys are a powerful way to update participant profile card data, such as adding contact details, collecting eligibility information, or tracking updates as your study progresses. To ensure that survey submissions are correctly matched to a participant's existing profile (rather than creating a new profile), personalized survey links should be used.
Matching a Survey Submission to an Existing Participant
When a survey is submitted, Ripple uses specific identifiers to determine whether the data should be matched to an existing participant profile or if a new participant profile card should be created. This process ensures data integrity and prevents duplicate profiles.
Identifiers Used to Match Survey Submissions
Ripple checks the following identifiers to find an existing participant:
-
First Name, Last Name, and Birthday
- If all three match, the survey submission will be associated with the existing participant.
-
First Name, Last Name, and Global ID
- If these three match, the submission will be linked to the corresponding profile.
-
Global ID Only
- A match on the Global ID alone is sufficient to link the survey submission to an existing participant.
NOTES:
- Spelling Sensitivity:
- The First Name and Last Name fields are spelling-sensitive but not case-sensitive.
- The case (e.g., lowercase, uppercase) in the participant’s name will update to reflect the format in the most recent submission.
- Global ID: This unique identifier provides a reliable way to match survey submissions to participant profiles, reducing errors in the matching process.
Best Practices
- Use consistent naming and formatting when collecting participant information to minimize mismatches.
- Where possible, rely on the Global ID as it is the most precise matching criterion.
By ensuring identifiers are accurate and consistent, you can streamline the survey submission process and maintain organized, up-to-date participant profiles.
TIPS
-
Optional Name Fields:
- Including First Name and Last Name can help participants verify the survey is meant for them.
- You can toggle “Read Only” on these fields to prevent accidental changes.
-
Get Creative:
- Use buttons or images for clickable elements instead of plain text to make the email more visually engaging.
- To personalize links in buttons or images, use the Action Section in the element’s properties.
How to Personalize a Survey Link for a Participant
You can use UTM codes pre-fill a survey with a participant’s Global ID or first name, last name, and Global ID to make sure the survey goes back to the participant.
Important Warning
It is not possible to pre-fill a participant's survey if their First Name, Last Name, or Global ID contains the following characters:
- Spaces
- Apostrophes (
') - Quotes (
") - Commas (
,) - Periods (
.) - Question marks (
?) - Pluses (
+)
Step-by-Step Guide to Personalize a Survey Link
Step 1: Add Participant Variables to Your Survey
-
Access the Survey Creator:
- Must have Site Admin or Study Admin permissions
- Navigate to Study Settings > Survey Creator.
-
Set Up Your Survey:
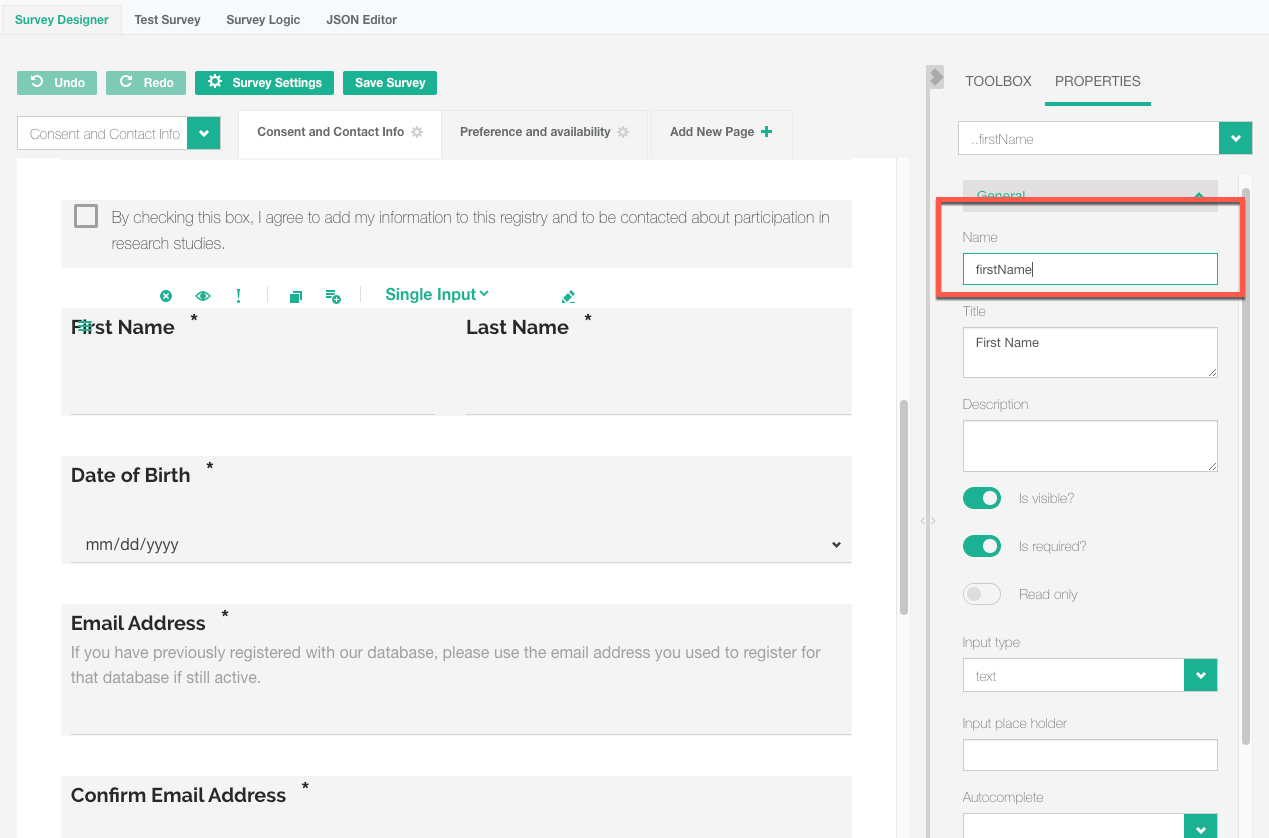
- Create your survey questions and ensure the First Name and Last Name fields remain exactly as Ripple created them.
- Go to the question’s properties (red) and verify:
- First Name has the name:
firstName. - Last Name has the name:
lastName. - These names are case-sensitive.
- First Name has the name:
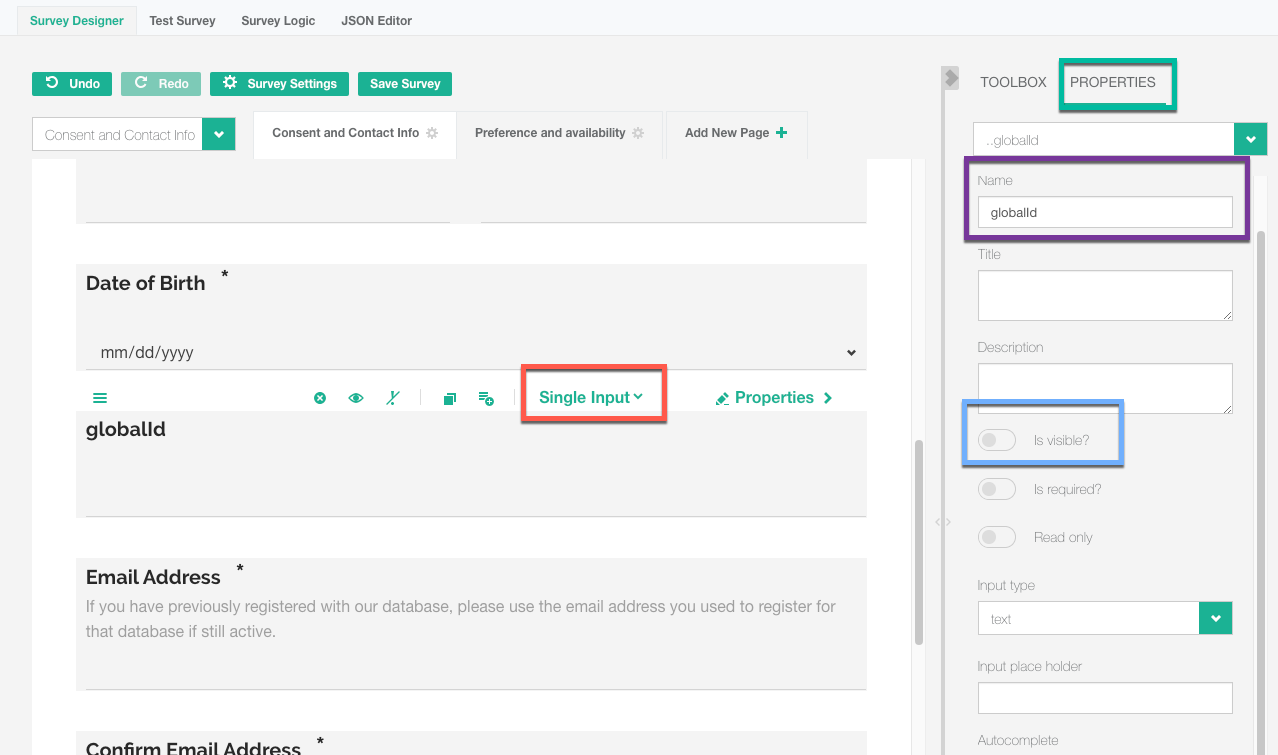
3. Add a Global ID Field:
-
- Add a Single Input question type.
- In the Properties (green) section:
- Name the field:
globalId(case-sensitive) (purple). - Toggle “Is Visible?” off so participants cannot see this field(blue).
- Name the field:
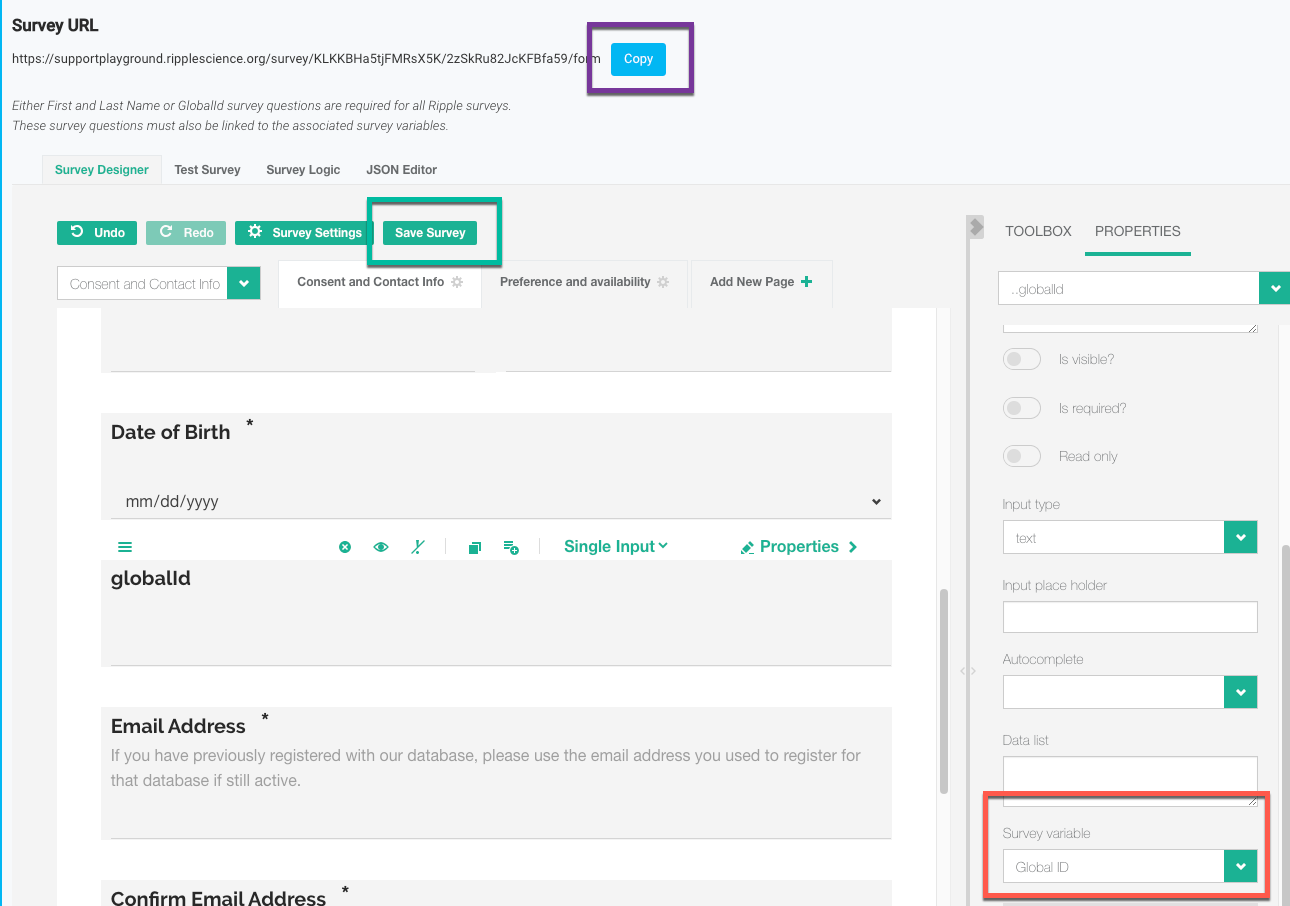
 4. Link the Global ID to the Survey Variable:
-
- In the Survey Variable section, enter “Global Id” (red) for this question.
5. Save and Copy the Survey Link:
-
- Save your survey and copy the survey URL.
TIP: It is not required to include first name and last name, but it can help participants know that the survey was meant for them. You can toggle “Read only” on so they can’t accidentally change their name.
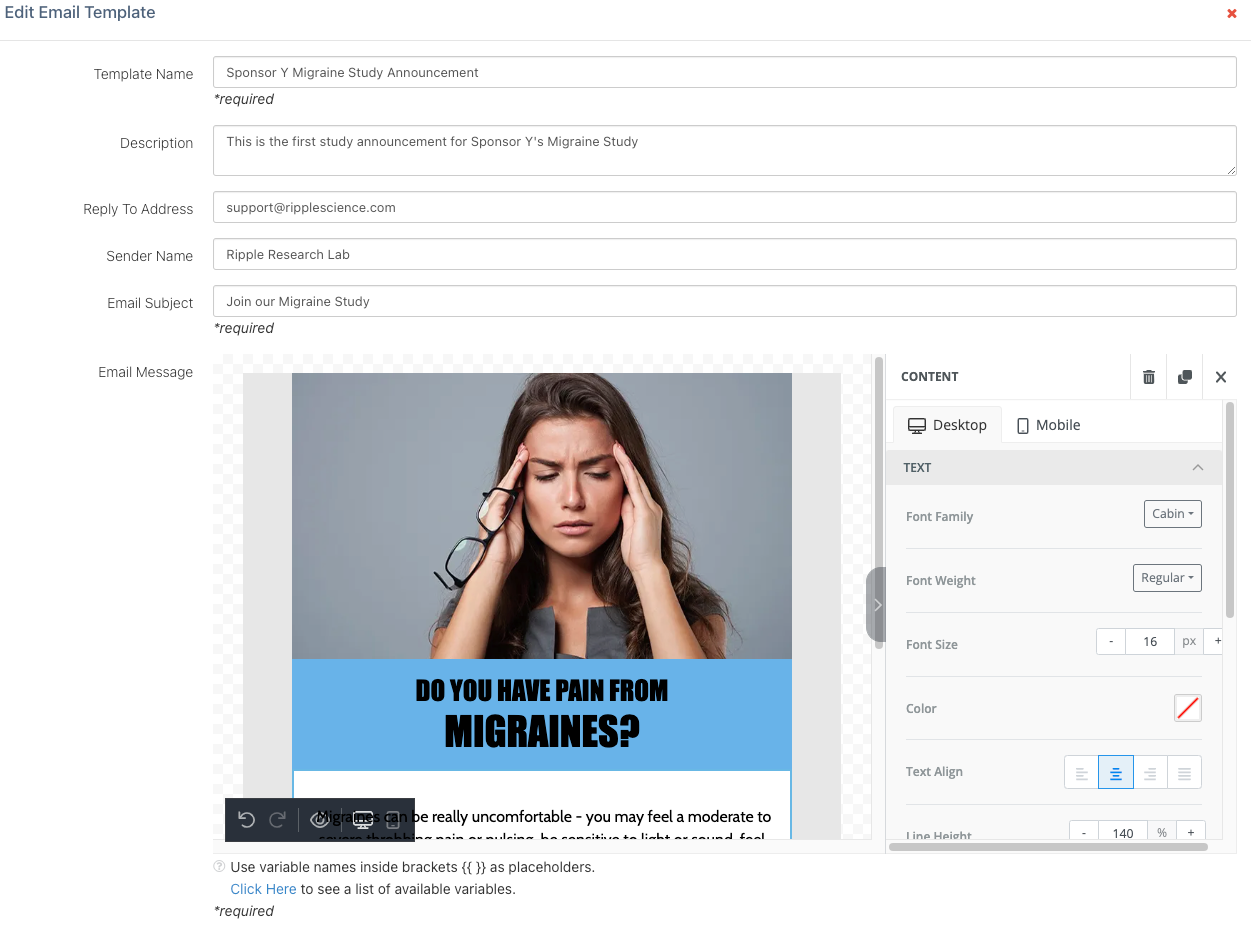
Step 2: Create an Email Template
-
Access the Email Creator:
- Go to Study Settings > Email and Text.
-
Design the Template:
- Create a new email template.
- Add the button, header, text, or image element that participants will click to activate the survey.
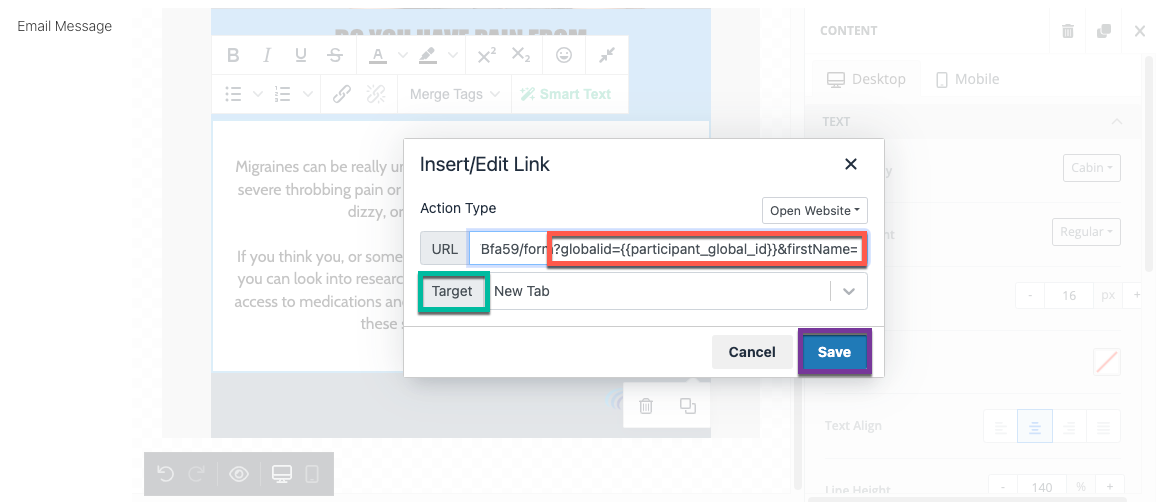
Step 3: Add the Personalized Survey Link
-
Insert the Survey Link:
- Highlight the text, header, button, or image where you want the link.
- Click the Link Icon in the editor.
-
Add the Survey URL with UTM Codes:
- Paste the survey URL into the URL Field in the pop-up.
- Append the following UTM parameters to the end of the URL(red):
?globalId=&firstName=&lastName= - Example:
https://your-survey-url.com?globalId=&firstName=&lastName=
-
Set the Target Field:
- Choose whether the link opens in the same tab or a new tab(green).
-
Save Your Email Template:
- Save (purple) the email and close the template editor.
Step 4: Test the Personalized Link
-
Access a Participant’s Profile:
- Open a participant's profile card and go to the Email Log.
-
Send a Test Email:
- Click Add Email and select the email template you just created.
- Open the email and click on the link.
-
Verify the Link Data:
- Check if the participant’s Global ID, First Name, and Last Name are correctly pre-filled in the survey.
TIPS:
-
Optional Name Fields:
- Including First Name and Last Name can help participants verify the survey is meant for them.
- You can toggle “Read Only” on these fields to prevent accidental changes.
-
Get Creative:
- Use buttons or images for clickable elements instead of plain text to make the email more visually engaging.
- To personalize links in buttons or images, use the Action Section in the element’s properties.