Ripple’s Contact Logs allow study teams to record and track all participant interactions, ensuring detailed documentation of outbound calls, incoming calls, appointments, no-shows, and other encounters.
What Information Can Be Recorded in a Contact Log?
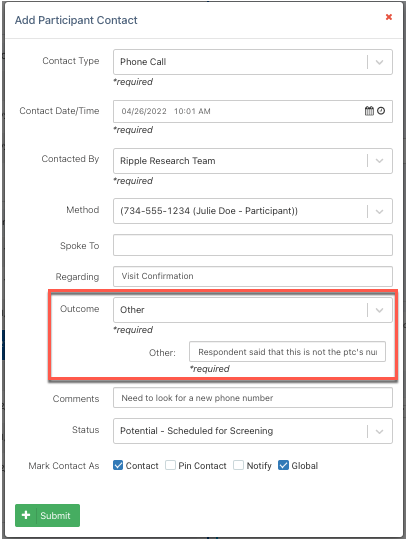
Each contact entry captures the following details:
- Contact Type – The nature of the interaction (e.g., phone call, email, appointment, no-show).
- Contact Date/Time – When the contact occurred.
- Contacted By – Identifies the team member who made the contact.
- Method – Specifies which email, phone number, or communication channel was used.
- Spoke To – Documents who received the contact (participant, guardian, healthcare provider, etc.).
- Regarding – Describes the purpose of the interaction.
- Outcome – Records the result of the contact (e.g., successful call, voicemail left, follow-up required).
- Comments – Additional notes or details about the interaction.
- Modify Participant Status – Updates the participant’s status based on the contact outcome.
Using the “Other” Contact Type
- "Other" is a pre-configured option in Contact Logs.
- When additional custom contact types are created, “Other” will always be listed last.
- If a user selects “Other”, a text field will appear, requiring them to provide specific details before completing the contact log.
Benefits of Using Contact Logs
- Tracks all participant interactions in one place.
- Ensures accurate documentation of participant engagement.
- Improves team coordination by providing a shared history of contacts.
- Helps manage follow-ups by tracking outcomes and modifying participant status accordingly.

Setting Up Contact Log Outcome Dropdown Options
Study Admins can customize the "Outcome" dropdown in the Contact Log, ensuring standardized tracking of participant communication attempts. This allows for consistent reporting and analysis of study team interactions with participants.
Who Can Set Up Contact Log Outcome Options?
- Study Admins have permission to create and modify the list of Contact Log Outcome options.
- The Outcome dropdown is set at the study level but applies globally across all studies and the Registry within the site.
Benefits of Custom Outcome Options
- Standardizes contact tracking across research teams.
- Enables reporting on communication effectiveness by categorizing outcomes.
- Improves follow-up strategies by understanding participant response trends.
Example Contact Log Outcome Options
Some commonly used Outcome options include:
- No Answer, No Message
- No Answer, Left Message
- Left Voicemail
- Disconnected Number
- Wrong Number
- Not Interested
- Requested Call Back
- Appointment Scheduled
- Confirmed Appointment
- Screening Completed
How to Set Up Contact Log Outcomes
1️⃣ Navigate to the Study Settings page (red).
2️⃣ Click on the “Requirements” module (green).
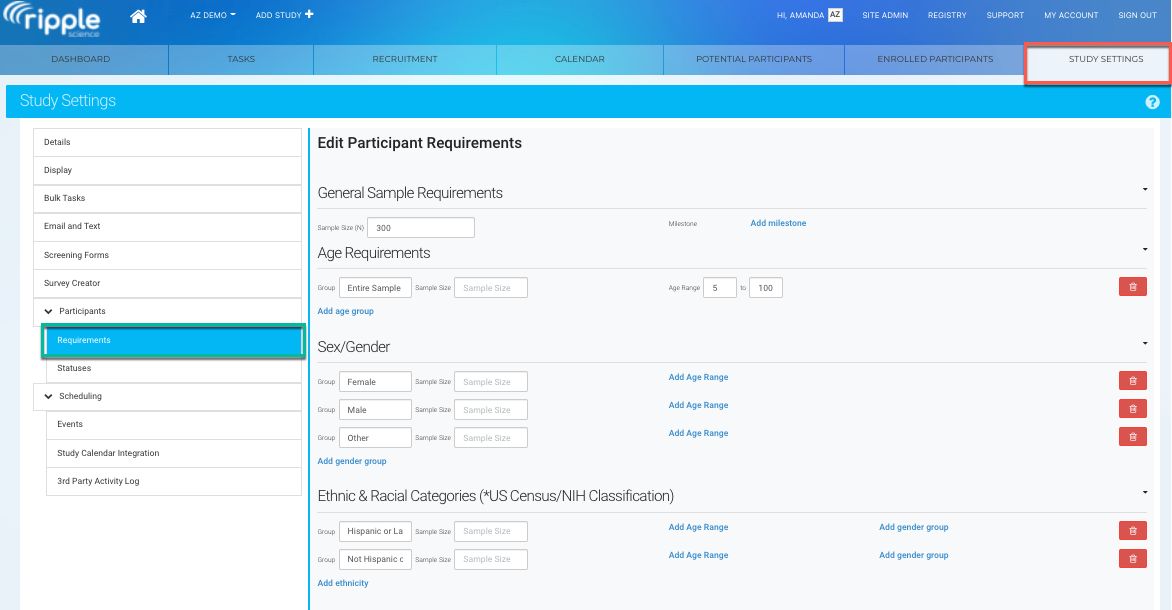
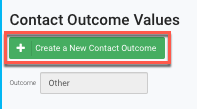
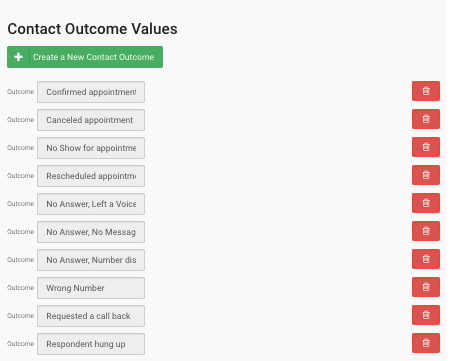
3️⃣ Scroll down to the "Contact Outcome Values" section.
4️⃣ Click the "Create a New Contact Outcome" button (red).
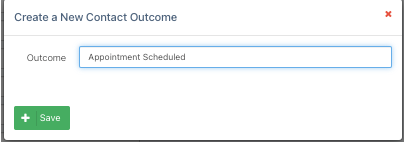
5️⃣ Enter the Outcome Name in the “Outcome” field.
6️⃣ Click "Save" to add the outcome to the dropdown list.
7️⃣ Repeat steps 3–6 for each additional outcome you need.
IMPORTANT NOTES:
- The created outcomes will appear in the dropdown in the order they were created.
- "Other" will always be the last option in the dropdown.
How to Use the Contact Log Outcome Dropdown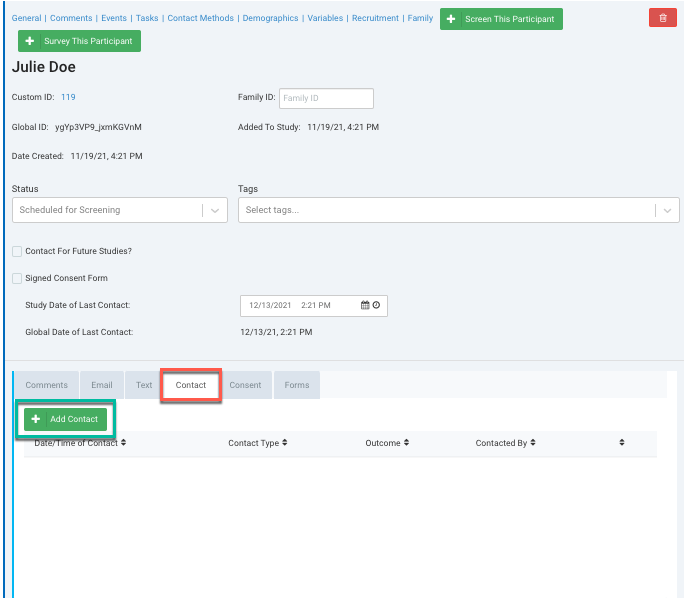
Add a New Contact Entry
- Open the Participant Profile Card for the desired participant.
- Click on the "Contact Log" tab (red).
- Click the "+Add Contact" button (green).
- Fill in the required contact details (Contact Type, Contacted By, Method, Spoke To, etc.).
- Click on the Outcome field and select the appropriate contact outcome from the dropdown list.
- If applicable, enter additional details in the Comments field.