Managing Participant Contacts in Ripple
Each participant profile in Ripple includes a Contacts section to store contact information for relevant individuals, such as parents, partners, or caseworkers. This organized table helps users quickly access essential details.
Why Manage Multiple Contacts?
Participants may have multiple points of contact for:
- Scheduling appointments
- Requesting medical records
- Providing alternate contacts in case they are unreachable
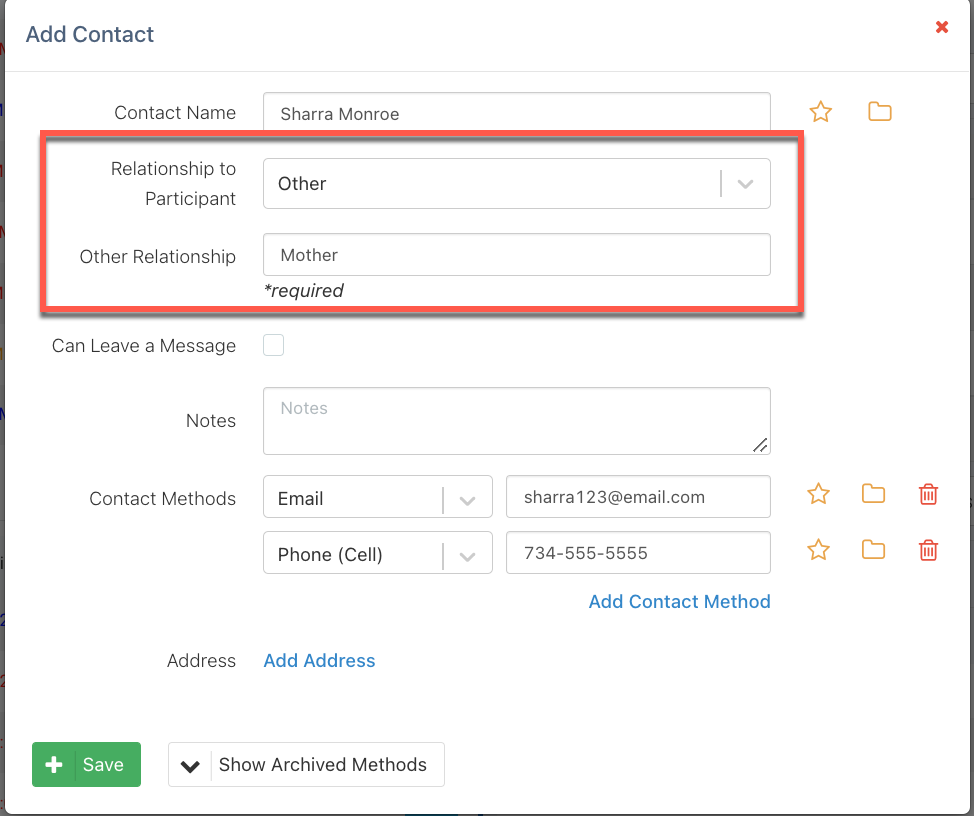
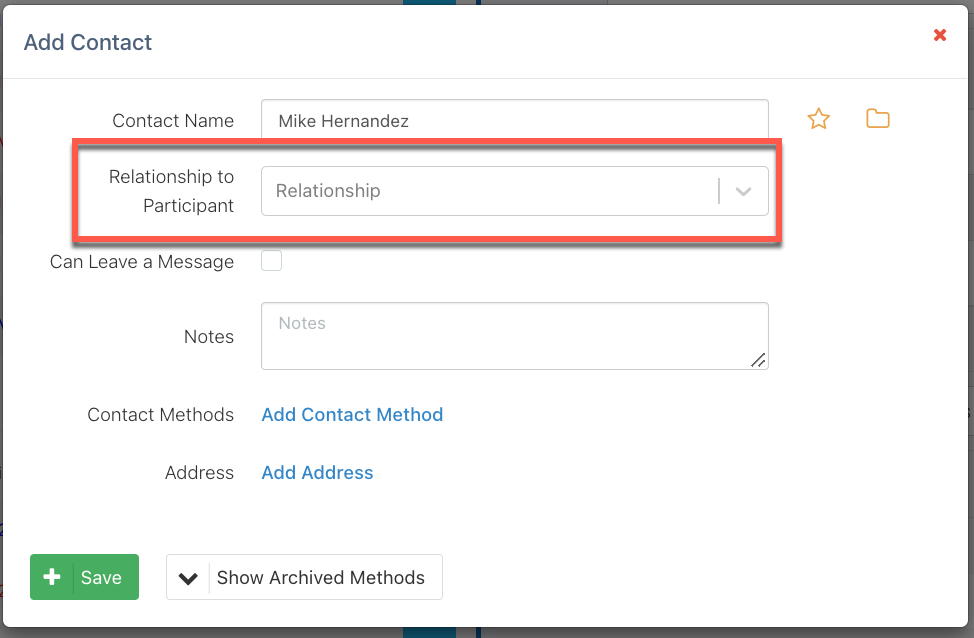
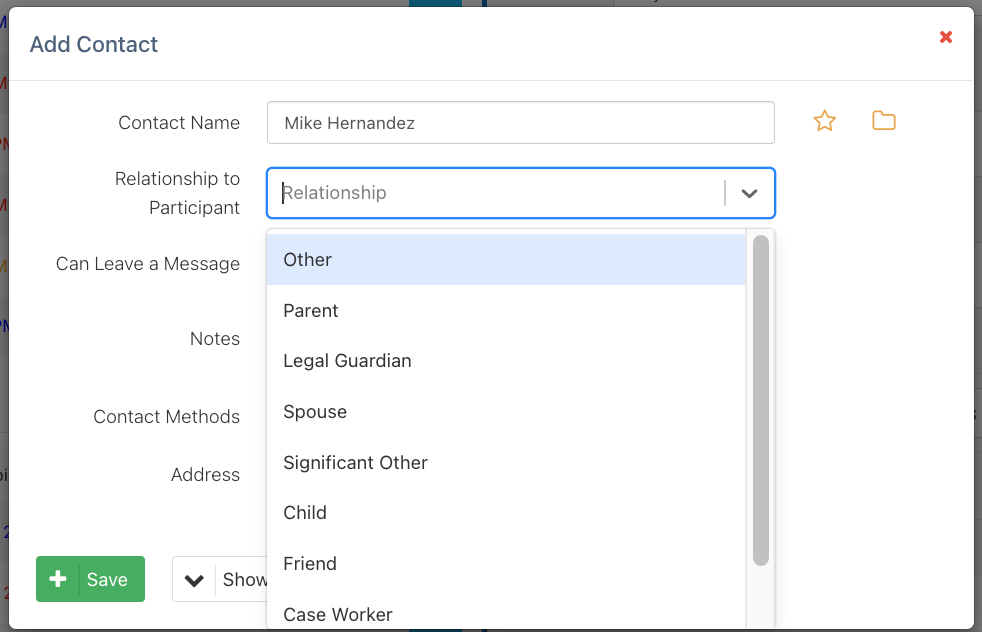
Relationship to Participant Dropdown
The "Relationship to Participant" field is a dropdown menu to ensure data consistency and efficient entry while allowing for various relationship types.
- "Other" is always the last option in the list.
- If a user selects "Other," a required text field appears for further clarification
Who Can Set Up the Relationship to Participant Dropdown Options?
Study Admins have the ability to create and manage the Contact Relationship Values that team members can select in the "Relationship to Participant" field. This ensures standardized data entry across all studies.
Key Features of the Dropdown List:
- Global (Site-Wide) Application – The dropdown list applies to all studies and the Registry at the study level.
- Standardization – Helps teams maintain consistency when recording participant contact relationships.
Example Relationship Options:
- Parent
- Legal Guardian
- Spouse
- Child
- Sibling
- Case Worker
- Healthcare Provider
- Friend
Study Admins can customize this list to meet the needs of their research teams while ensuring clarity and uniformity in participant records.
Setting Up Relationship to Participant Dropdown Options
How to Set Up the Dropdown:
- Navigate to Study Settings (red) and open the Requirements (green).
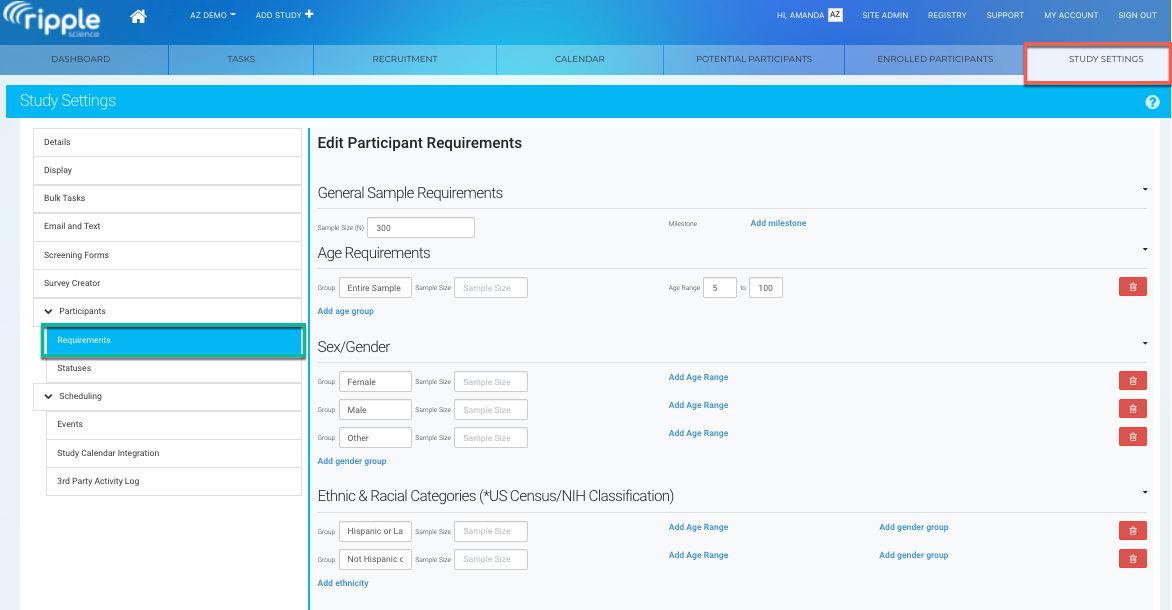
2. Scroll to the Contact Relationship Values section.
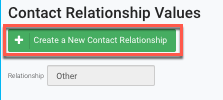
3. Click Create a New Contact Relationship (red).
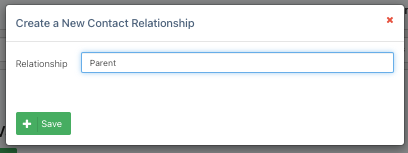
4. Enter the relationship name and click Save.
5. Repeat for additional relationships.
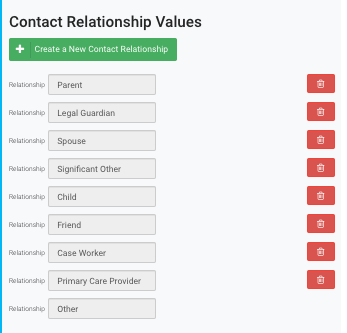
Ordering Options:
-
- Relationship options appear in the order they are created.
- "Other" is always the last option.
Using the Relationship to Participant Dropdown
- Open the Participant Profile Card.
- Scroll to the Contact Methods section.
- Click the green "+" button (red) to add a new contact.

4. Enter the Contact Name.
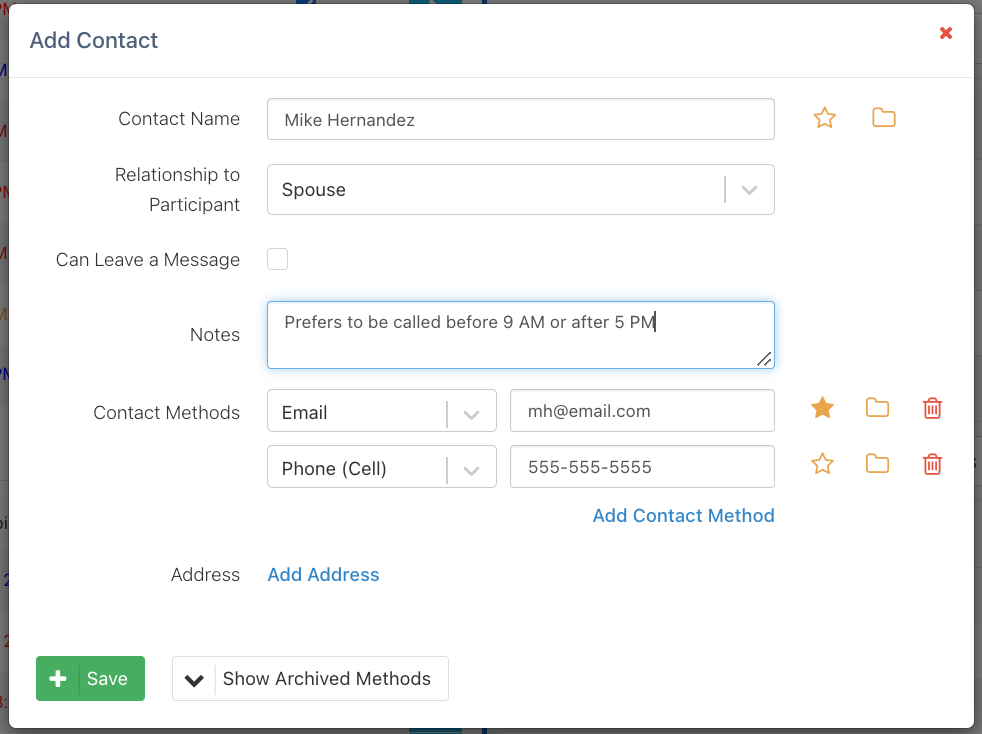
5. Click the "Relationship to Participant" (red) field and select the appropriate relationship.
6. Complete the contact details and click Save.
7. Enter the remaining contact information and click Save
This process ensures all participant contacts are accurately recorded and easily accessible across studies.