Personalizing Emails with Variables in Ripple
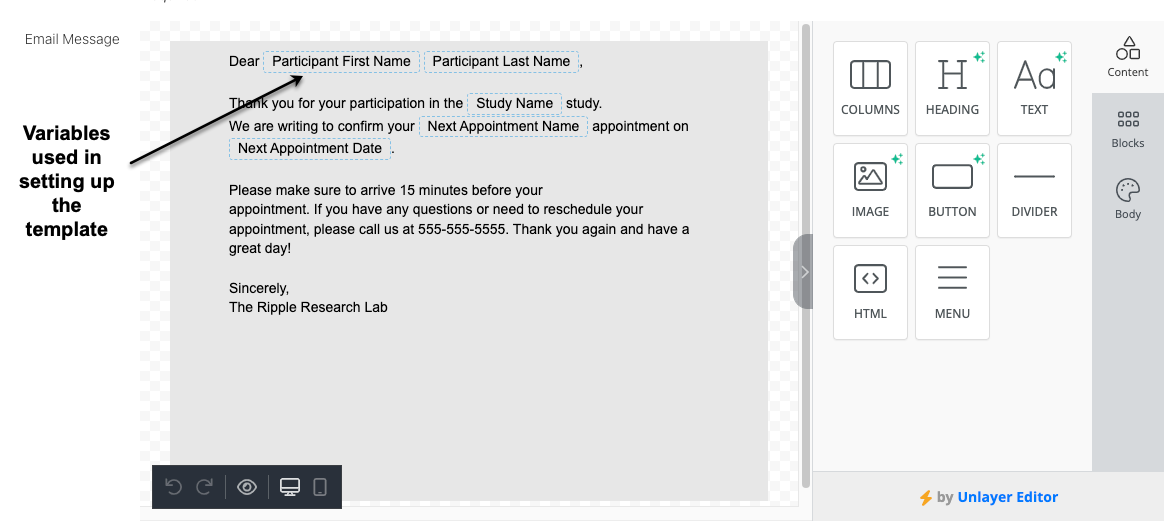
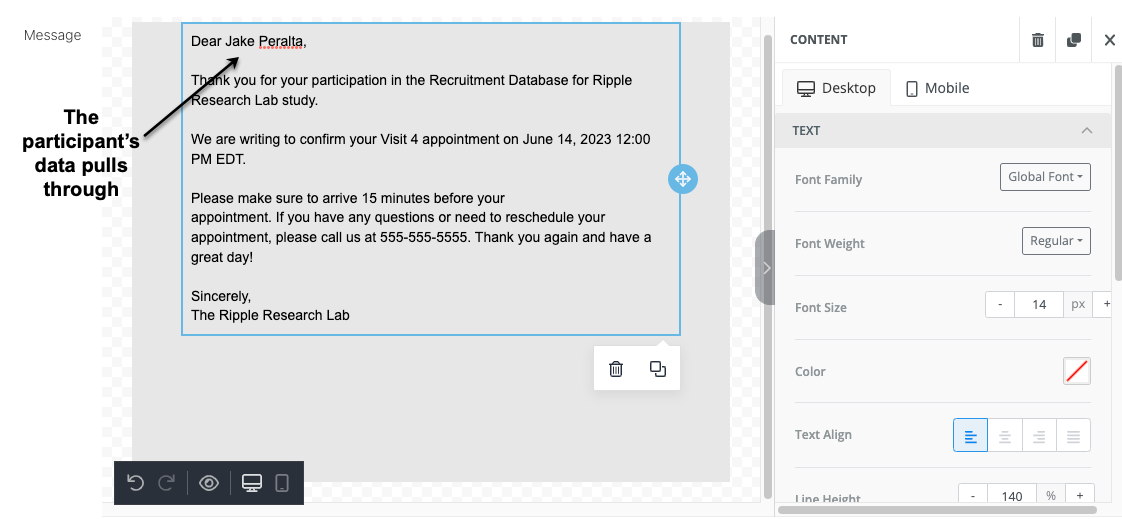
Ripple allows you to customize participant emails by inserting dynamic variables that automatically populate with participant-specific details. This feature helps personalize messages, ensuring that participants receive relevant and clear communication.
📌 Email variables act as placeholders that are replaced with real participant data when the email is sent.
📌 These variables allow you to personalize emails by including details specific to each recipient.
Common Variables You Can Use
✔ Participant First Name → Automatically inserts the participant's first name.
✔ Participant Last Name → Adds the participant’s last name.
✔ Next Appointment Date → Displays the date of the participant’s upcoming visit.
✔ Study Name → Inserts the name of the study the participant is enrolled in.
✔ Custom Variables → Any custom data field stored in Ripple can be used.
List of Available Email Variables in Ripple
Ripple allows you to personalize participant emails by inserting dynamic variables that automatically populate with relevant participant and study details. These variables help ensure that participants receive customized and accurate information regarding their study involvement.
Available Variables
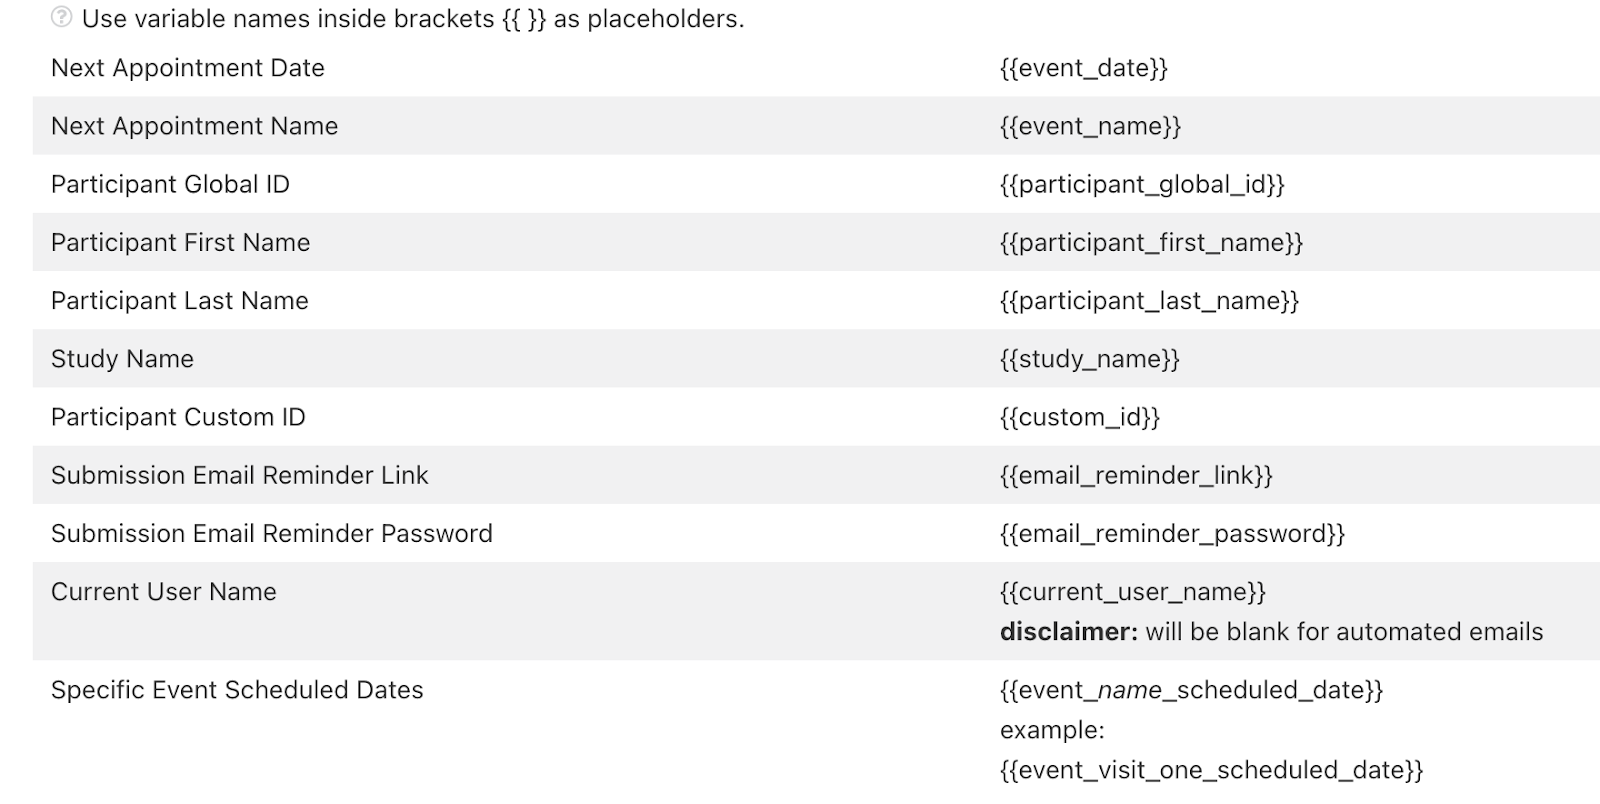
Below are the variables that can be inserted into email templates:
Participant & Study Information
✅ {Participant First Name} – Inserts the participant’s first name.
✅ {Participant Last Name} – Inserts the participant’s last name.
✅ {Participant Custom ID} – Inserts a custom identifier assigned to the participant.
✅ {Participant Global ID} – Inserts the unique global ID assigned to the participant.
✅ {Study Name} – Inserts the name of the study the participant is enrolled in.
✅ {Current User Name} – Inserts the name of the Ripple user sending the email.
Appointment & Event Information
✅ {Next Appointment Name} – Inserts the name of the participant’s next scheduled study visit.
✅ {Next Appointment Date} – Inserts the date of the participant’s next scheduled appointment.
✅ {Specific Event Scheduled Date} – Allows you to specify any scheduled event date, even if it is not the next upcoming event.
📌 If using appointment variables ({Next Appointment Name}, {Next Appointment Date}, or {Specific Event Scheduled Date}), make sure the event is actually scheduled, not just expected.
📌 These variables will only work if an event date is confirmed in the participant’s schedule.
📌 You can use multiple event variables to list more than one upcoming event in a single email.: If
How to Add Ripple Variables to Emails
Ripple allows you to personalize participant emails using dynamic variables. These variables can be added in two ways:
1️⃣ Using Merge Tags
2️⃣ Using the "Click Here" Button to View Available Variables
Adding Variables Using Merge Tags
Follow these steps to insert variables using Merge Tags:
Step 1: Add a Text or Heading Element
- Open the email editor in Ripple.
- Add a Text or Heading element where you want to insert the variable.
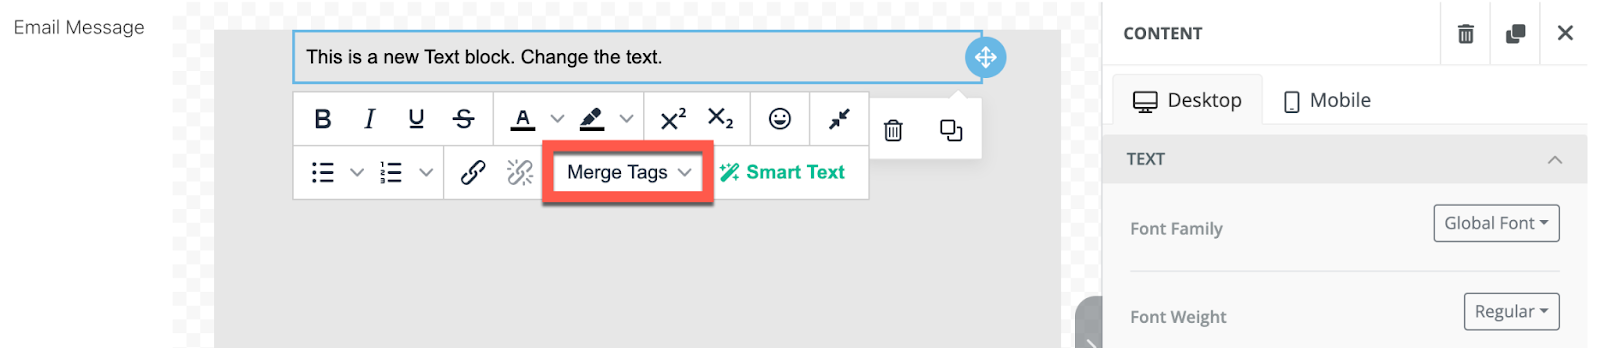
Step 2: Access the Merge Tags Dropdown
- Click inside the Text or Heading box where you want the variable to appear.
- A dropdown menu will appear.
- Click on "Merge Tags."
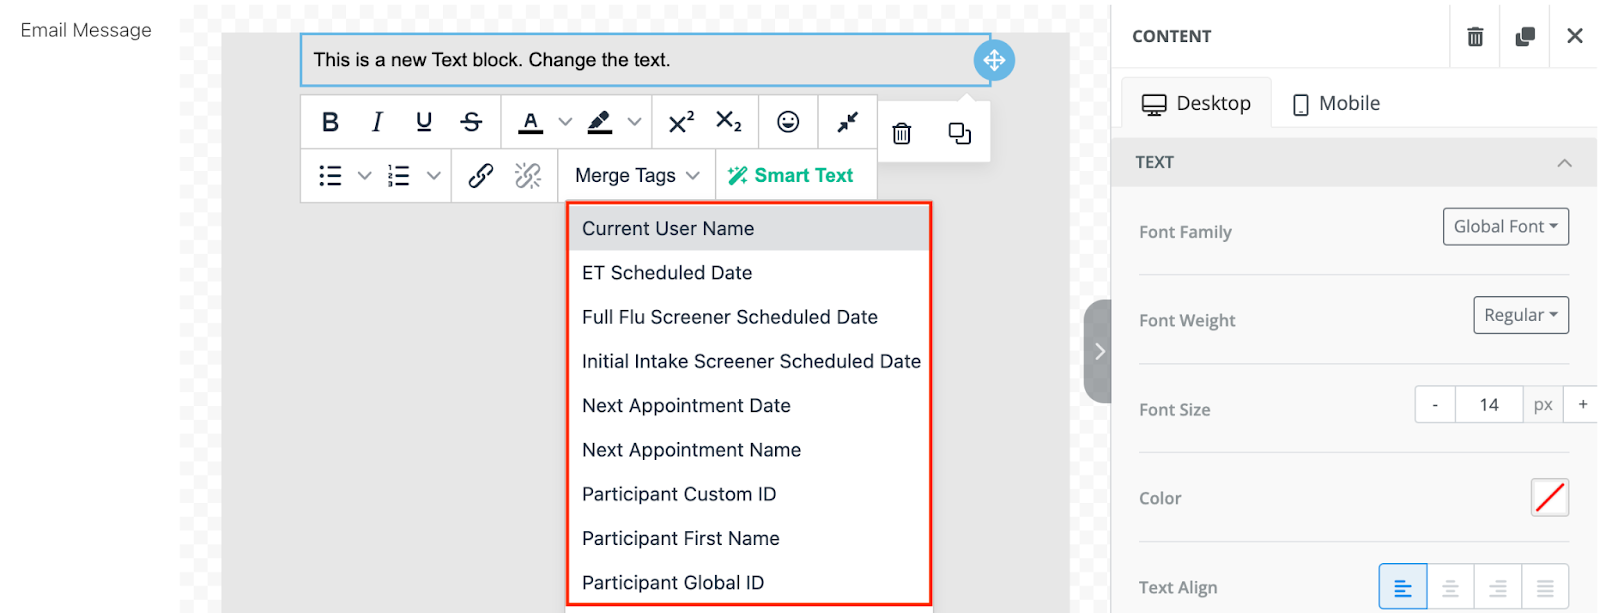
Step 3: Select a Ripple Variable
- A list of available Ripple variables will appear.
- This list includes all study events with their event title and scheduled date.
- Click on the variable you want to include in your email.
Step 4: Verify Variable Placement
- The selected variable will be inserted exactly where your cursor was placed.
- Ensure it appears correctly formatted before saving the email template.

Adding Variables Using the "Click Here" List
Ripple allows users to easily insert dynamic variables into emails using the "Click Here" method. This ensures personalized messages with participant-specific details.
Step 1: Add a Text or Heading Element
- Open the email editor in Ripple.
- Add a Text or Heading element to your email body.
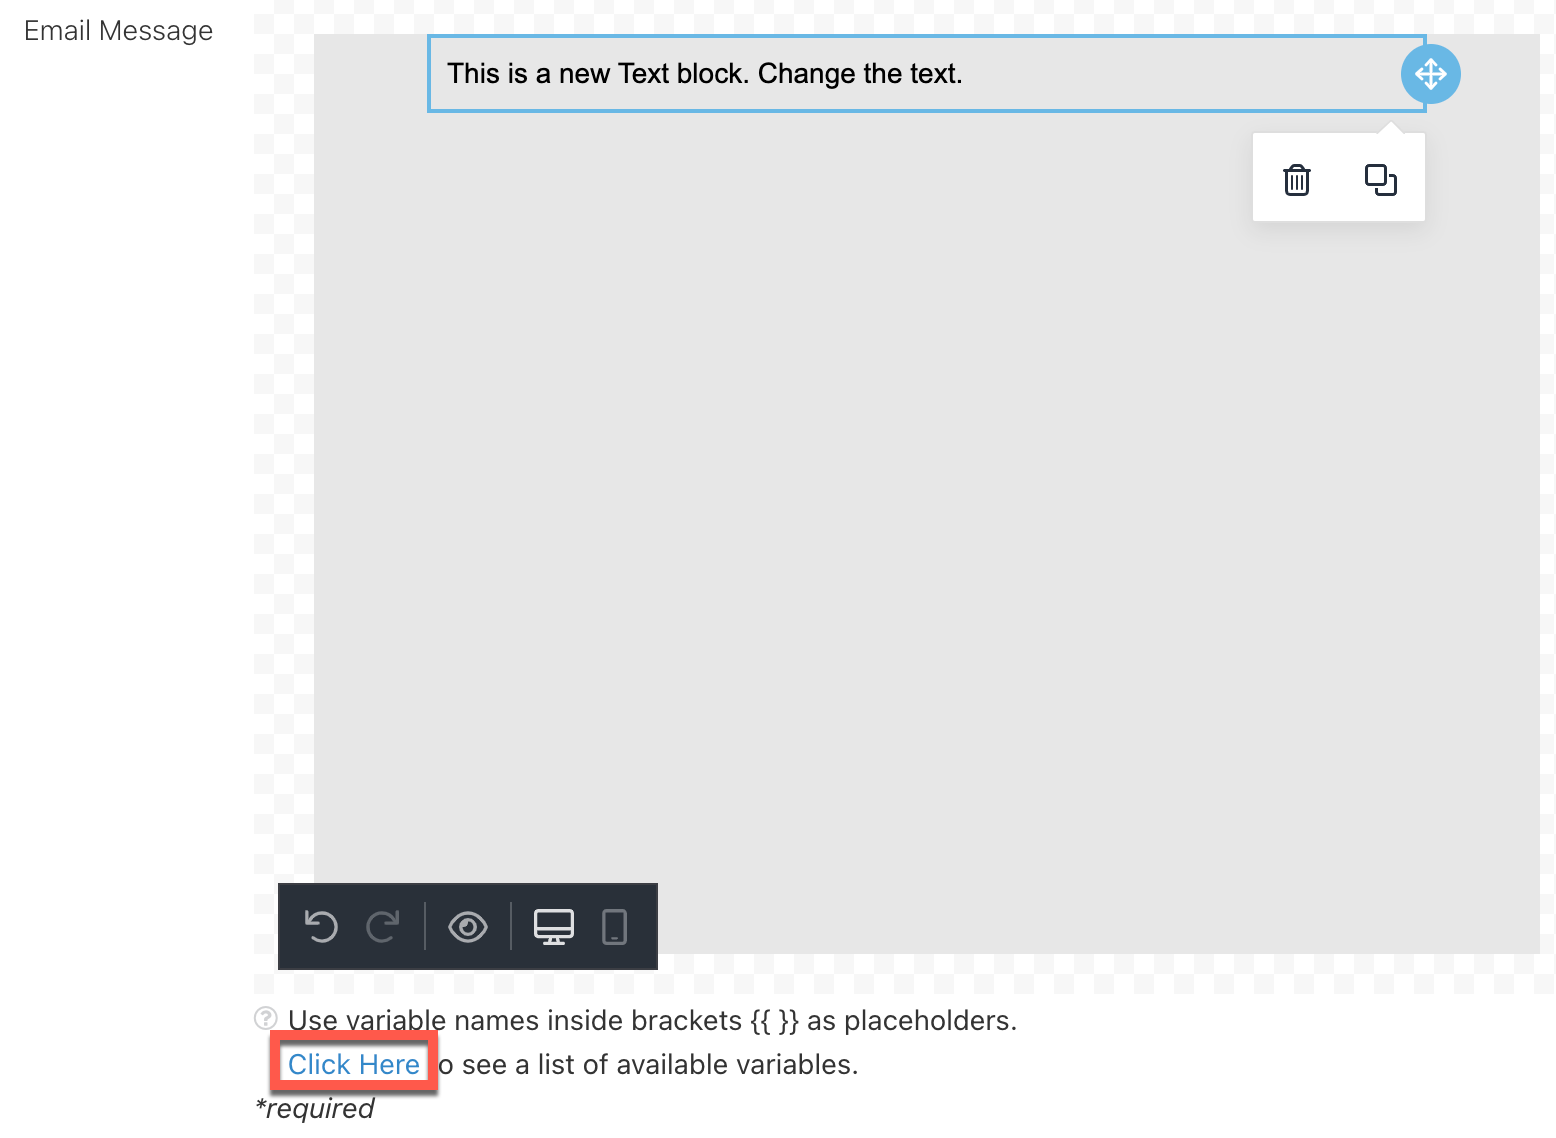
Step 2: Access the List of Available Variables
- Under the email message, find the blue hyperlink text that says "Click Here."
- Click on "Click Here" to open the list of available Ripple variables.
Step 3: Select and Copy a Variable
- A list of Ripple variables will appear.
- Find the variable you want to use.
- If you want to include an event’s title and scheduled date, you will need to modify the format:
📌 Replace "name" in the variable format:
bash date➡ Example: If the event is "Baseline Visit," update the variable to:
bash dateStep 4: Paste the Variable into the Email
- Copy the variable from the list.
- Paste it into the Text or Heading box where you want it to appear in the email.
Step 4: Paste the Variable into the Email
- Copy the variable from the list.
- Paste it into the Text or Heading box where you want it to appear in the email.

Step 5: Confirm the Variable Displays Correctly
- Click outside the Text or Heading element.
- The variable will convert automatically to show the correct format.
- No further modifications are needed.
⚠️ WARNING: Proper Use of Merge Tags & Click Here Variables
When personalizing emails in Ripple, you must use Merge Tags or the “Click Here” list to insert dynamic variables.
❌ Typing in regular text (e.g., “John” instead of {Participant First Name}) will not automatically pull participant data into the email.
✅ Use the Merge Tags dropdown or the "Click Here" button to properly insert variables that will dynamically update when the email is sent.