The Ripple Registry is a powerful tool designed to streamline your team’s workflow by providing quick access to a curated pool of potential participants. By leveraging the registry, you can save time, increase efficiency, and enhance productivity in participant recruitment and management.
This guide serves as a Registry 101, covering essential functionalities, including:
- Navigating the Registry
- Setting Up Searches and Filters
- Managing Participants Effectively
Accessing Your Ripple Registry
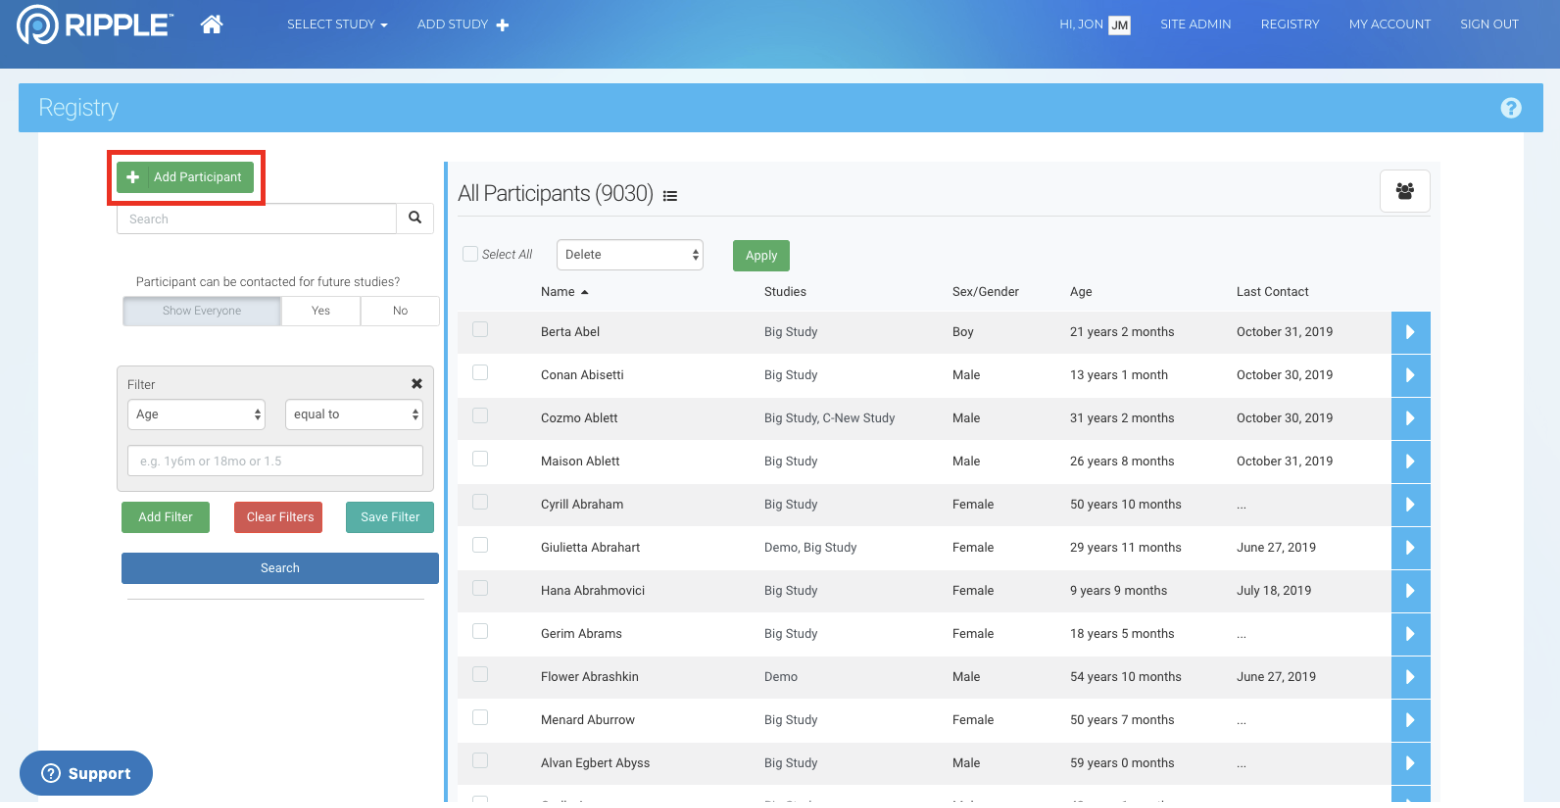
To navigate to your Ripple Registry, follow these steps:
- Locate the Registry button.
- Click the Registry button, found in the top right corner of your screen (Red Box).
This will direct you to the Ripple Registry, where you can search, filter, and manage participant data efficiently.
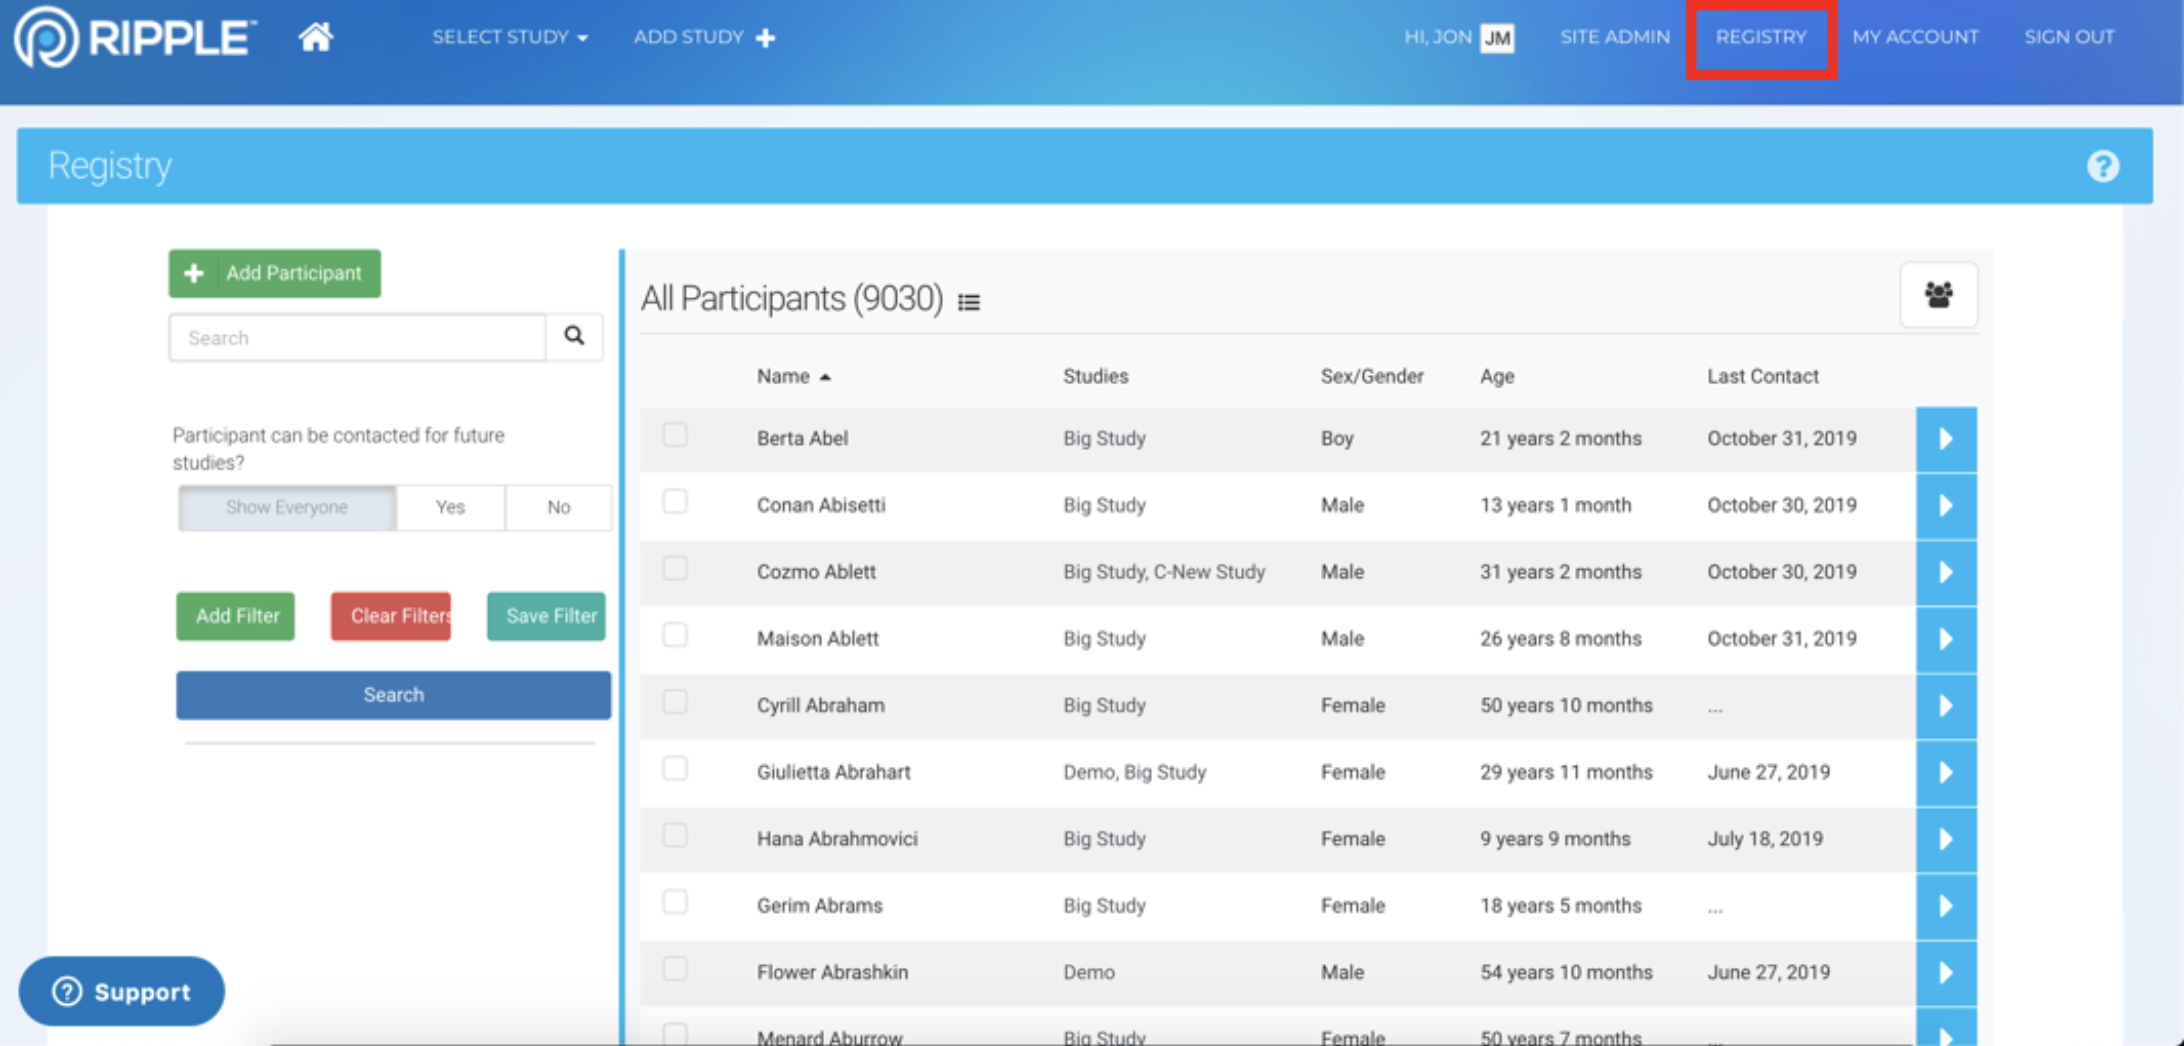
NOTE: Only site admins and users assigned registry access permissions will be able to see the registry button and enter the registry. You can learn more about assigning participants here.
Searching and Filtering the Ripple Registry
The Ripple Registry provides two primary tools to help you efficiently locate participants:
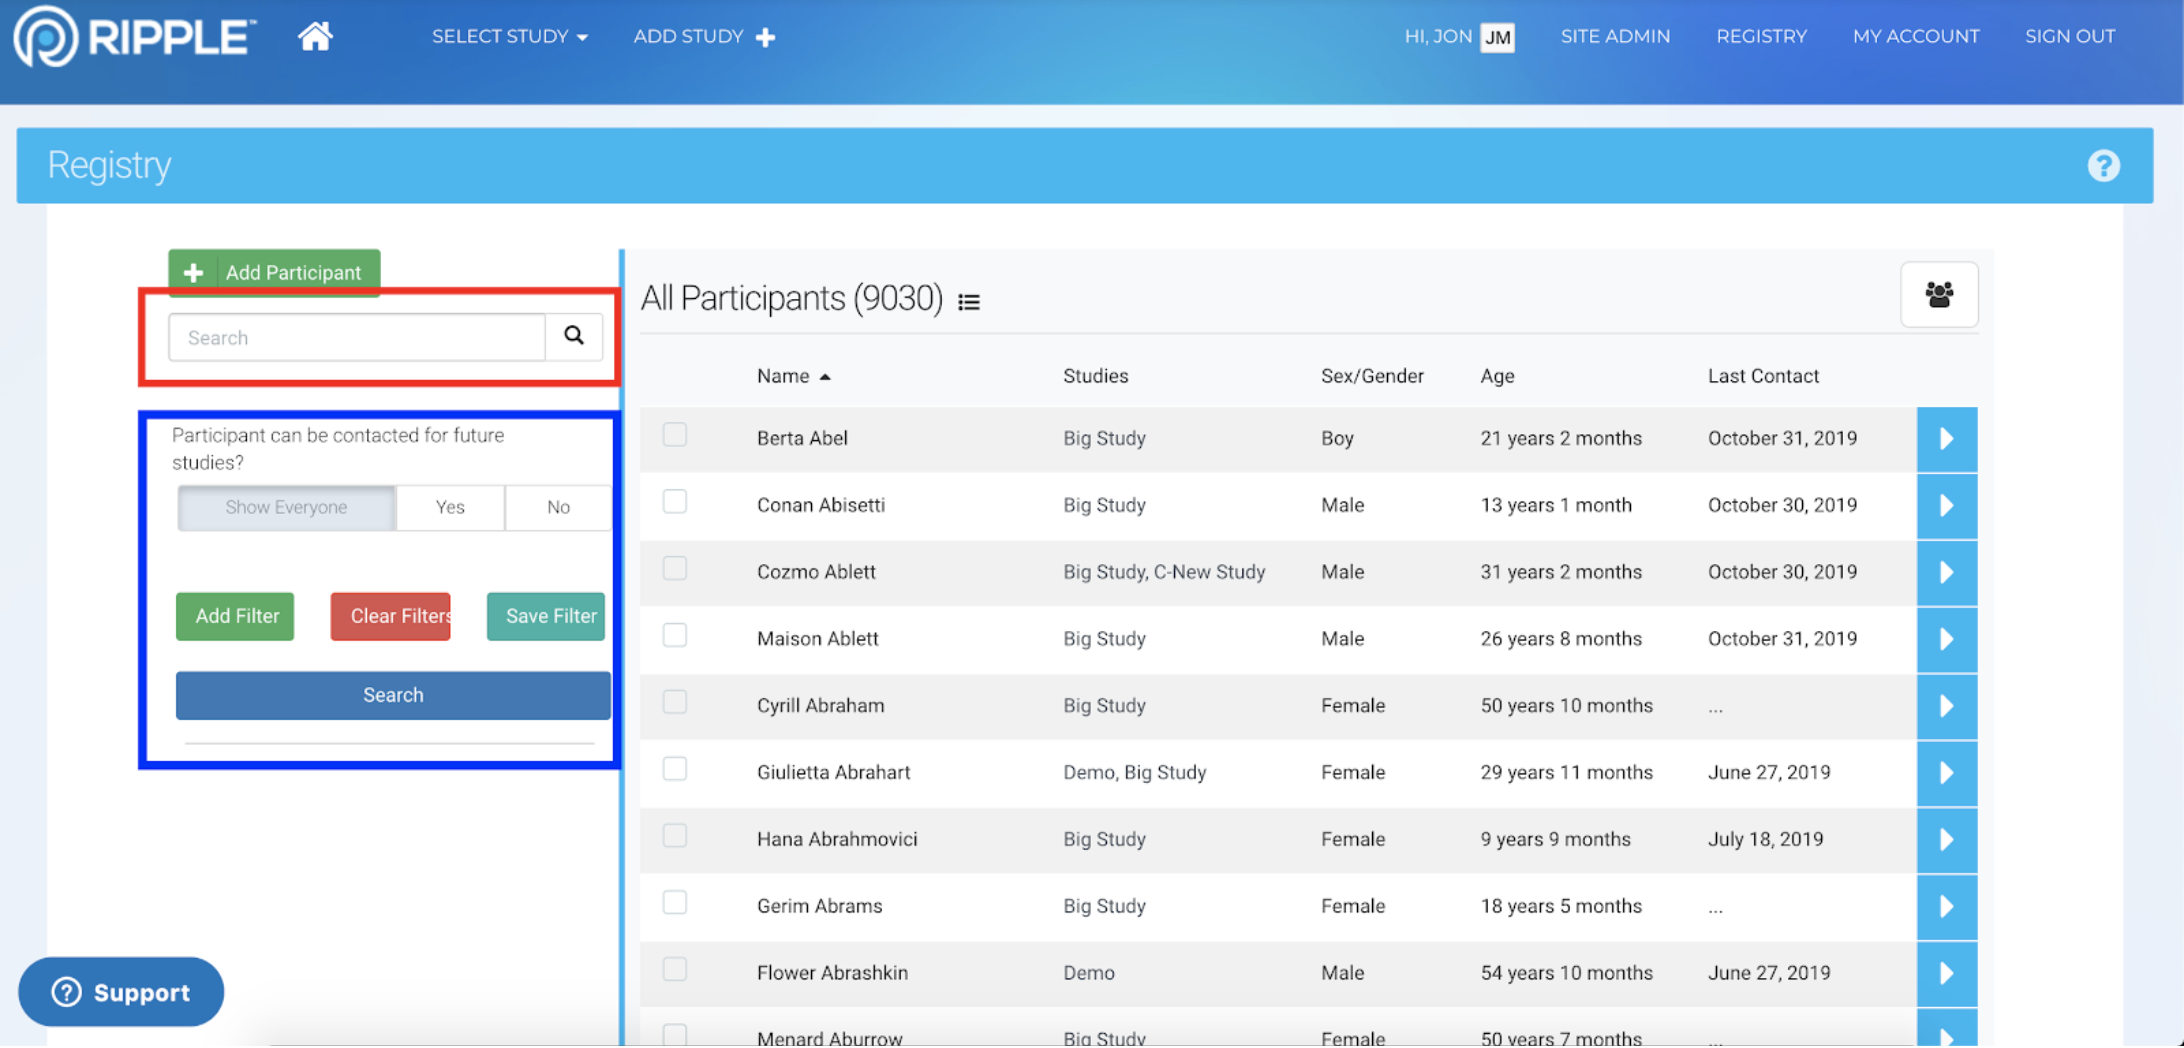
1. Searching (Red)
-
- Allows you to input custom queries to find exact matches for specific participant details.
- Searchable fields include:
- Participant Names
- Global IDs
- Tags
- Ethnicities
- And more
2. Filtering (Blue)
-
- Uses pre-defined variables to refine your participant list.
- Common filtering options include:
- Age
- Custom variables such as "Medications Taken"
- Other study-specific criteria
By combining Searching and Filtering, you can narrow down your registry to identify ideal participants for your study.
For a detailed guide on how to use these tools effectively, visit:
👉 Ripple Science Support – Searching & Filtering Guide
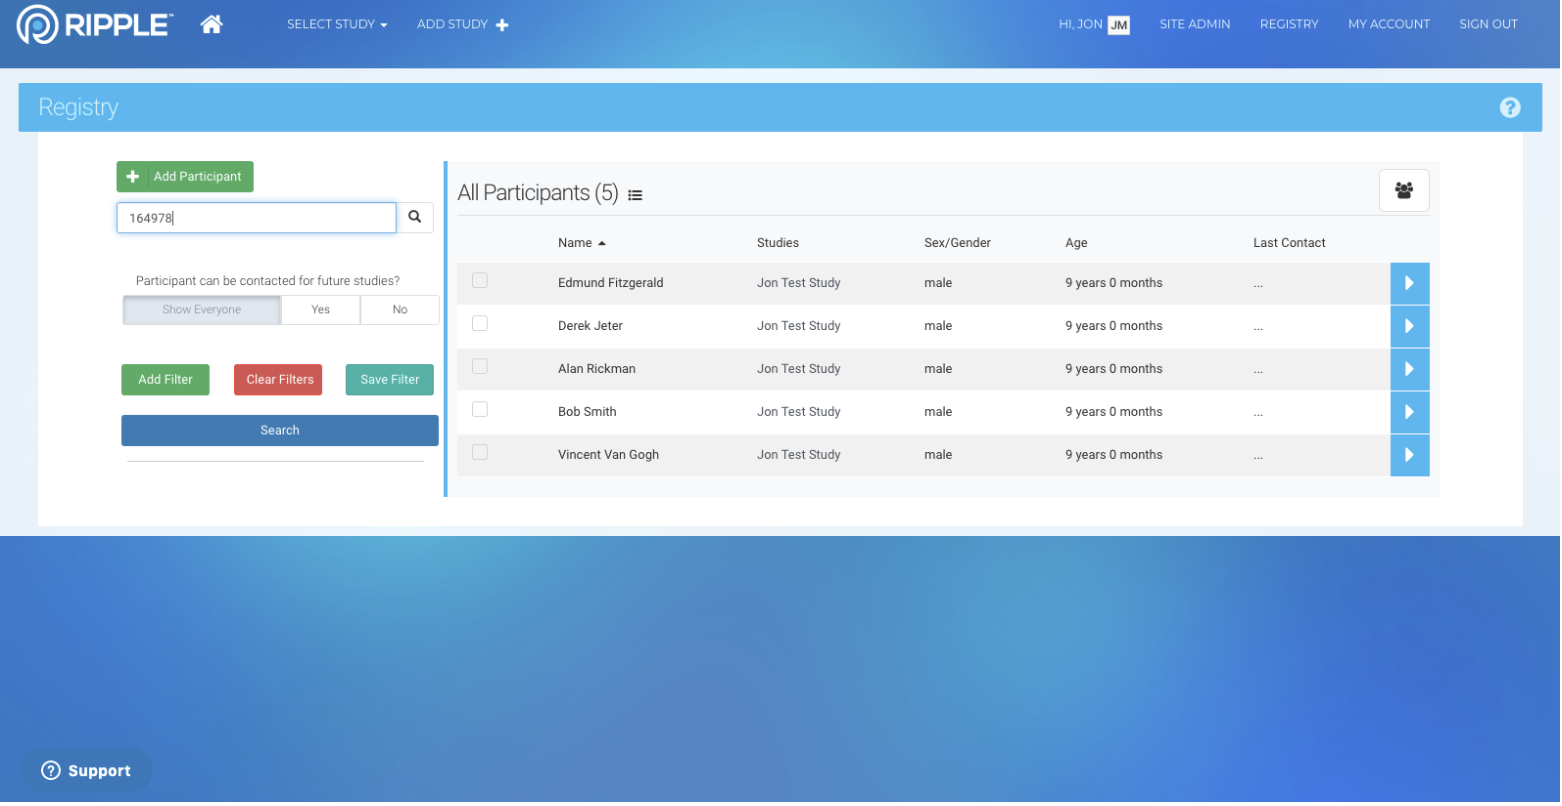
Searching for Specific Participants in Ripple
The search bar in the registry allows you to conduct custom searches to quickly locate specific participants, identify family groups, or find subsets of your registry based on key attributes.
Common Search Criteria:
- Participant Name: Locate an individual by their full or partial name.
- Family ID: Identify groups of participants linked by a common Family ID.
- Ethnicity: Search for subsets of your registry, such as participants of Asian descent or other ethnic groups.
- Other Custom Queries: Find participants using unique identifiers like Global IDs, Tags, or Enrollment Status.
- Click inside the search bar in the Registry.
- Enter your custom query (e.g., a participant’s name, Family ID, or Ethnicity).
- Press Enter or click the Search icon to retrieve matching results.
Ethnicity
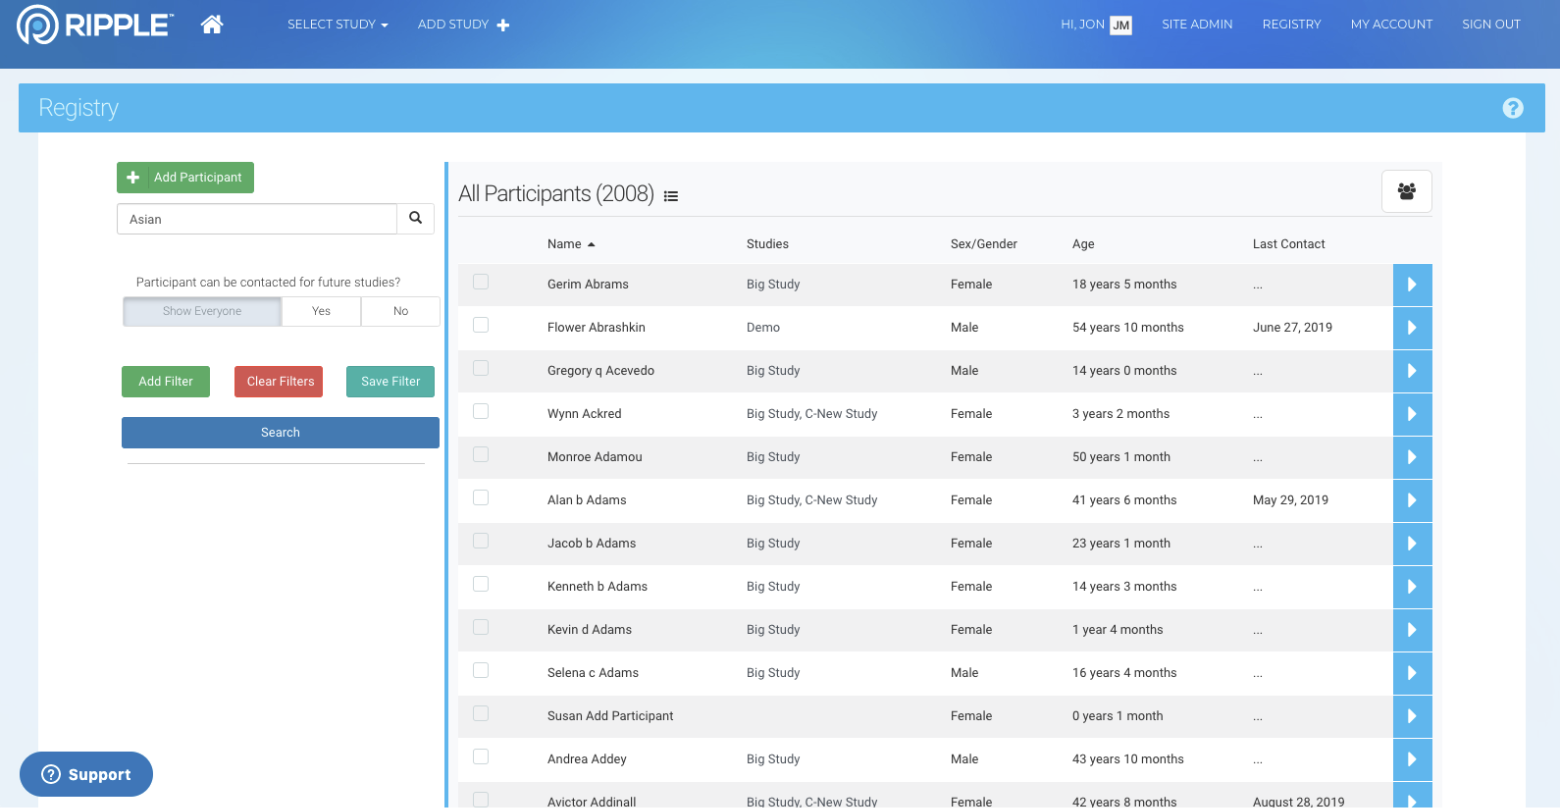
Family ID
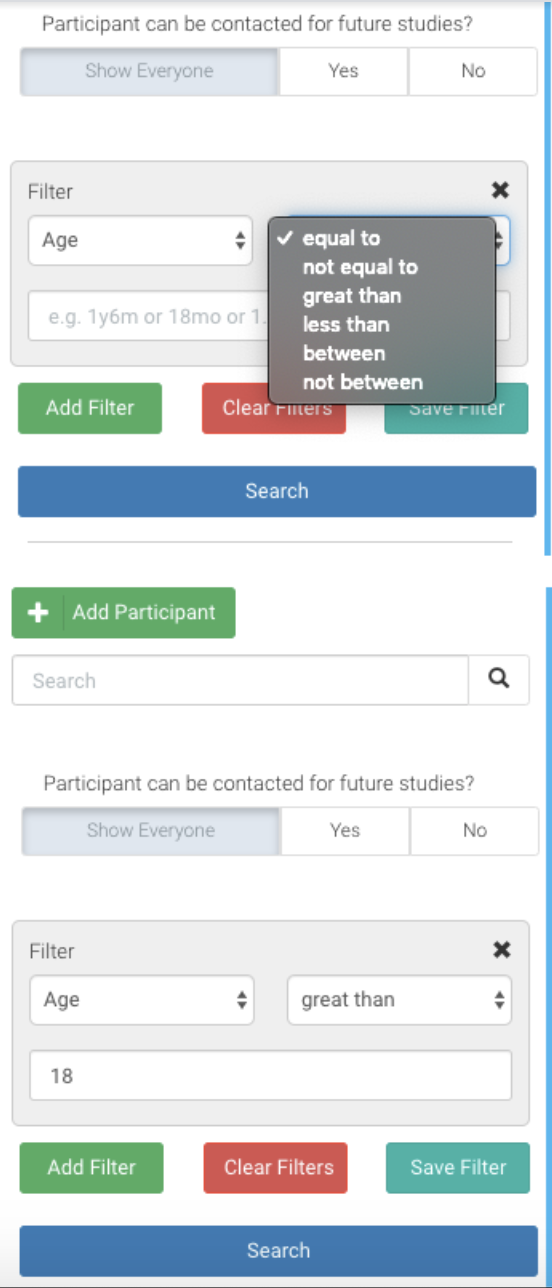
Using Registry Filters in Ripple
Registry Filters allow you to segment your registry using predefined variables, including both Ripple preset variables and custom variables created by your lab for specific studies.
Creating a New Filter
To add a filter to your registry, follow these steps:
- Click the "Add Filter" button (Green).
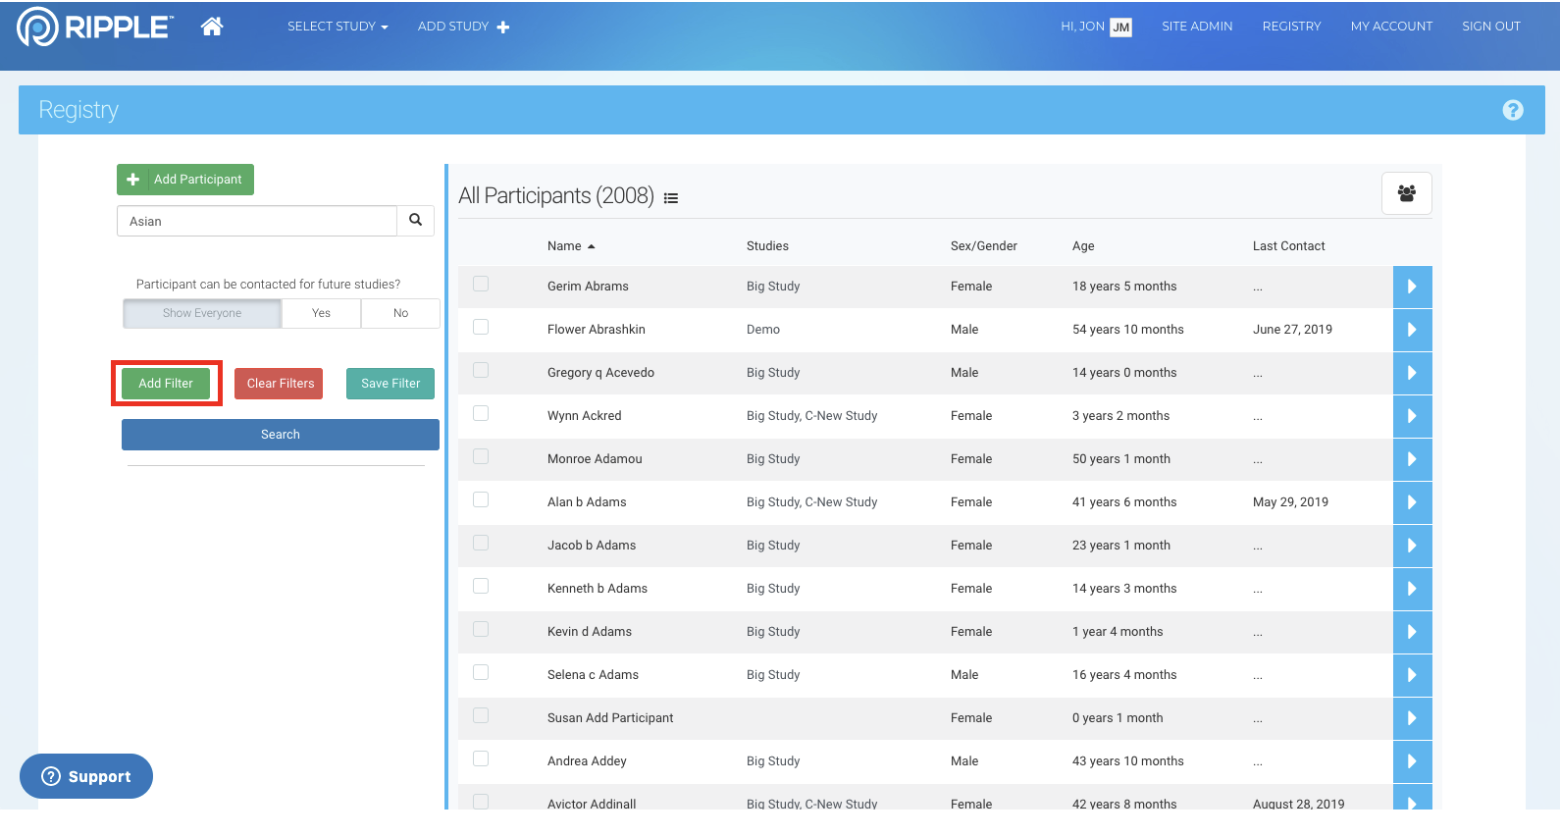
2. A new filter box will appear, allowing you to define your filtering criteria.
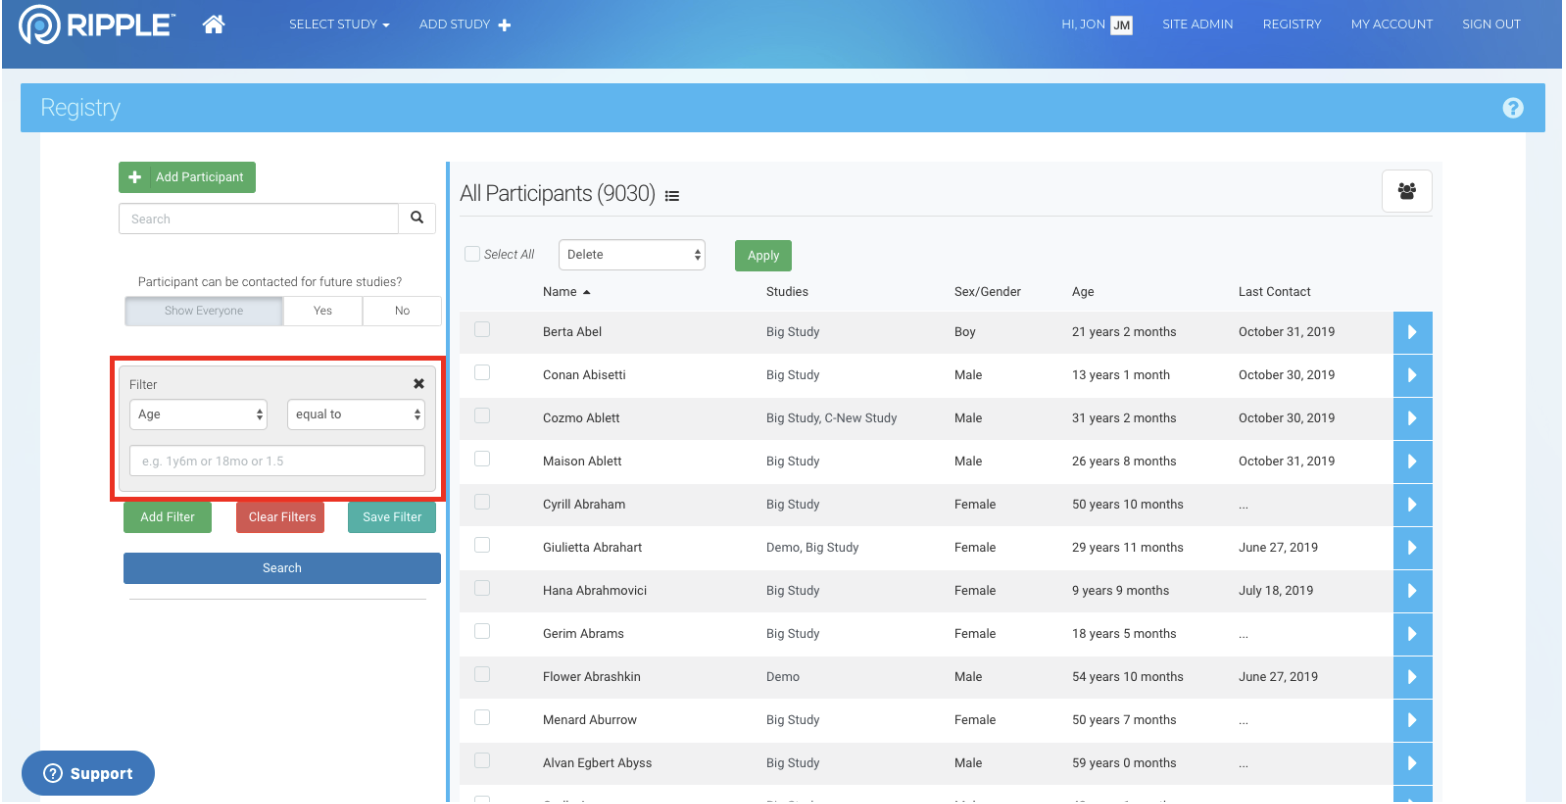 3. Configure your filter:
-
- Filter Type: (e.g., Age, Sex/Gender, Studies, etc.).
- Filtering Method: (e.g., "is equal to," "greater than," "contains").
- Specific Value for filtering: (e.g., Age ≥ 40).
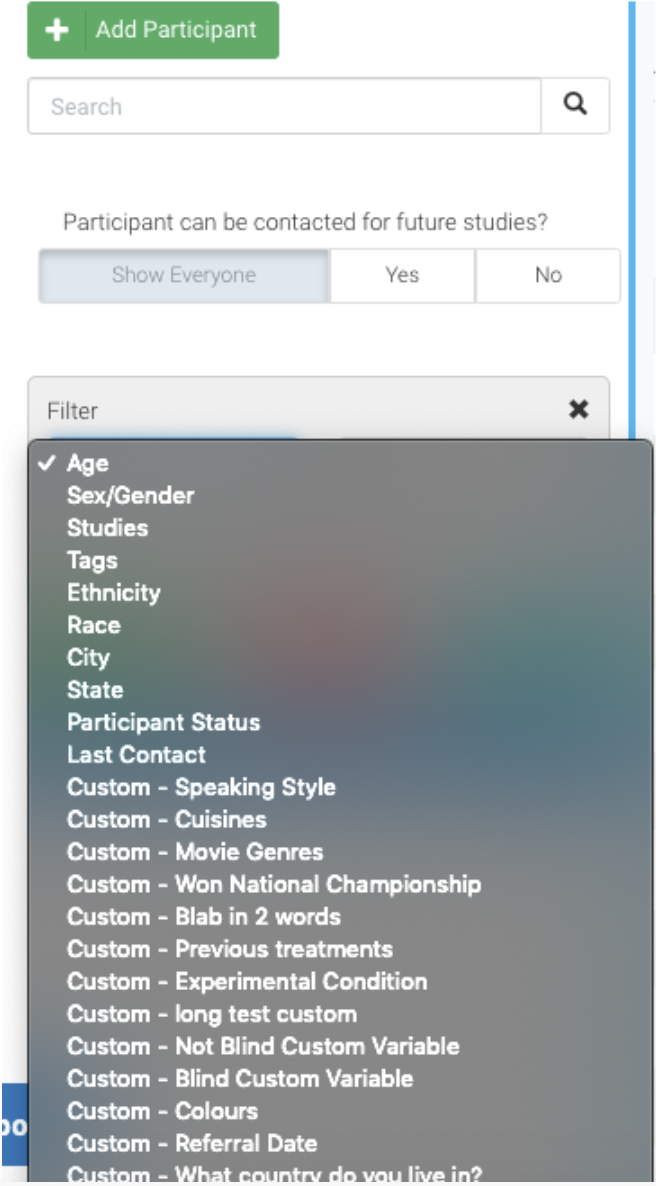
Available Filtering Variables
Ripple provides preset variables, including:
- Age
- Sex/Gender
- Studies (participants enrolled in)
- Tags (assigned by your team)
- Ethnicity & Race
- City & State
- Participant Status (Enrolled, Potential, On-Hold, etc.)
- Last Contact Date (date of last communication)
Additionally, your lab can create custom variables tailored to your study's unique requirements.
For a detailed guide on using the filtering tool, visit:
👉 Registry Search Filtering Overview
NOTE:
When performing a search for numerical or text-based values that include a decimal point or period, always enclose the value in quotation marks ("").
Example:
If you are searching for participants with a BMI of 28.7, enter:
✅ "28.7"
instead of ❌ 28.7
Why is This Important?
- Ensures the search function accurately retrieves relevant results.
- Prevents misinterpretation of the decimal point as a separator or formatting character.
Managing Participants in Ripple Registry
Once you have successfully searched or filtered your registry to locate target participants, you can use various tools to edit their profiles and enroll them in studies.
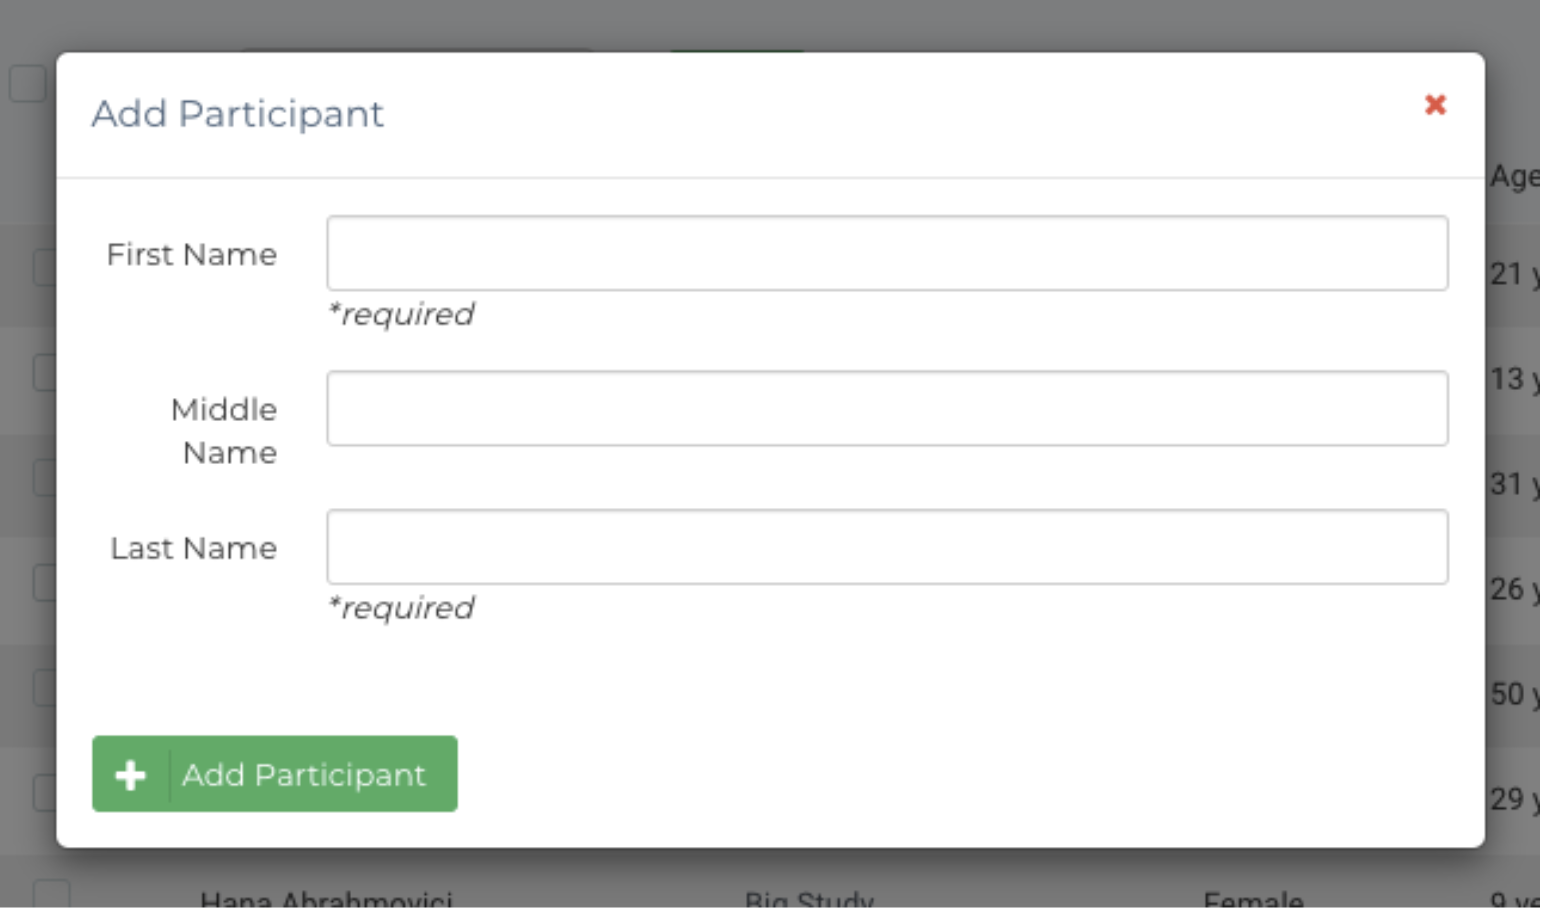
Adding Participants to the Registry
If a participant is not yet enrolled in an active study, you can manually add them to your registry using the "Add Participant" button.
Enrolling Participants in a Study
Once you have identified your target participants, you can add them to a study individually or in bulk for consideration or enrollment.
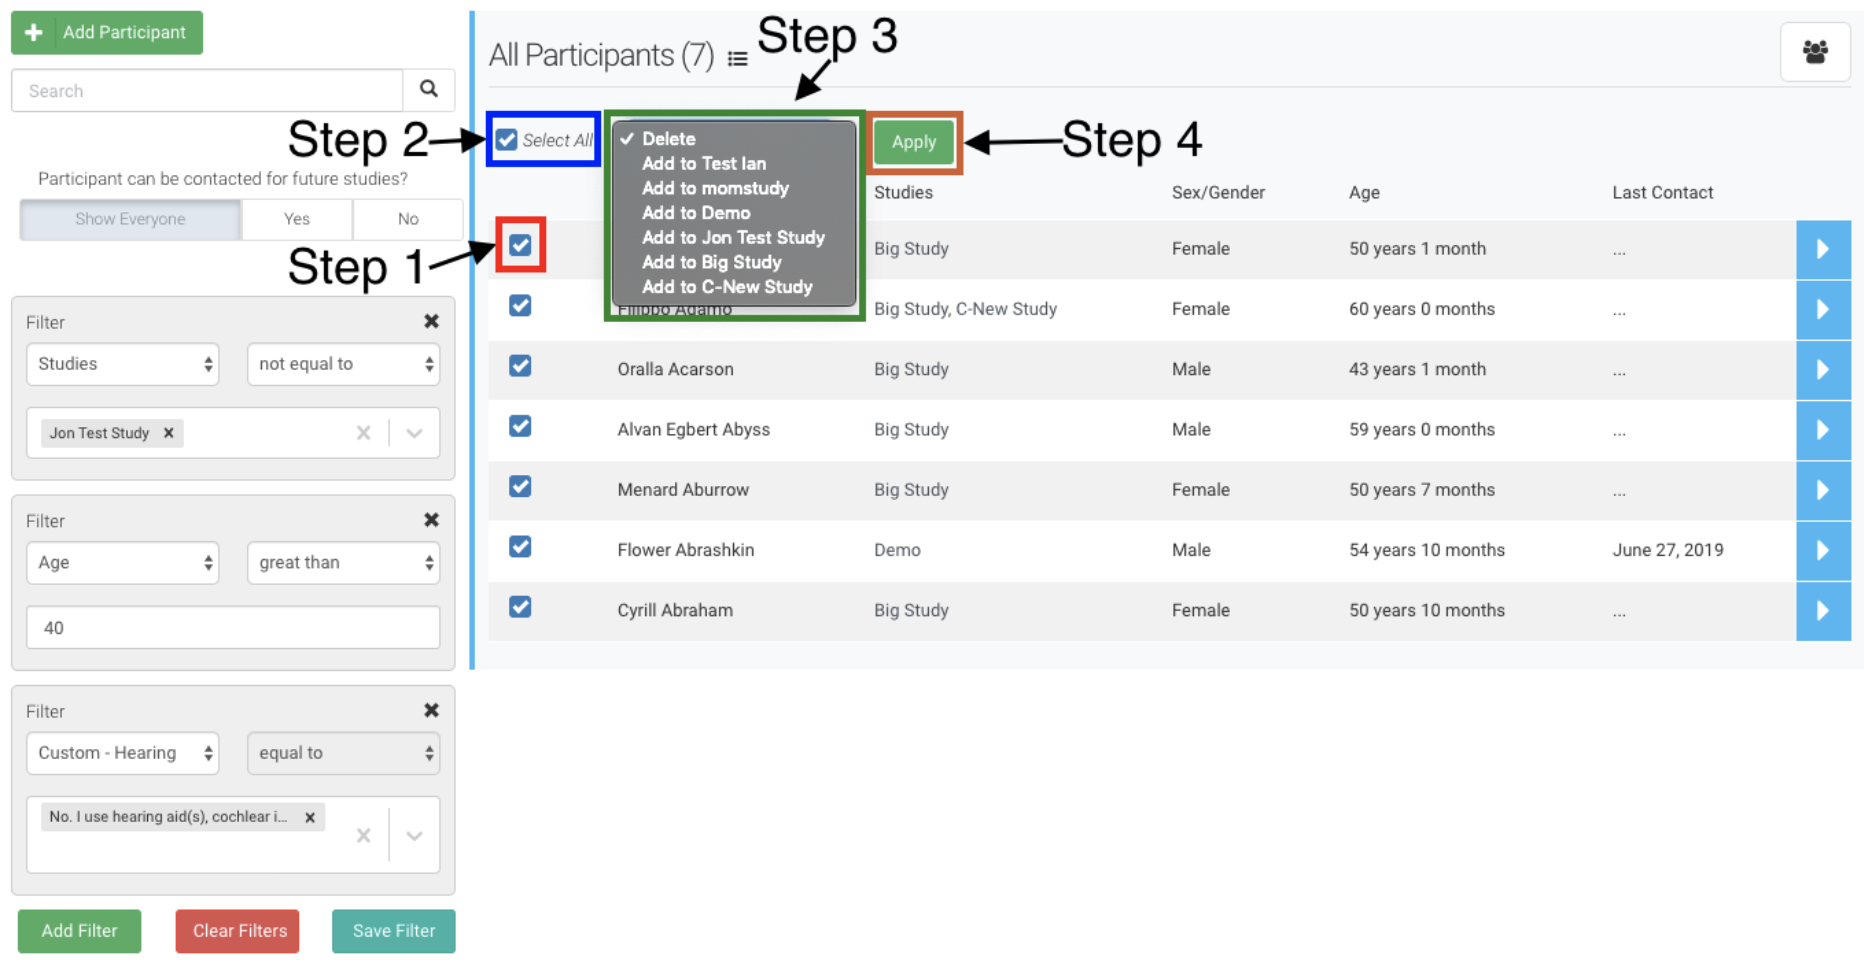
Example Scenario
In this example, the Ripple Registry was filtered to include participants who meet the following criteria:
- Not enrolled in Jon Test Study
- Aged over 40
- Using hearing devices or cochlear implants
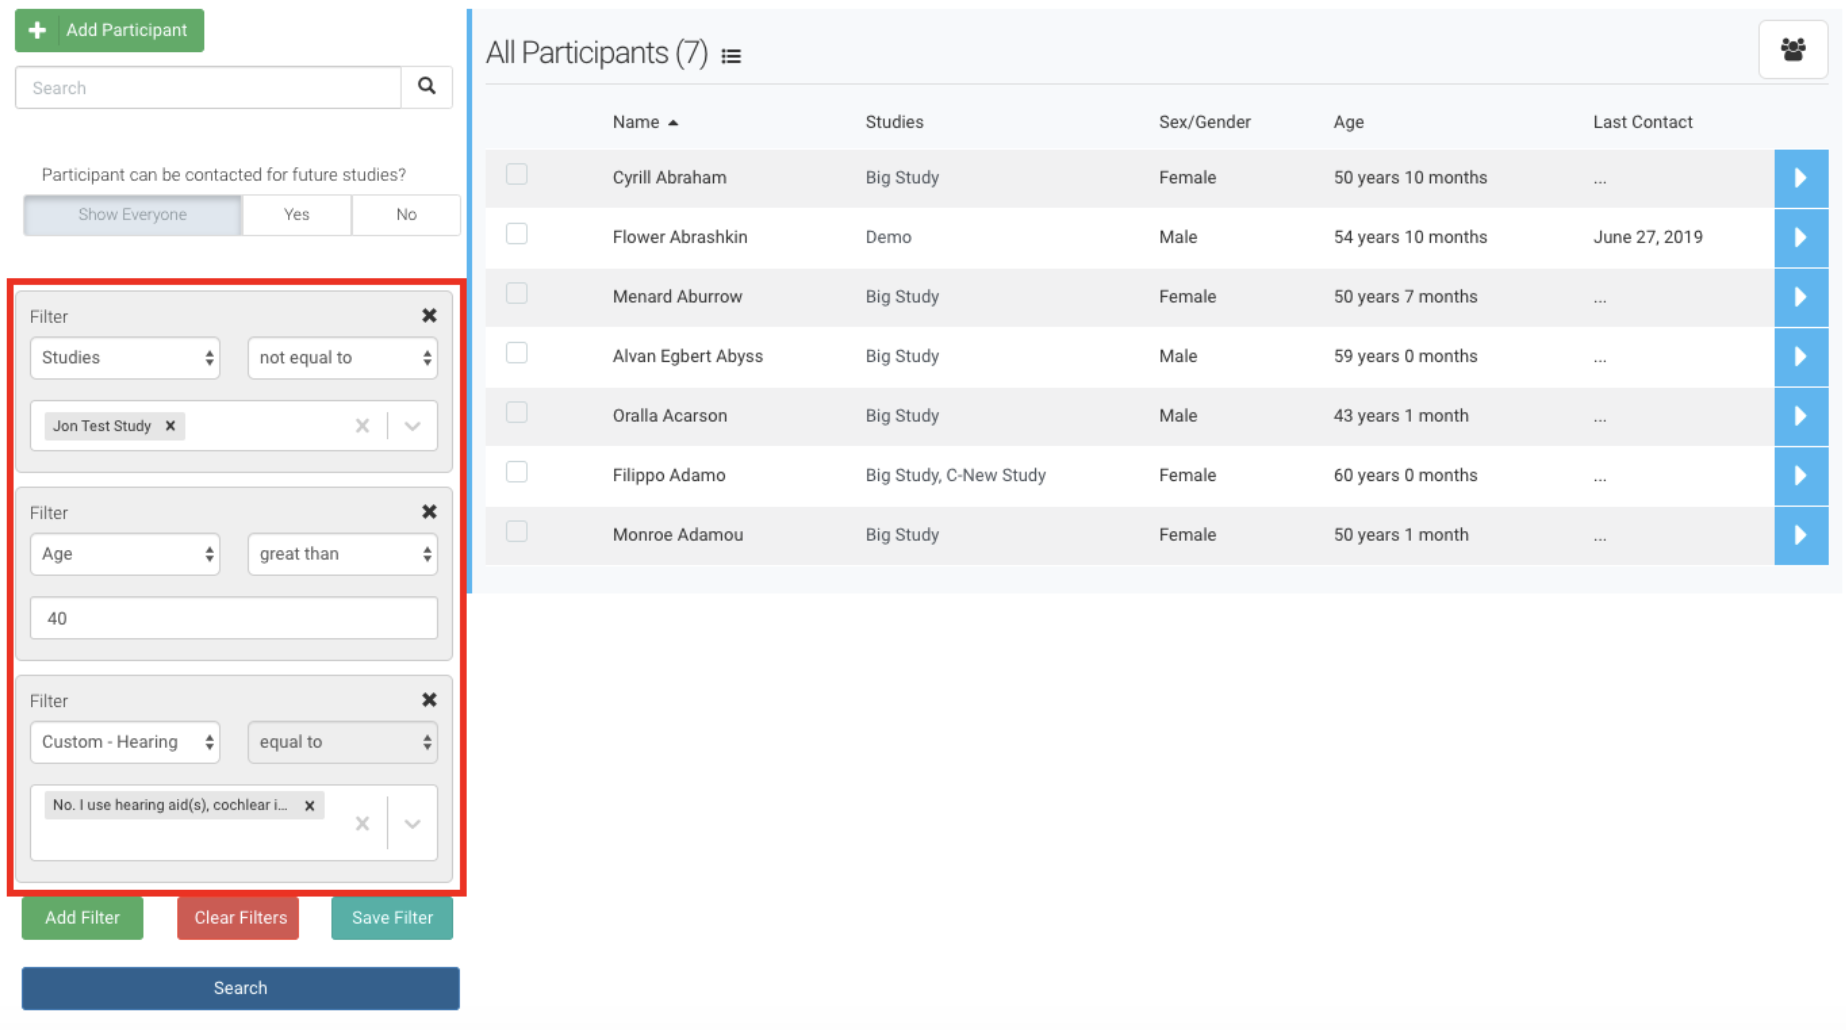
Steps to Add Participants to a Study:
- Select a Participant: Click the checkbox next to a participant’s name (Red).
- Select All Participants: Click the "Select All" button to include all filtered participants (Blue).
- Choose a Study: Open the drop-down list of studies and select your desired study (Green).
- Apply the Selection: Click the "Apply" button to finalize the enrollment (Orange).
NOTE: Using the same process, you can also delete participants from your registry if needed.