Customizing Survey Completion Messages in Ripple
The Survey Designer in Ripple allows users to customize and brand the participant experience by tailoring the thank you message or redirecting respondents based on their survey responses. This feature helps build rapport with participants by expressing gratitude or providing additional resources and next steps.
How to Customize the Completion Message
By default, Ripple displays a generic thank you message upon survey completion. To create a custom message, follow these steps:
1. Access Survey Settings
- Open the Survey Designer.
- Click on Survey Settings.
2. Navigate to Completion Message Settings
- Locate the Properties sidebar.
- Scroll to the “Show on Completed” dropdown.
3. Enable the Custom Completion Message
- Ensure the “Show the completed page at the end (completed HTML)” checkbox is checked ON.
4. Enter Your Custom Message
- In the "Completed HTML" textbox, type the message you want participants to see upon completing the survey.
5. Format Your Message Using HTML (Optional)
- Use HTML to customize text spacing, font, color, and formatting for a more visually appealing message.
- Example:
<h2>Thank You for Participating!</h2>
<p>We appreciate your time and effort in completing this survey.</p>
<p style="color:blue;">For more information, visit our <a href="https://example.com">website</a>.</p>
Benefits of a Custom Completion Message
✅ Enhances participant experience by showing appreciation.
✅ Provides next steps (e.g., directing participants to resources).
✅ Strengthens study engagement through branding and customization.
By using the Survey Designer’s customization features, you can create a personalized and engaging survey experience for participants.
Note
- For more details on HTML formatting, refer to the HTML Guide in Ripple's documentation.
Redirecting Participants to a URL Upon Survey Completion
Instead of displaying a custom message, Ripple allows you to automatically redirect respondents to a specific webpage once they complete the survey. This feature is useful for directing participants to additional resources, study websites, or next steps.
How to Redirect Participants to a URL Upon Completion
-
Open the Survey Designer
- Navigate to Survey Designer in Ripple.
- Click on Survey Settings.
-
Access Completion Settings
- Locate the Properties sidebar.
- Scroll to the “Show on Completed” dropdown.
-
Enter the Redirect URL
- In the “Navigate to URL” field, enter the webpage you want respondents to be redirected to.
-
Save Your Changes
- Ensure all settings are correct.
- Save and test the survey to confirm the redirect functions as expected.
Customizing Redirects or Completion HTML Based on Survey Answers
You may want to show or direct different participants to different messages. This can be useful if you want to send them a message about eligibility or their next steps or want to send them to a URL where they can learn more about the research.
You can use the “Navigate to url on condition” or “Completed html on condition” options to provide a more advanced experience based on survey responses. These expressions can utilize answers from any existing question simply by including the question name in curly brackets: {question1}. The following example will walk through customizing redirection.
Example: Showing a Custom Thank You Message and Redirecting to a URL based on a Rating
Step 1: Create your questions
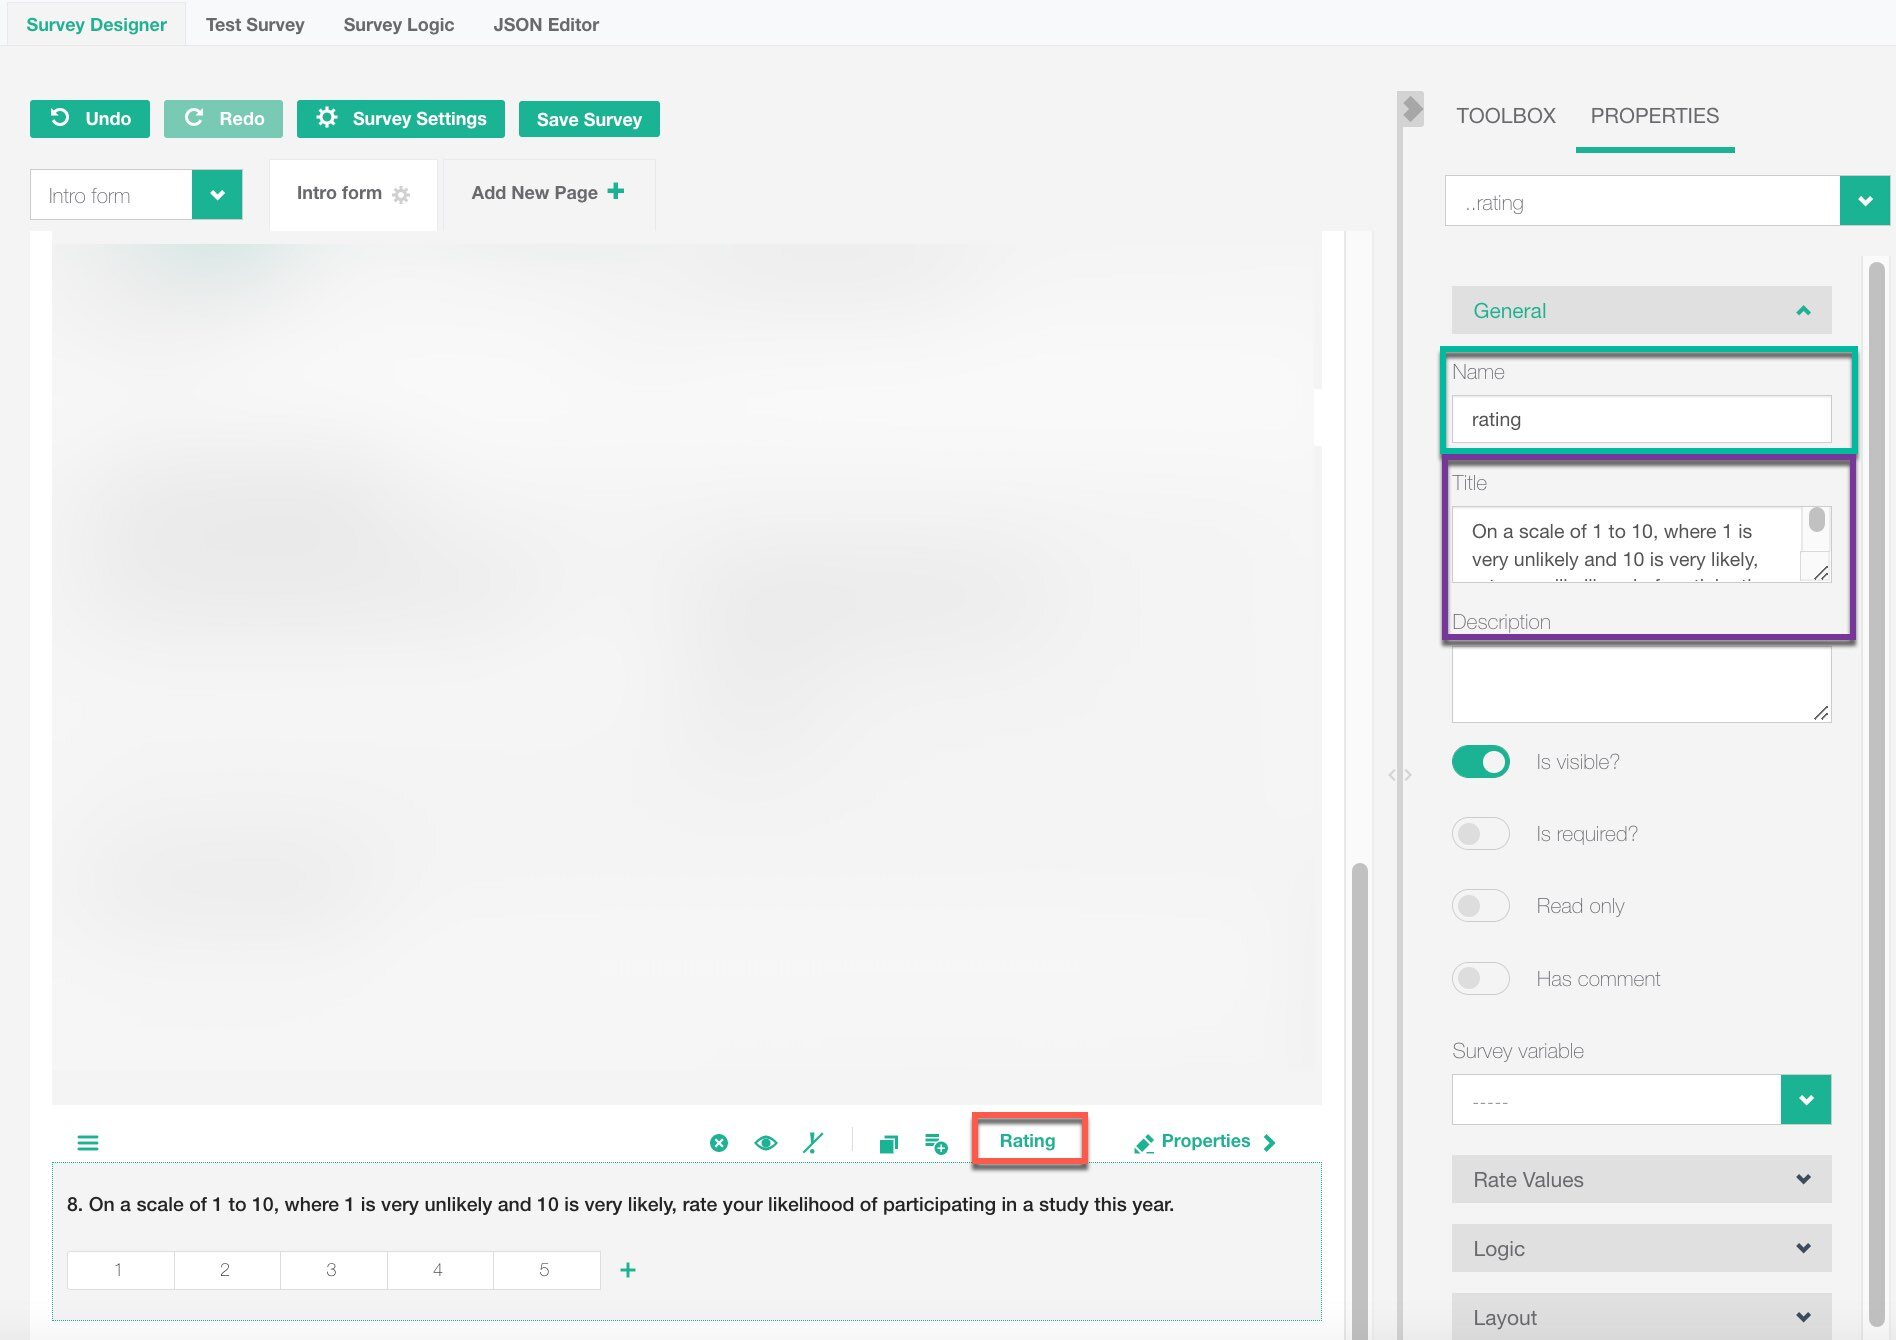
- Add a “Rating” question to a survey (red)
- Change the Name of the rating question to “rating” (green)
- Type in the question as respondents should read it in the Title (purple)
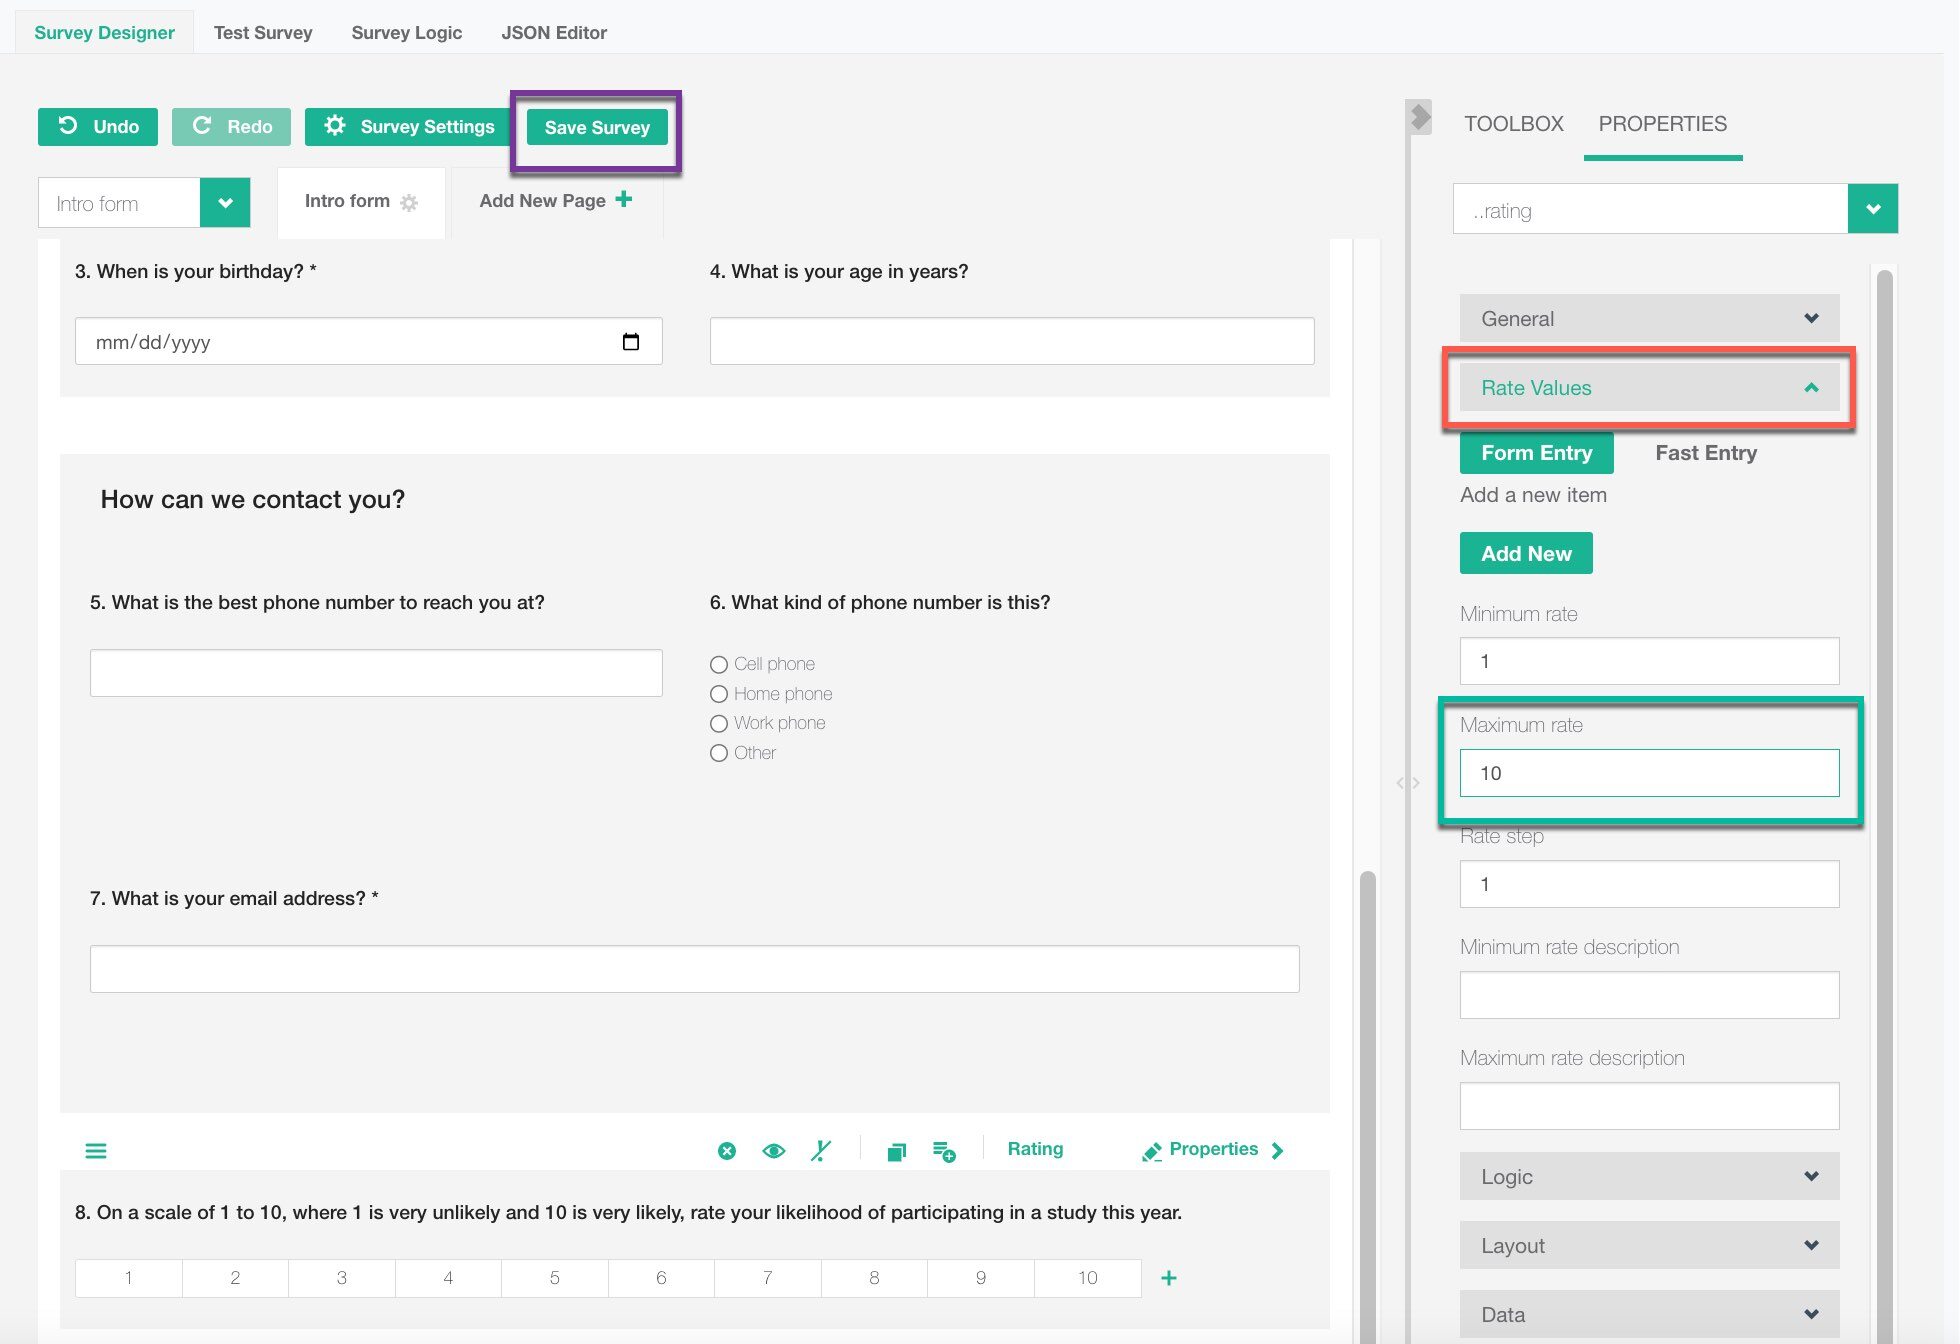
- Scroll down to the “Rate Values” dropdown (red)
- Change the “Maximum rate” to 10 (green)
- Click the “Save Survey” button (purple)
Step 2: Create the Completion Page HTML
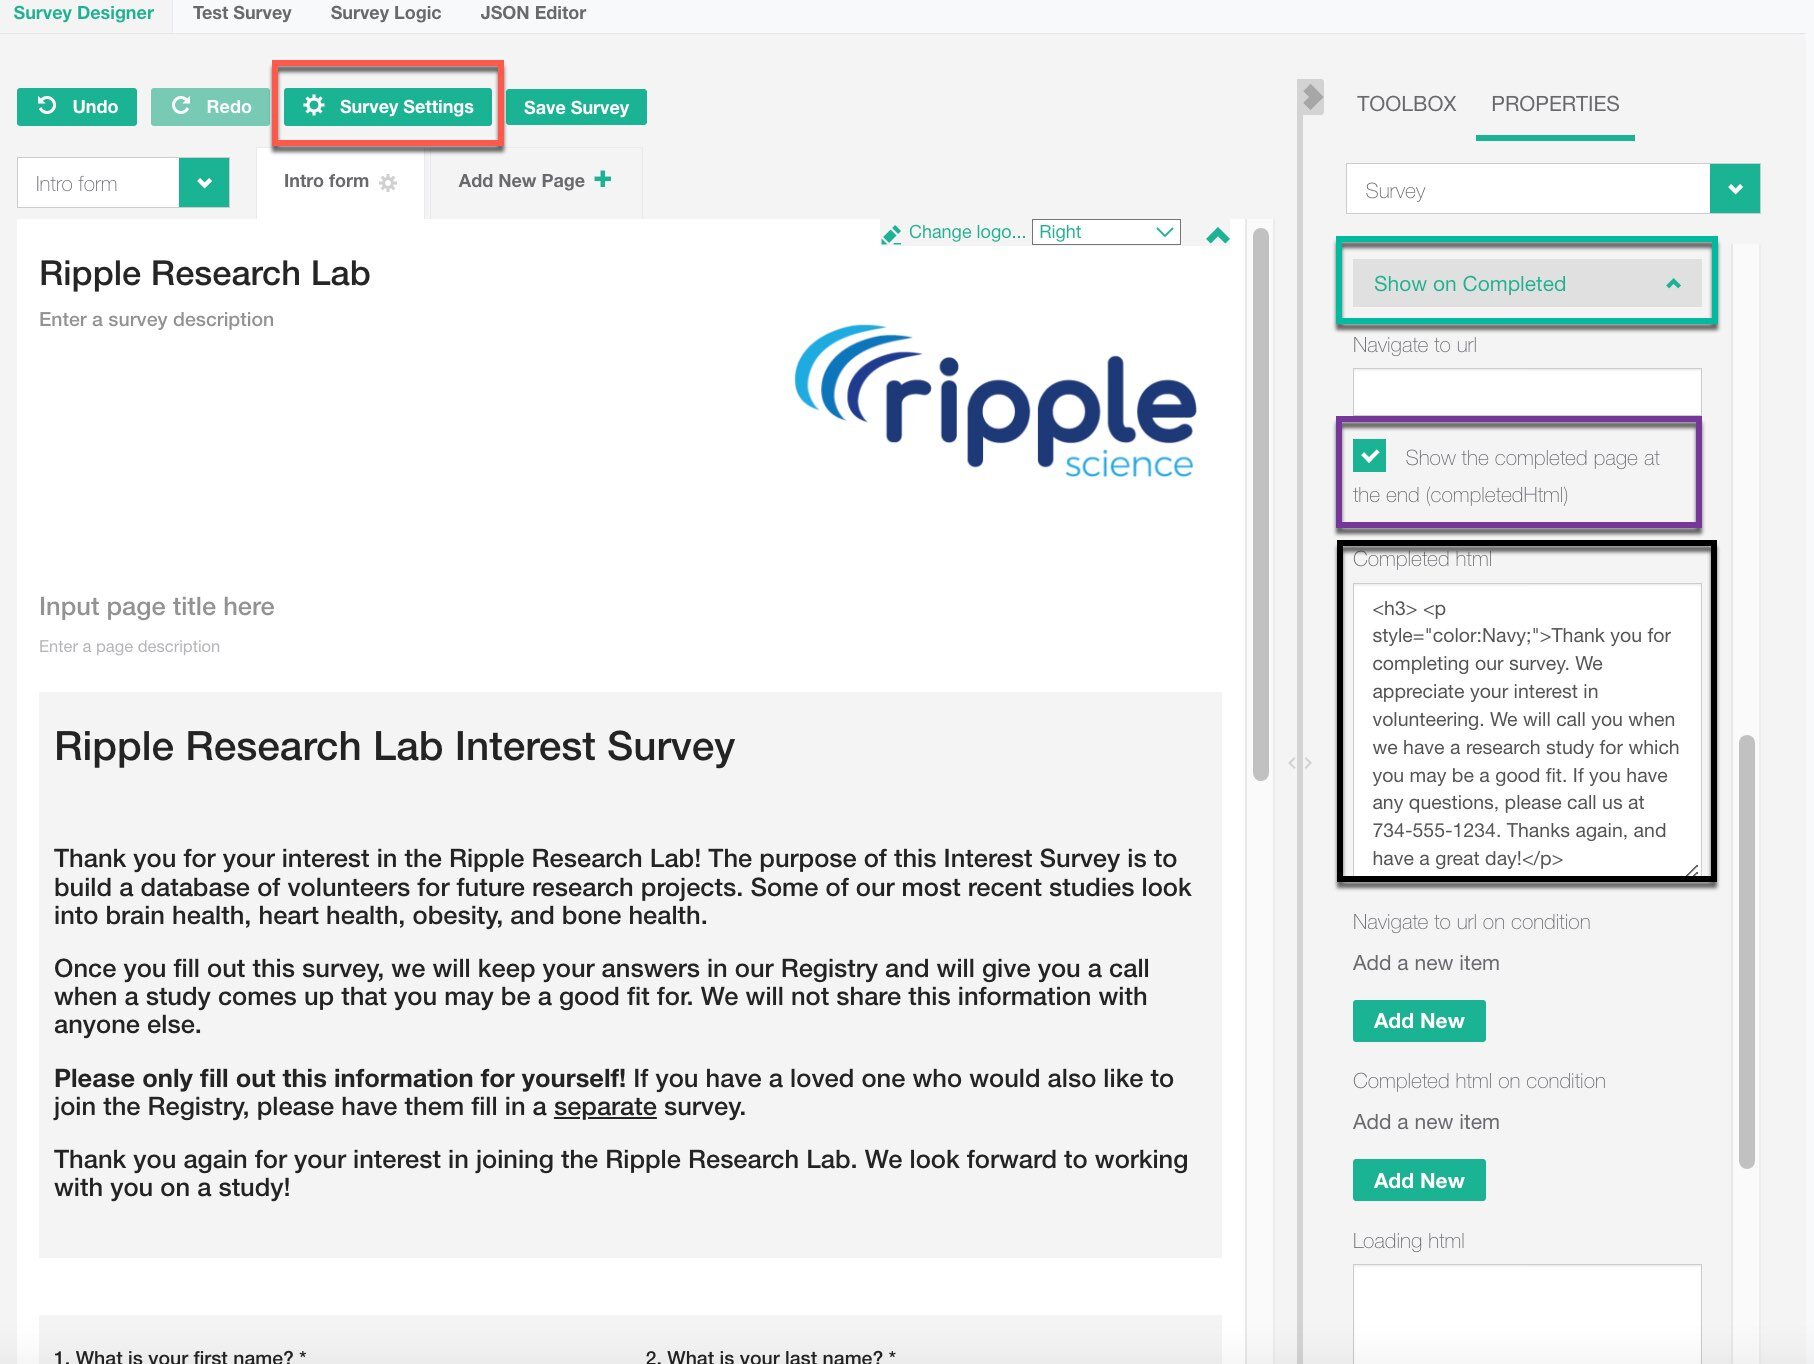
- Click on the “Survey Settings” button (red)
- Scroll to the “Show on Completed” section (green)
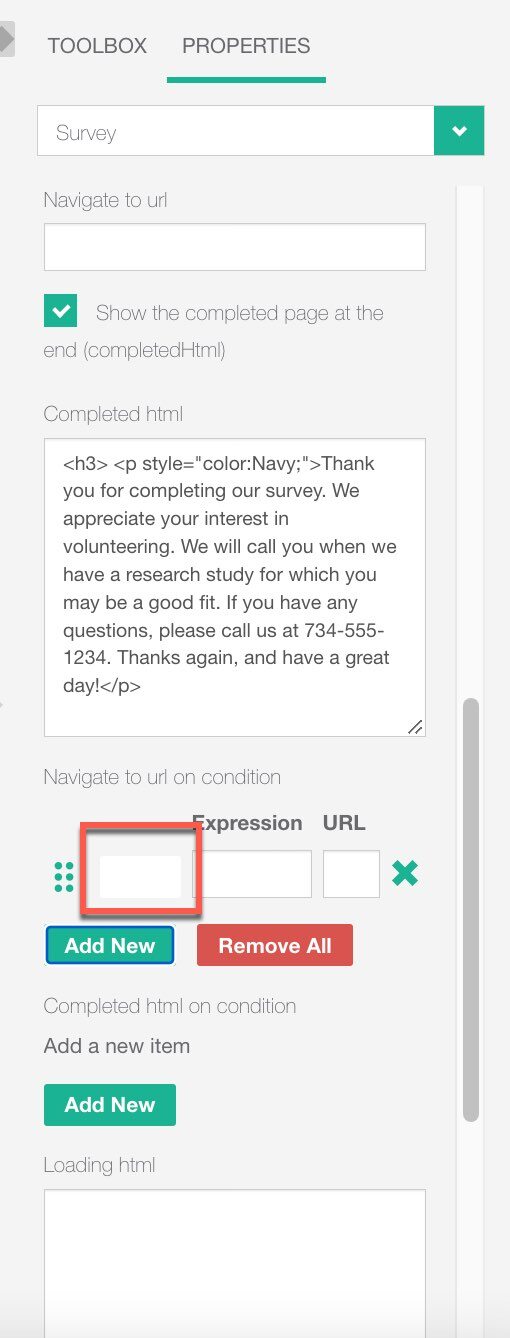
- Make sure the “Show the completed page at the end (completedHtml)” checkbox is checked on (purple)
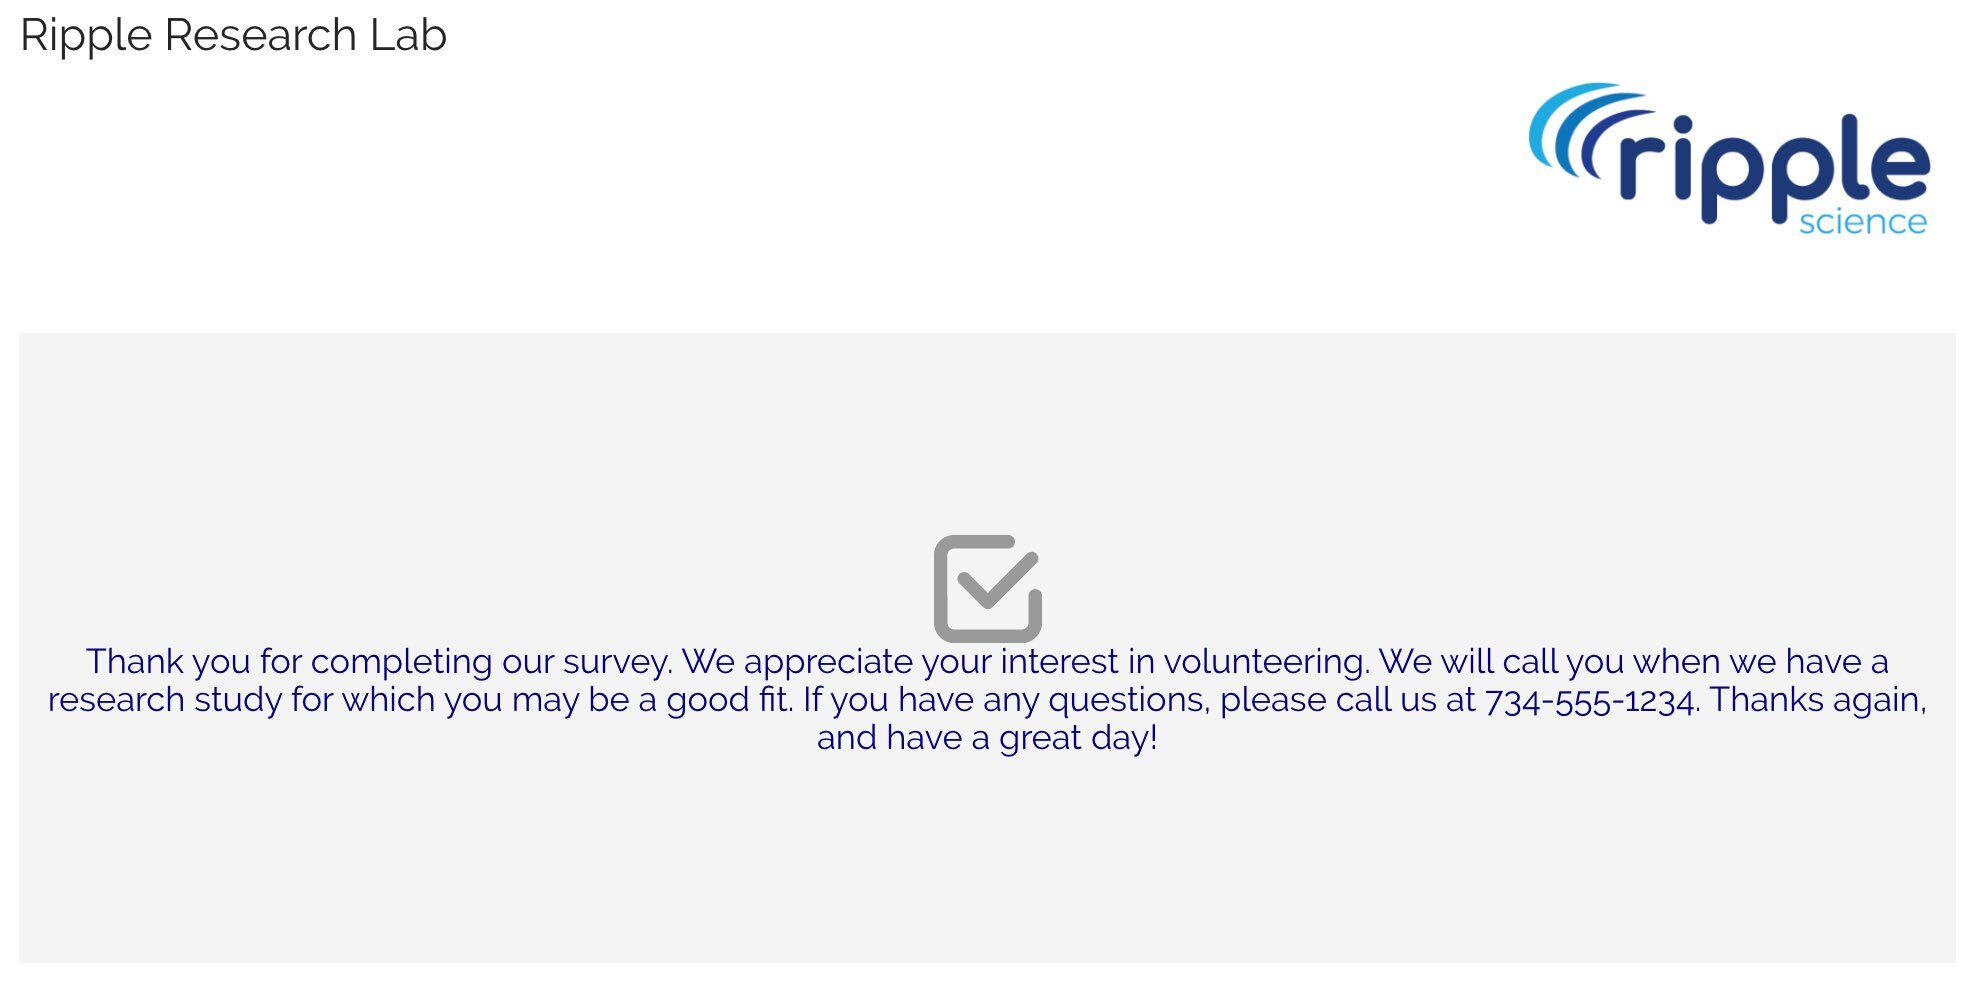
- Add your message and HTML elements in the Completed html box (black)
Step 3: Create the URL to Navigate to based on the score
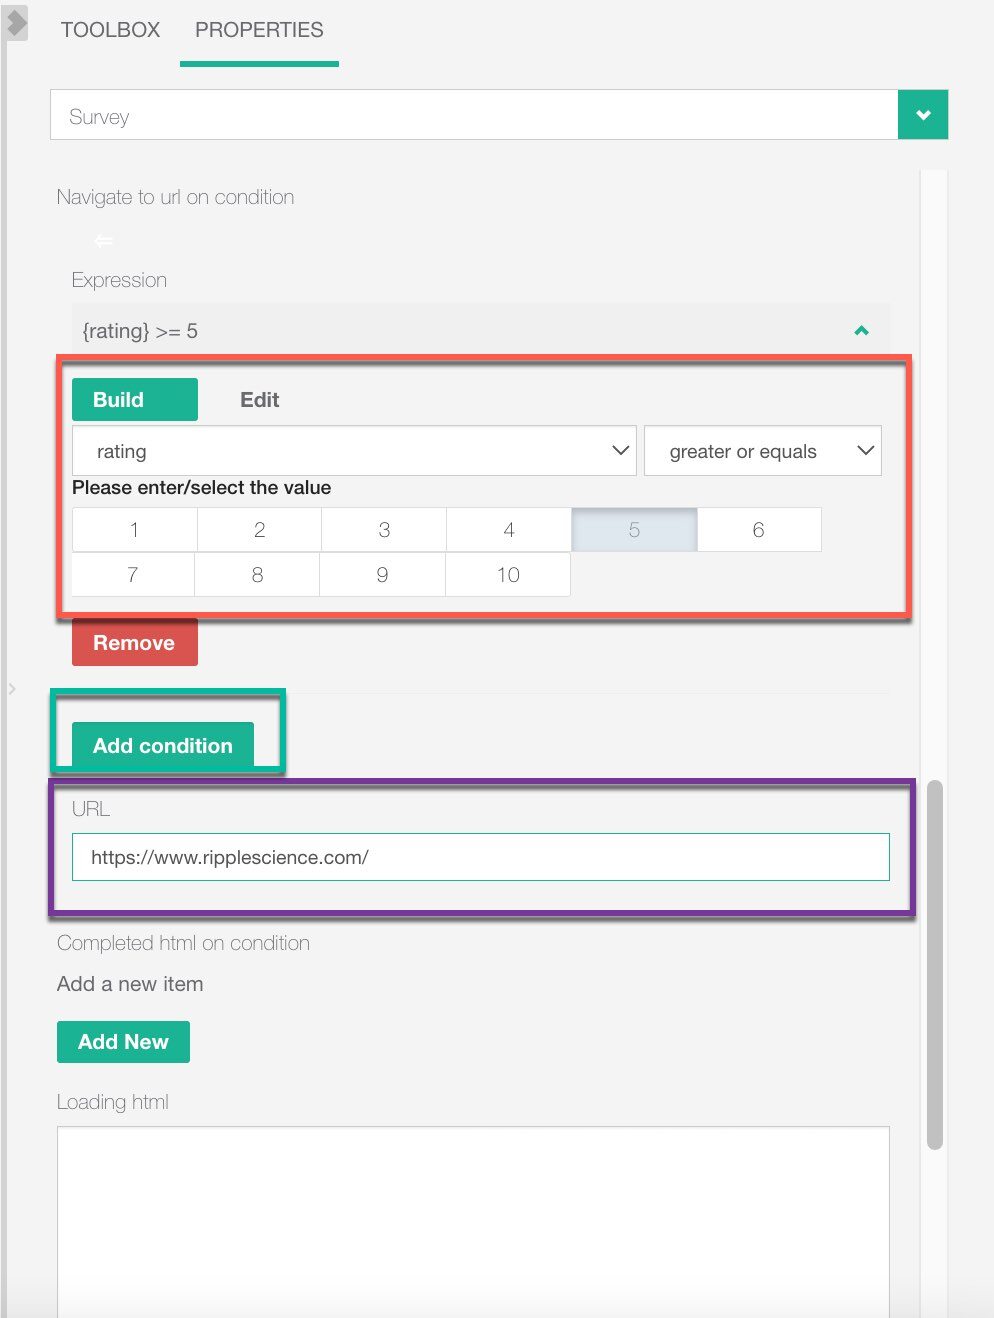
In this example, if respondents choose a 5 or higher on the Rating question, we want to show them the Thank You page and direct them to the Ripple Science page to learn more. If they choose less than 5, they should only see the Thank You page.
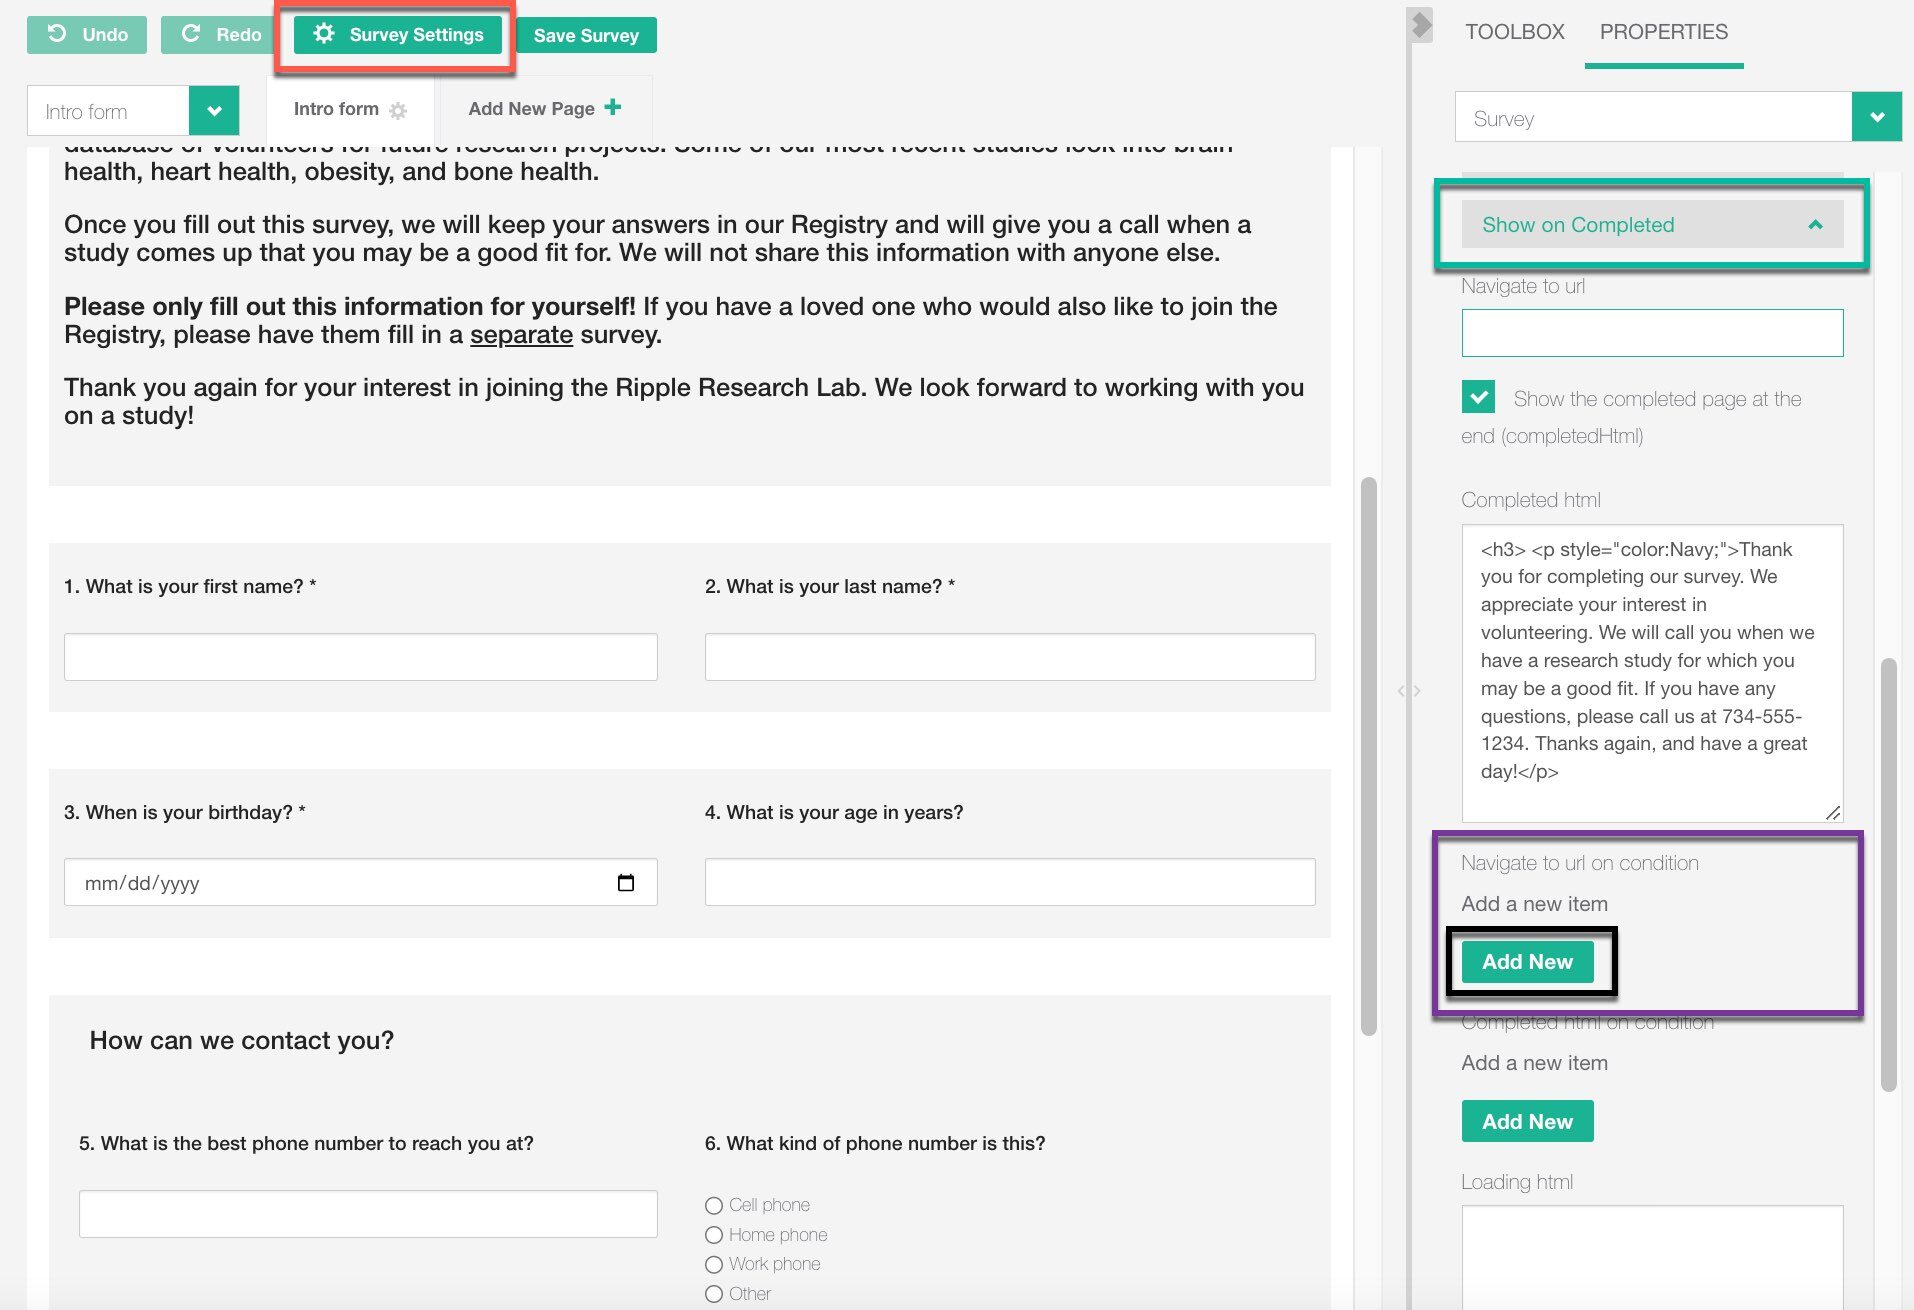
- Click on the “Survey Settings” button (red)
- Scroll to the “Show on Completed” section(green)
- Scroll to the item “Navigate to url on condition” (purple)
- Click on the “Add New” button (black)
- Click on the Edit square to the right of the Expression field (red)
- Click on the “Expression is empty” dropdown to activate the Expression builder
- Use the dropdowns to add your condition: if the rating is greater or equals 5 (red)
- If necessary, add another condition (green)
- Enter the URL for participants to be redirected to when they select a rating above 5 (purple)
- Click the “Save Survey” button
- Test your survey