Exporting and importing Study Settings in Ripple allows teams to streamline study setup, reuse configurations, and share best practices across labs or with Ripple Support. This is especially useful when launching multiple studies or collaborating across institutions.
Exportable and Importable Settings
The following components can be exported and imported:
- Statuses
- Custom Variables
- Contact Relationship Values
- Contact Outcome Values
- Email Templates
- Text Templates
- Surveys
Key Benefits
- Simplifies study setup by reusing existing settings.
- Facilitates collaboration between teams using different Ripple sites.
- Eases troubleshooting by allowing Ripple support staff to review exported files.
How to Export a Study (Study Definitions)
To export a study’s settings:
-
Ensure Admin Access
You must have Study Admin permissions for the study. -
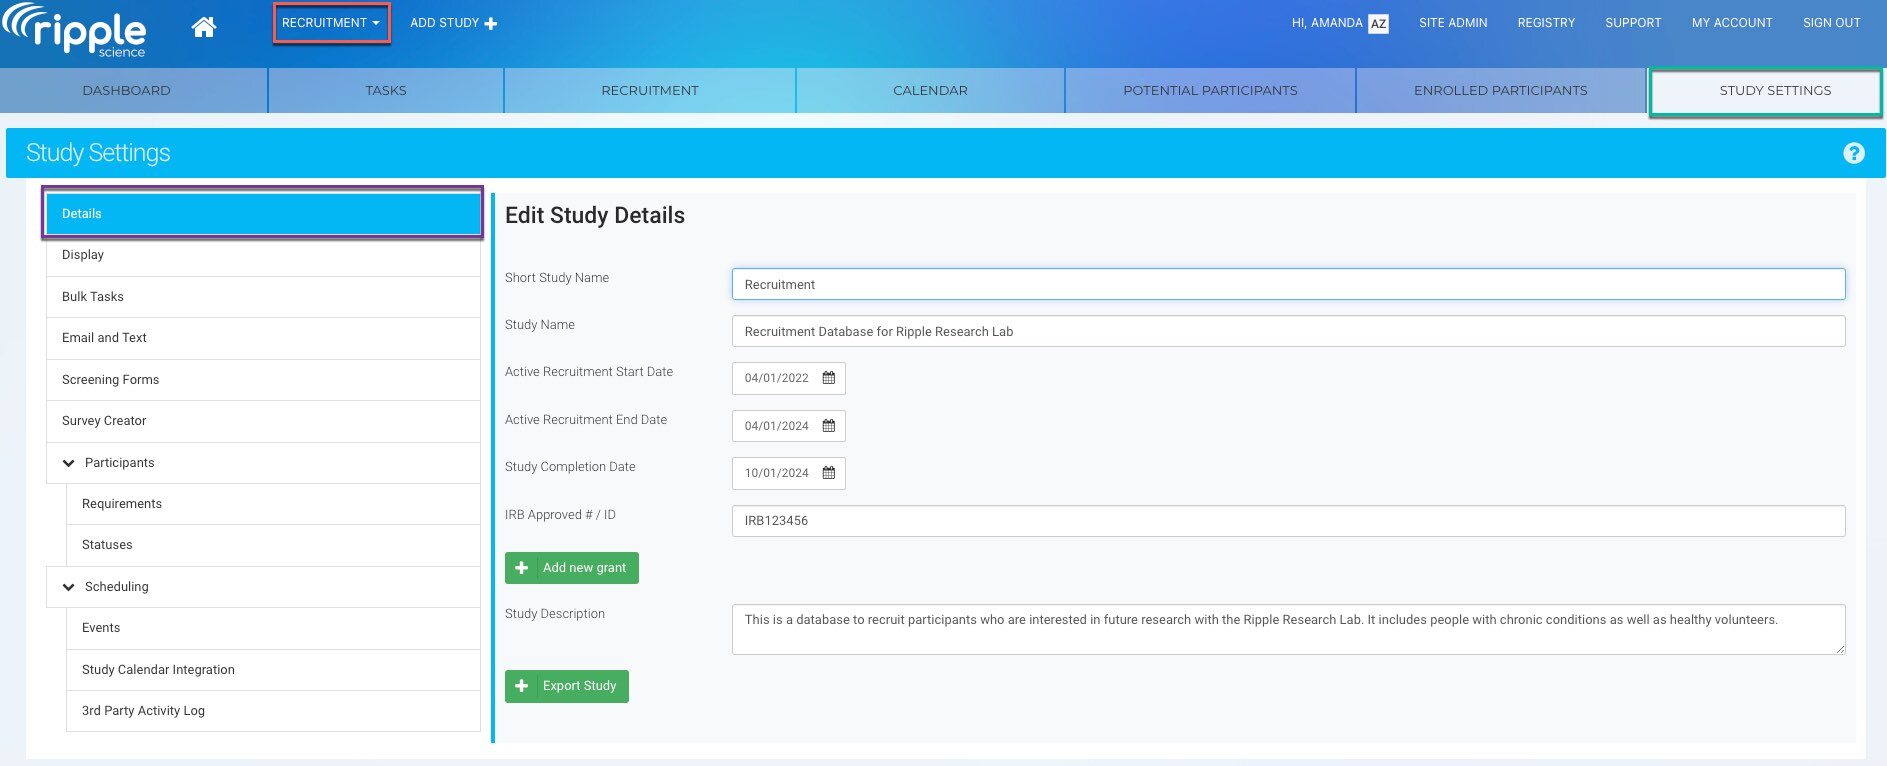
Select the Study
Use the Studies dropdown (🔴 red) to select the study you wish to export. -
Go to Study Settings
Navigate to the Study Settings tab (🟢 green) in the left-hand menu. -
Open Details Page
Click the Details page (🟣 purple) under Study Settings. -
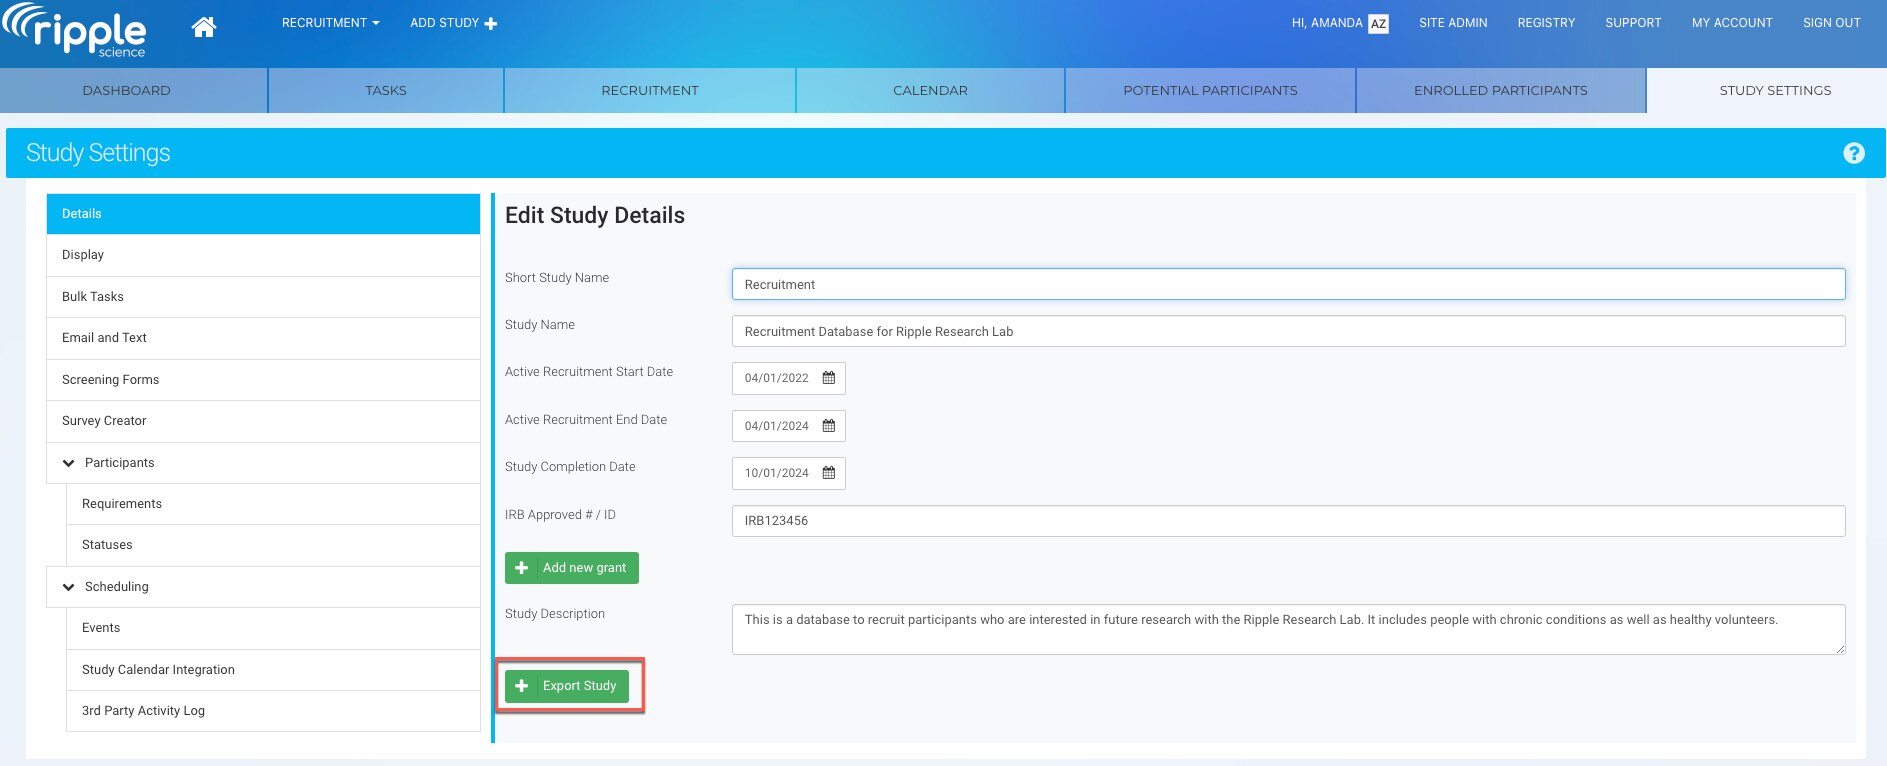
Export the Study
Click the “Export Study” button (🔴 red) to download the study settings file.
NOTE: This file can be used to replicate your study setup or sent to Ripple Support for assistance.
LIMITATIONS:
The following components are not included in export/import:
-
Screening Forms
-
Recruitment Pages
-
Events
-
Bulk Tasks
How to Import Study Components
To import study components into Ripple, follow these steps:
-
Confirm Admin Access
You must have Study Admin permissions in the destination study. -
Select or Create Study
Navigate to or create the study into which you want to import components. -
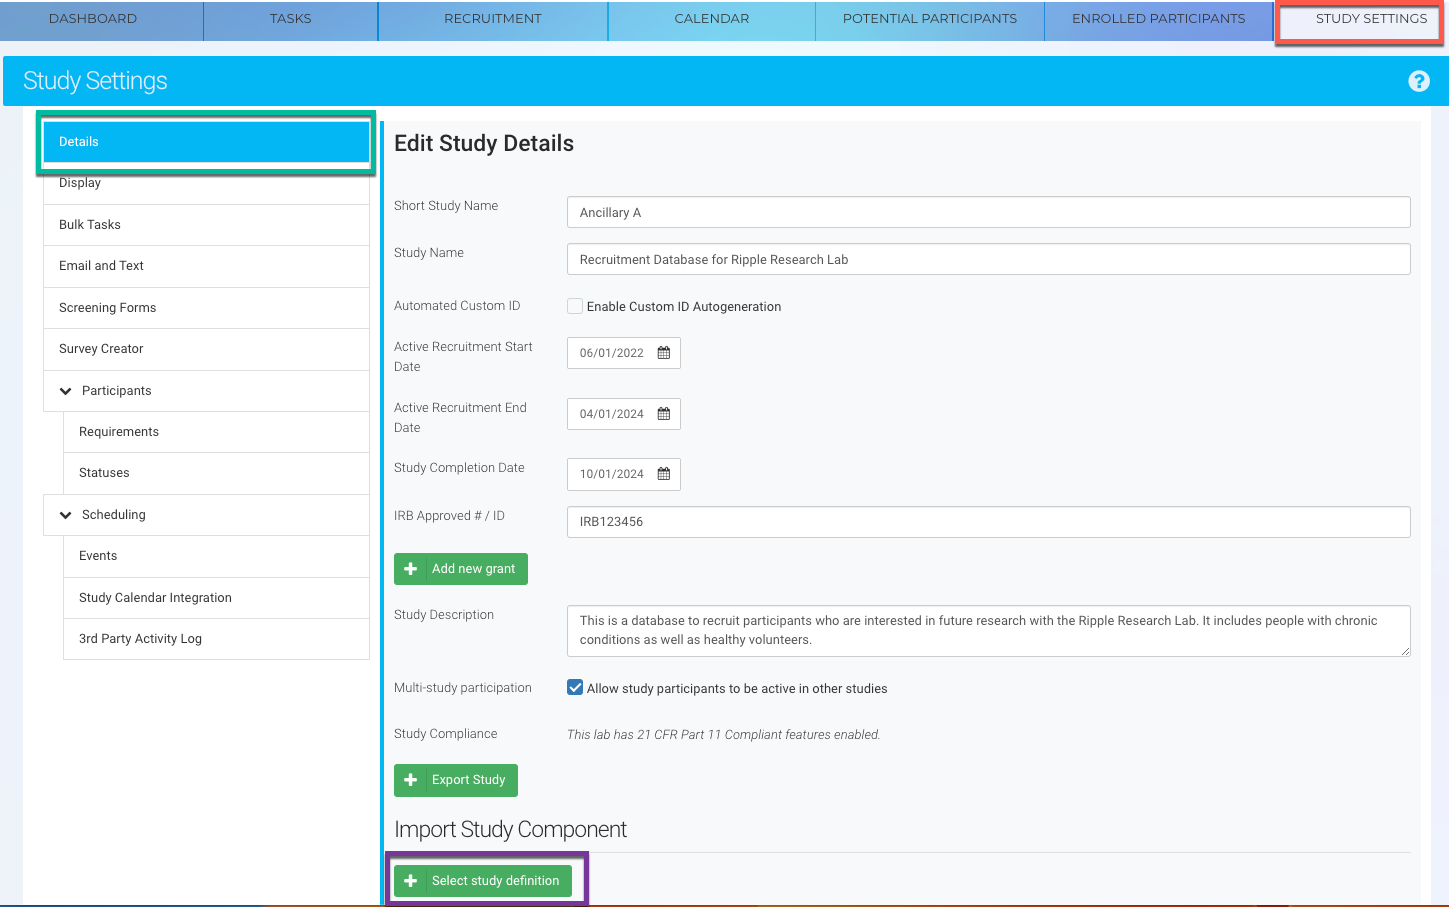
Go to Study Settings
Open the Study Settings page (🔴 red). -
Open Details Page
Go to the Details page (🟢 green) within Study Settings. -
Import the File
Scroll to the Import Study Component section and click “Import Study Definition” (🟣 purple). Select the file to import.
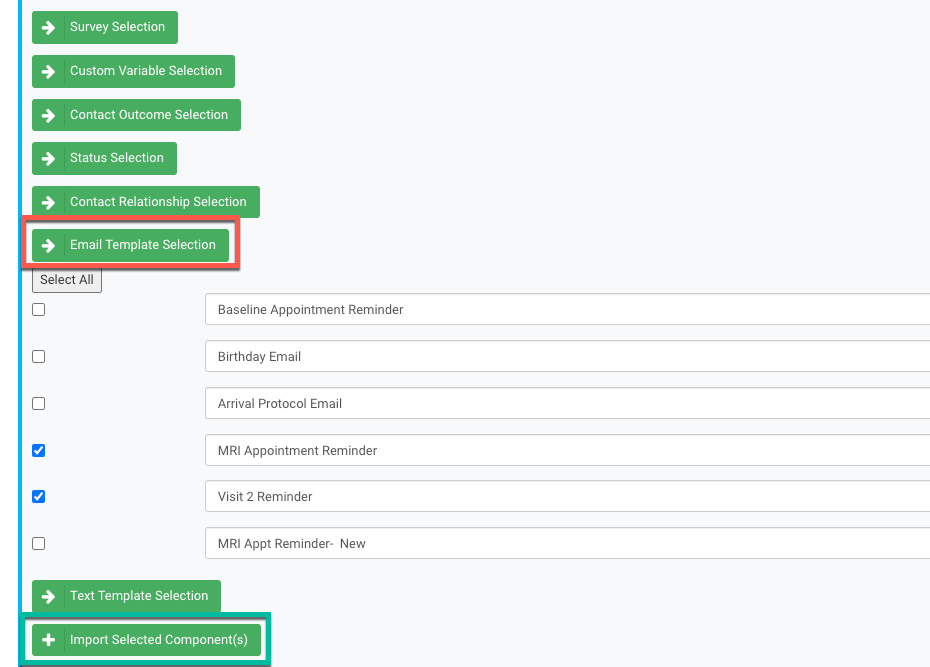
6. Select Components to Import
Choose the specific components you wish to import (🔴 red), then click “Import Selected Components” (🟢 green).
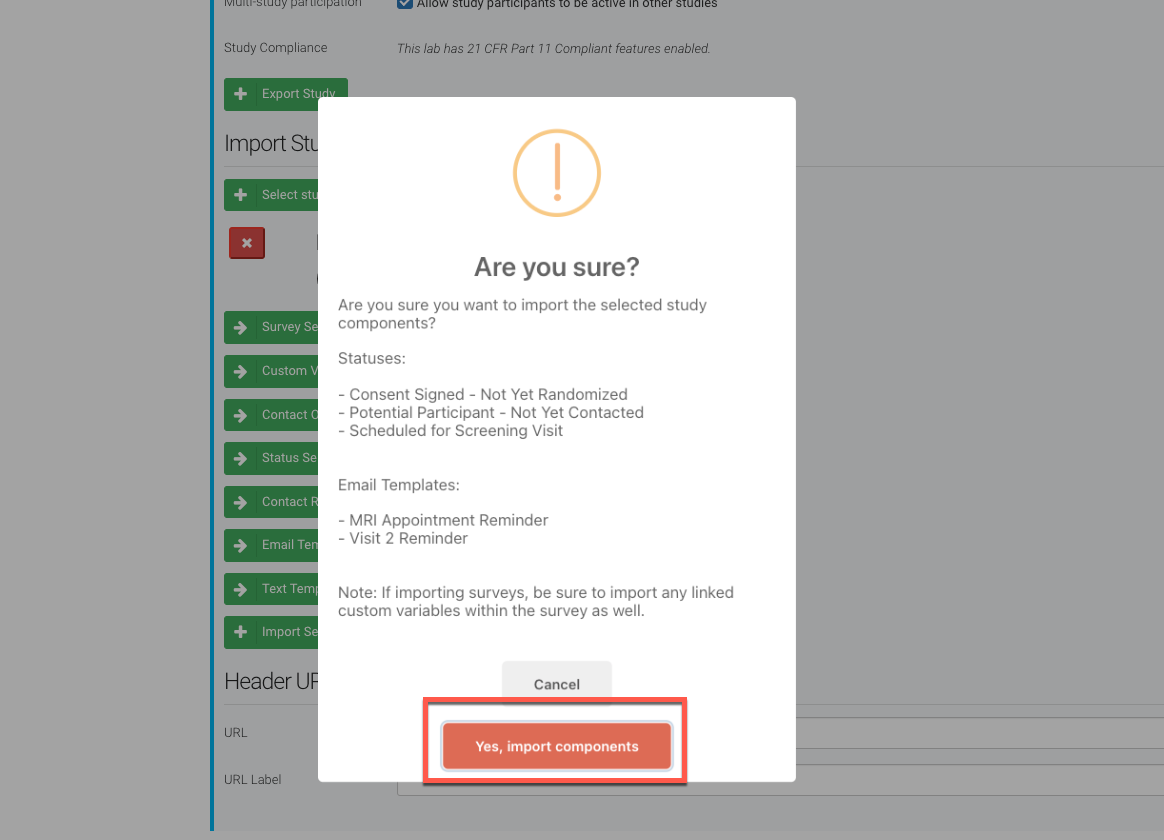
7. Complete Import:
-
- Confirm by clicking the "Yes, import components" button.
This process allows you to integrate selected components into your current study setup efficiently. Imported components will now be available in your study and editable as needed.
Keep Your Workflow Connected
When importing study components, ensure your workflow remains seamless:
- If your surveys, emails, or text templates include survey URLs, make sure to import all related study components into your study simultaneously.
- This ensures that all links and references remain functional and integrated within your workflow.