Tags are customizable keywords or flags that help classify participants based on study-related criteria. They enable research teams to quickly identify participant characteristics, follow-up needs, risk factors, or study eligibility, improving coordination and workflow efficiency.
What Are Tags?
Tags appear on the Participant Profile Card and serve as visual cues for your team. They are especially useful for:
-
Highlighting important participant details
-
Flagging special requirements or follow-ups
-
Streamlining recruitment and retention workflows
Examples of commonly used tags include:
-
Translator needed
-
Schedule transportation for visits
-
High risk
-
Eligible for Phase 2
Important Considerations Before Adding Tags
- New tags will not overwrite existing tags—multiple tags can exist per participant.
- Only one tag can be added per survey submission.
- Tags are case-sensitive – e.g.,
"Follow up needed"and"follow up needed"will be treated as separate tags.
Adding a Tag to a Survey
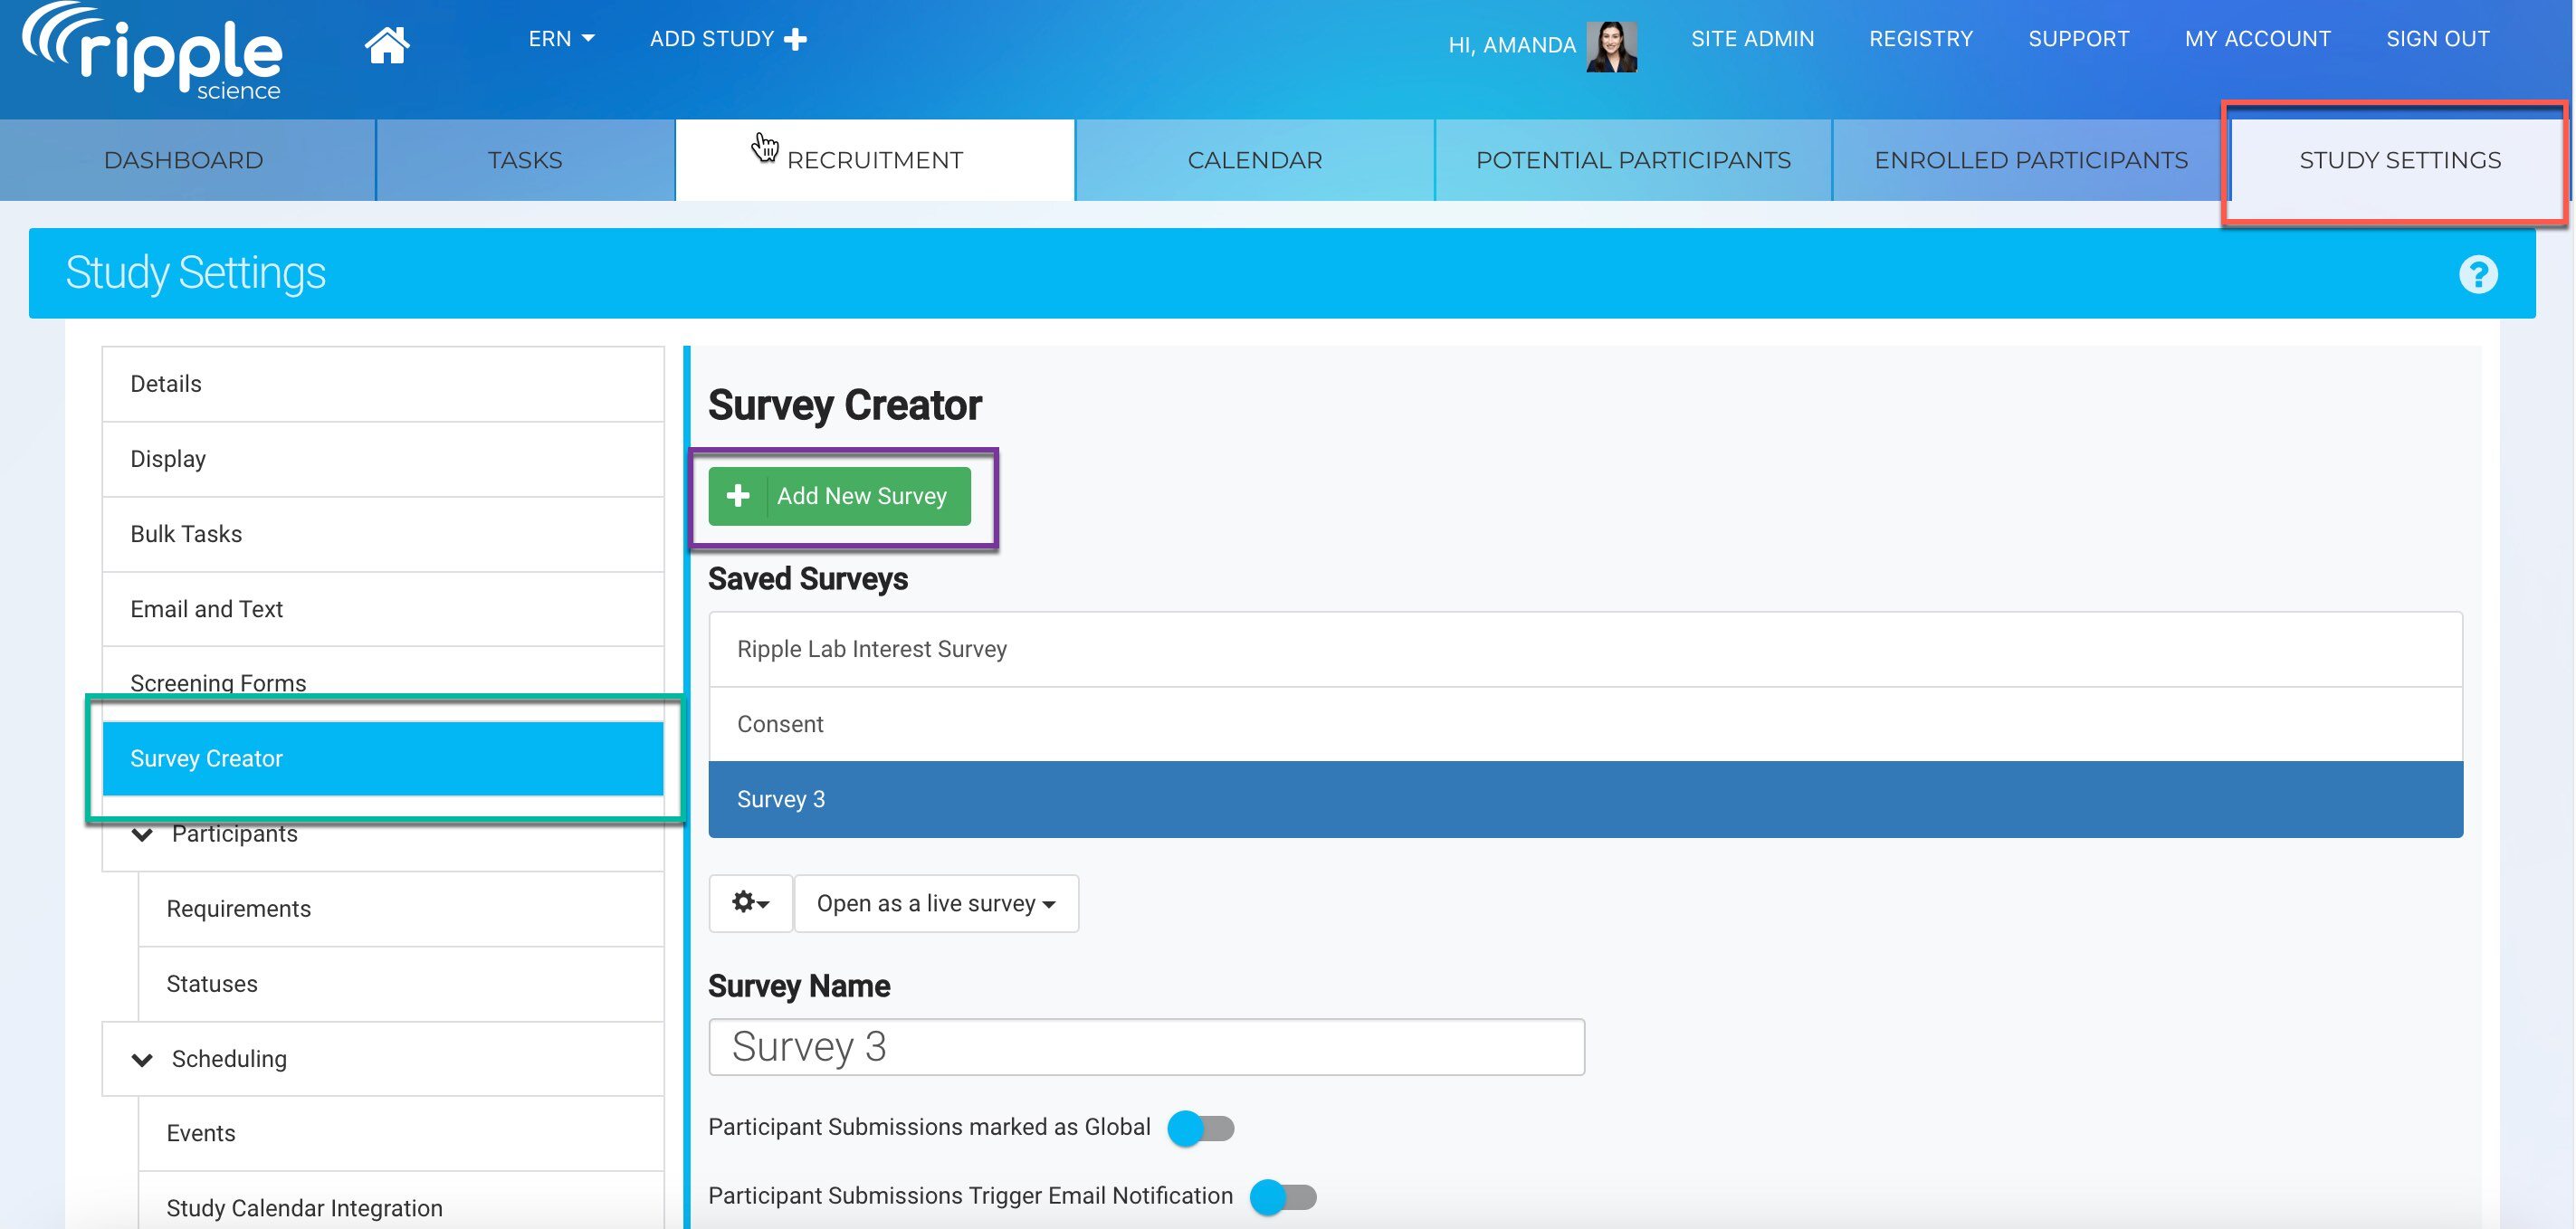
1. Access the Survey Creator
- Navigate to the Study Settings tab (red).
- Go to the Survey Creator module (green).
- Click "Add New Survey" (purple) to create a new survey or edit an existing one.
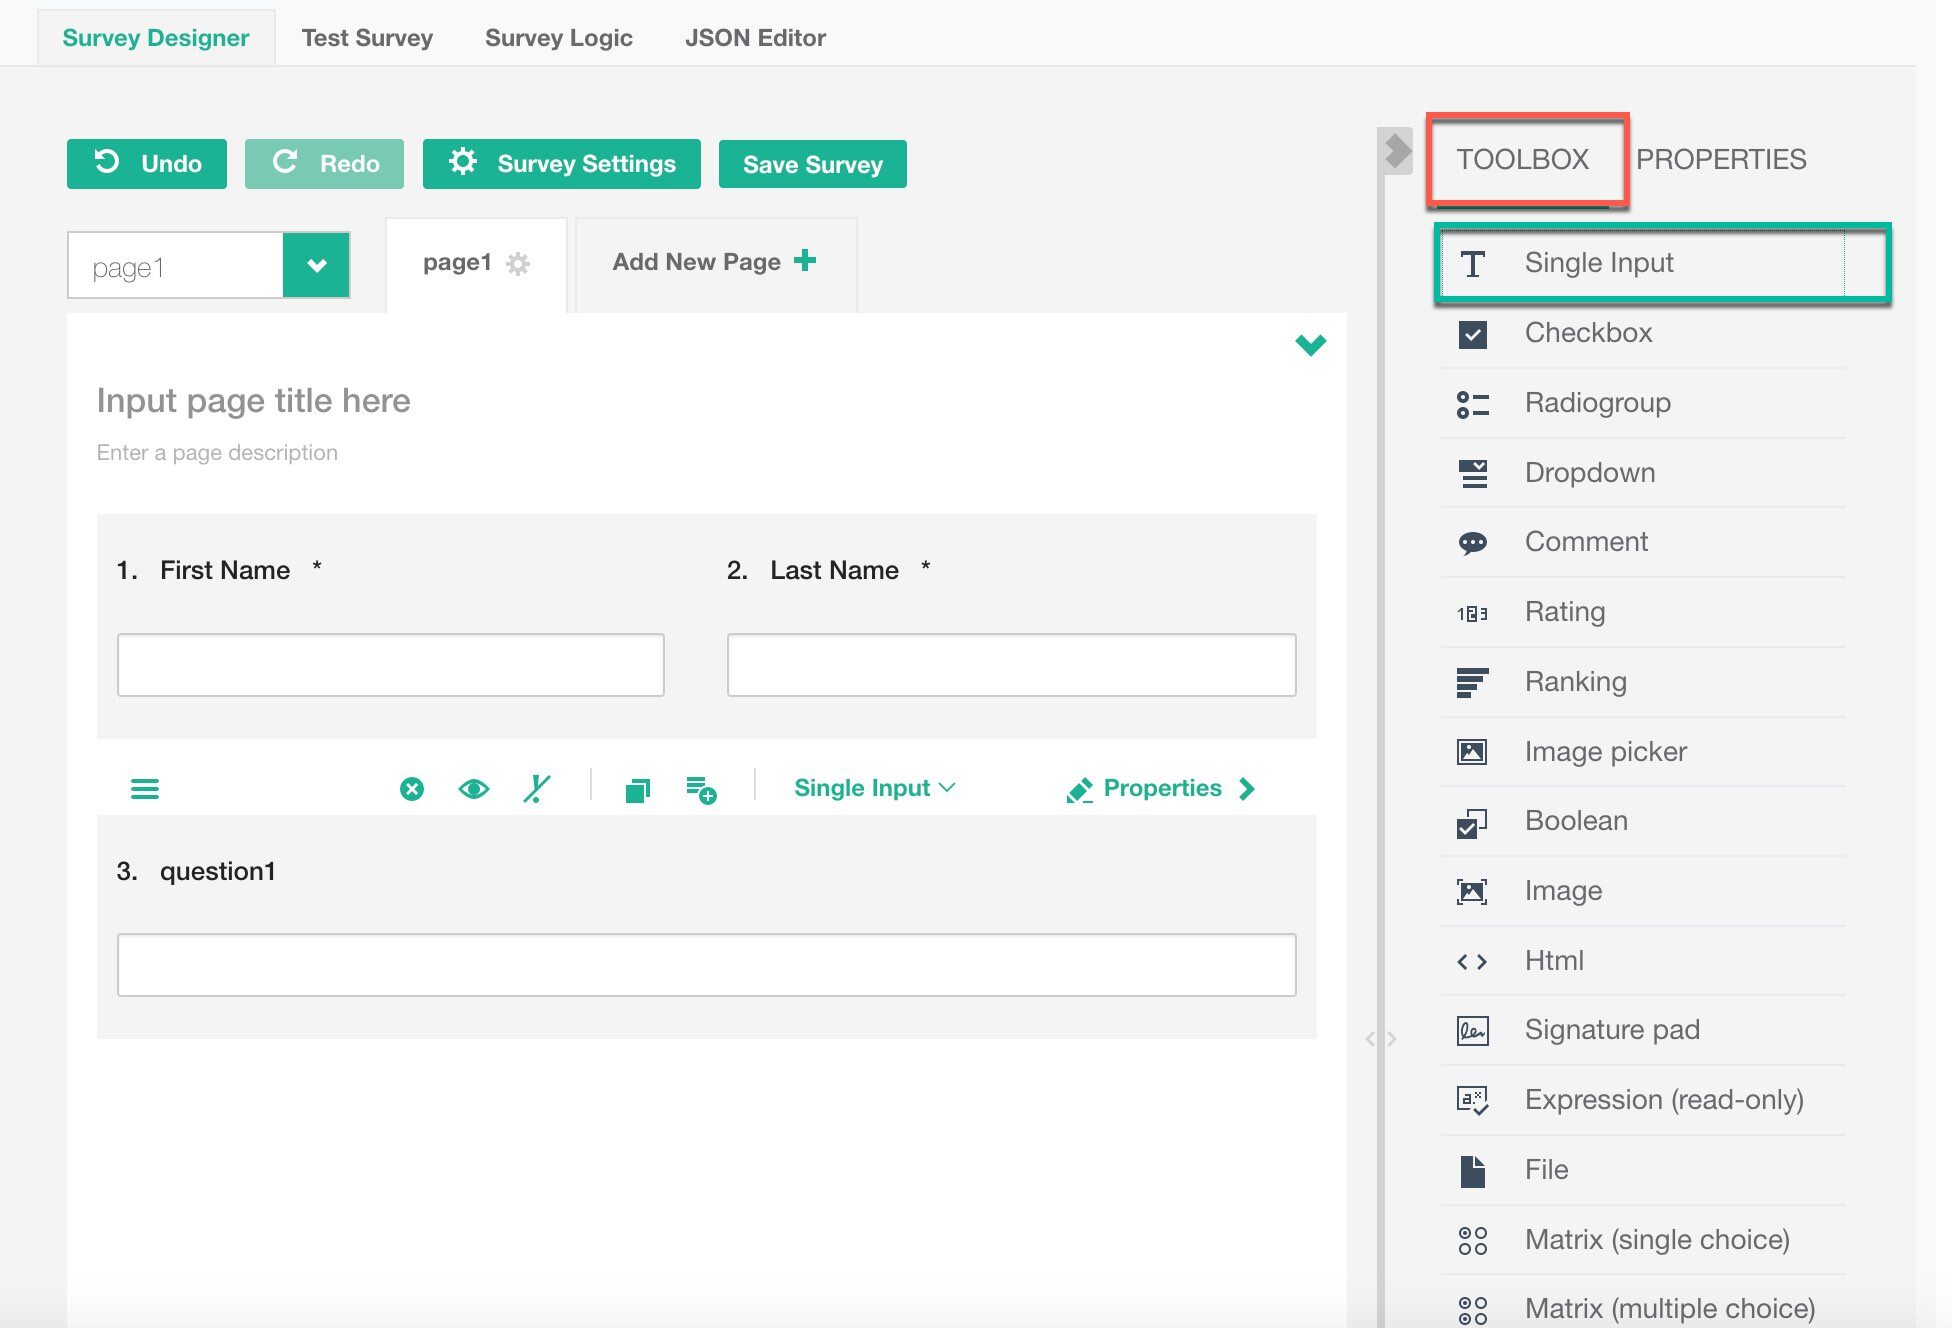
2. Add a Tag Input Field to the Survey
- Scroll down to the Survey Designer section.
- Open the Toolbox (red) and select
- Choose a Single Input question (for user-entered tags)
OR an Expression (Read-Only) question (for automated tag assignment).
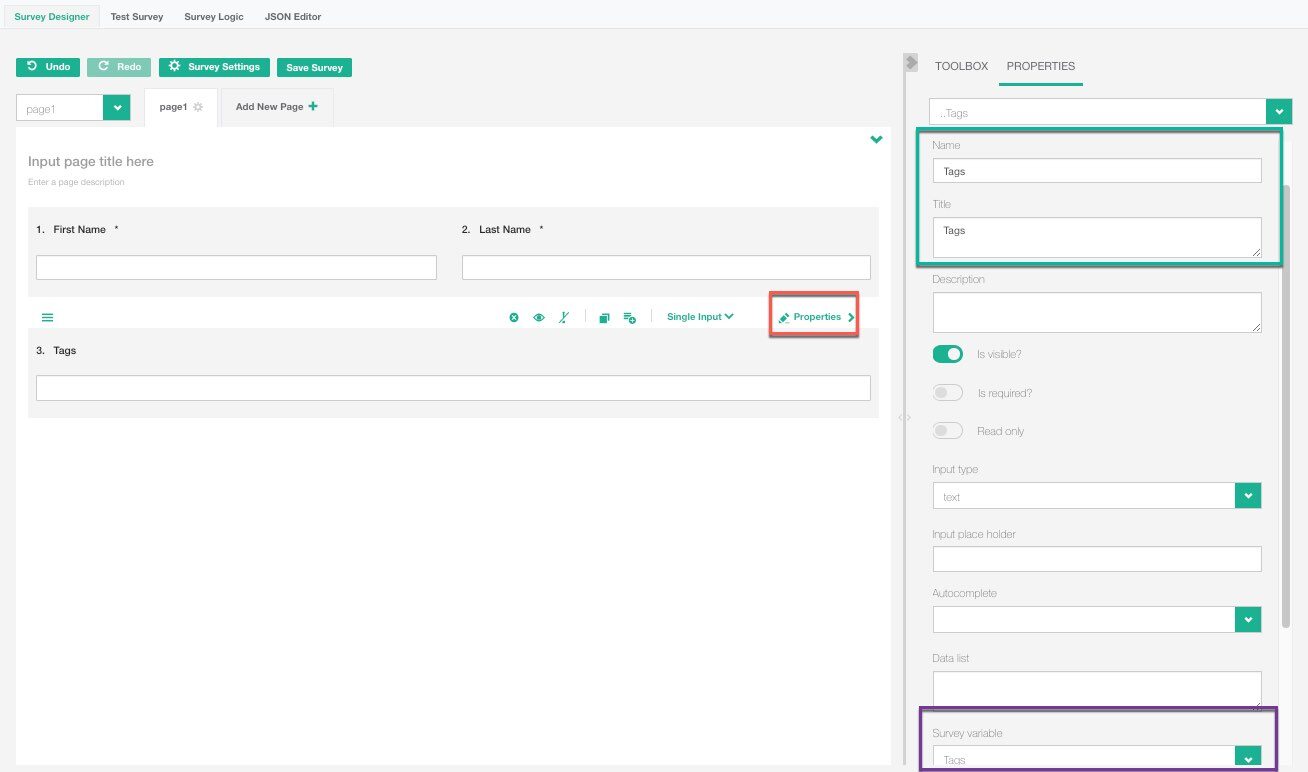
3. Configure the Tag Field
- Click on the Properties of the question (red).
- Add a Name and Title for the question (green).
- Scroll down to the Survey Variable dropdown and select “Tags” (purple).
4. Save and Test the Survey
- Click Save Survey to apply the changes.
- Run a test survey to ensure that tags are correctly assigned to participants.
Best Practices for Using Tags
- Use consistent naming conventions to avoid duplicate tags due to case sensitivity.
- Limit survey-assigned tags to key classification needs (e.g., eligibility, follow-up status).
- Review participant tags regularly to ensure accuracy and relevance.