Ripple Survey Creator
The Ripple Survey Creator enables users to design enhanced screening and survey forms with complex display logic and robust inclusion criteria. These surveys can be used for both internal participant screening and external data collection via web-based forms.
Key Features of the Ripple Survey Creator
1. Advanced Survey Logic
-
Supports complex display logic, allowing questions to appear based on participant responses.
-
Enables custom inclusion criteria, ensuring that only qualified participants proceed through specific sections.
2. Flexible Survey Use
-
Internal Screening: Used by researchers to assess participant eligibility.
-
External Forms: Can be shared externally via a web-based link for participant self-completion.
3. Participant Profile Integration
-
Survey questions can be linked to the Participant Profile Card, ensuring relevant data is automatically stored.
- Completed surveys are saved directly under the "Forms" tab on the participant's profile for easy access and tracking.
Benefits of Using Ripple Surveys
✅ Streamlined Participant Screening – Automate the identification of eligible participants.
✅ Efficient Data Collection – Collect responses digitally and link them directly to participant records.
✅ Improved Organization – Maintain all survey data in a central location under each participant’s profile.
By leveraging the Ripple Survey Creator, users can create dynamic, logic-driven surveys that enhance both internal research processes and external participant engagement.
Building a Basic Survey in Ripple
Follow these steps to create a basic survey using the Ripple Survey Creator:
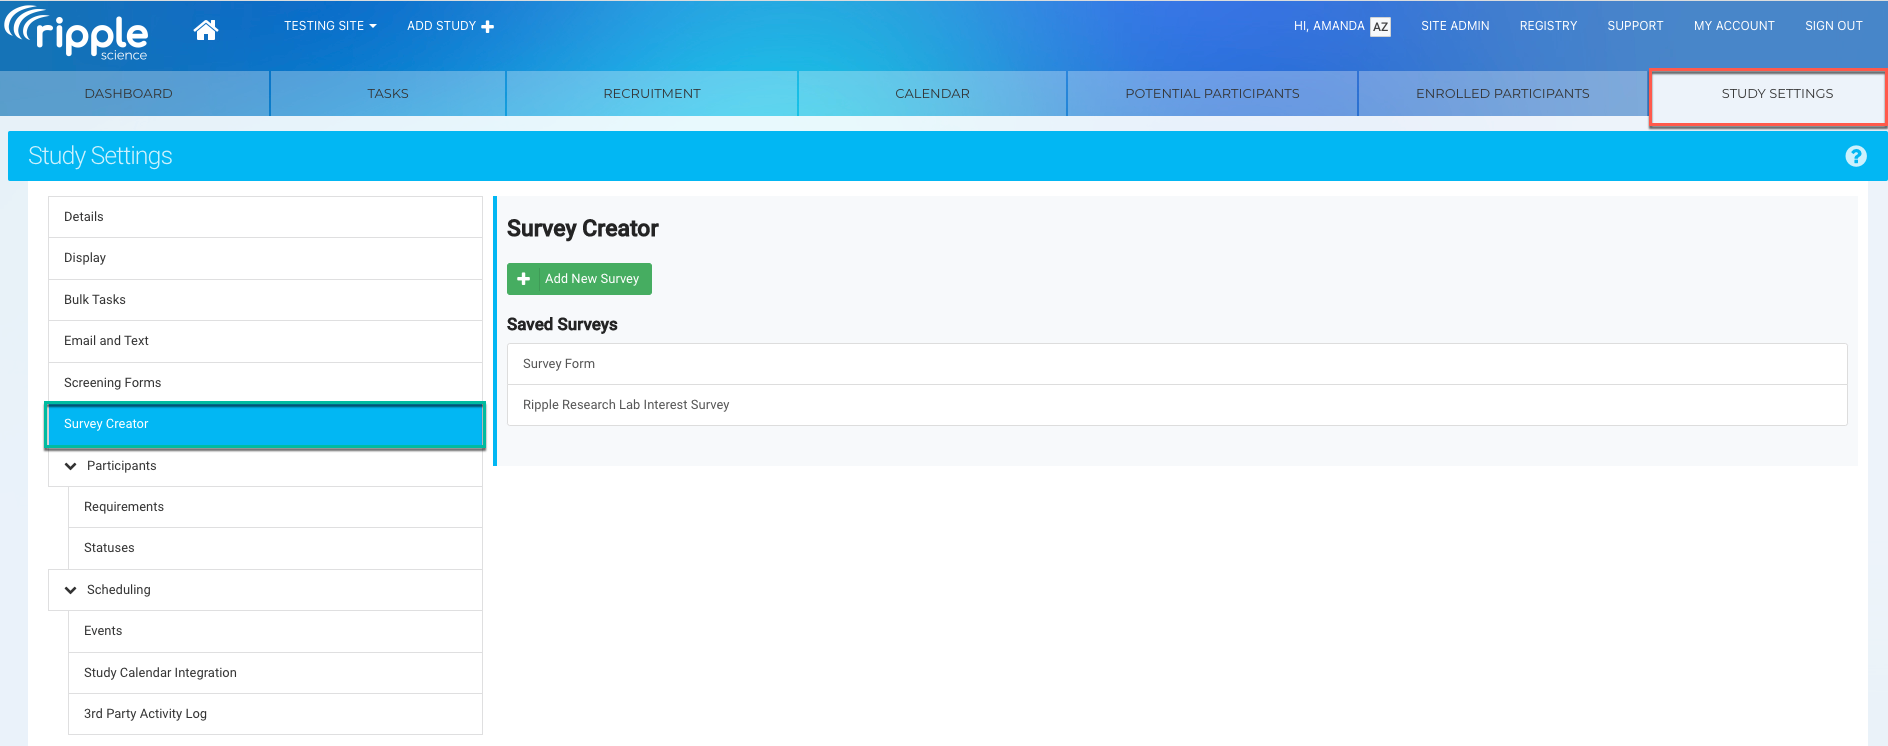
1. Access the Survey Creator
- Navigate to the Study Settings (red) page.
- Click on the Survey Creator (green) tab.
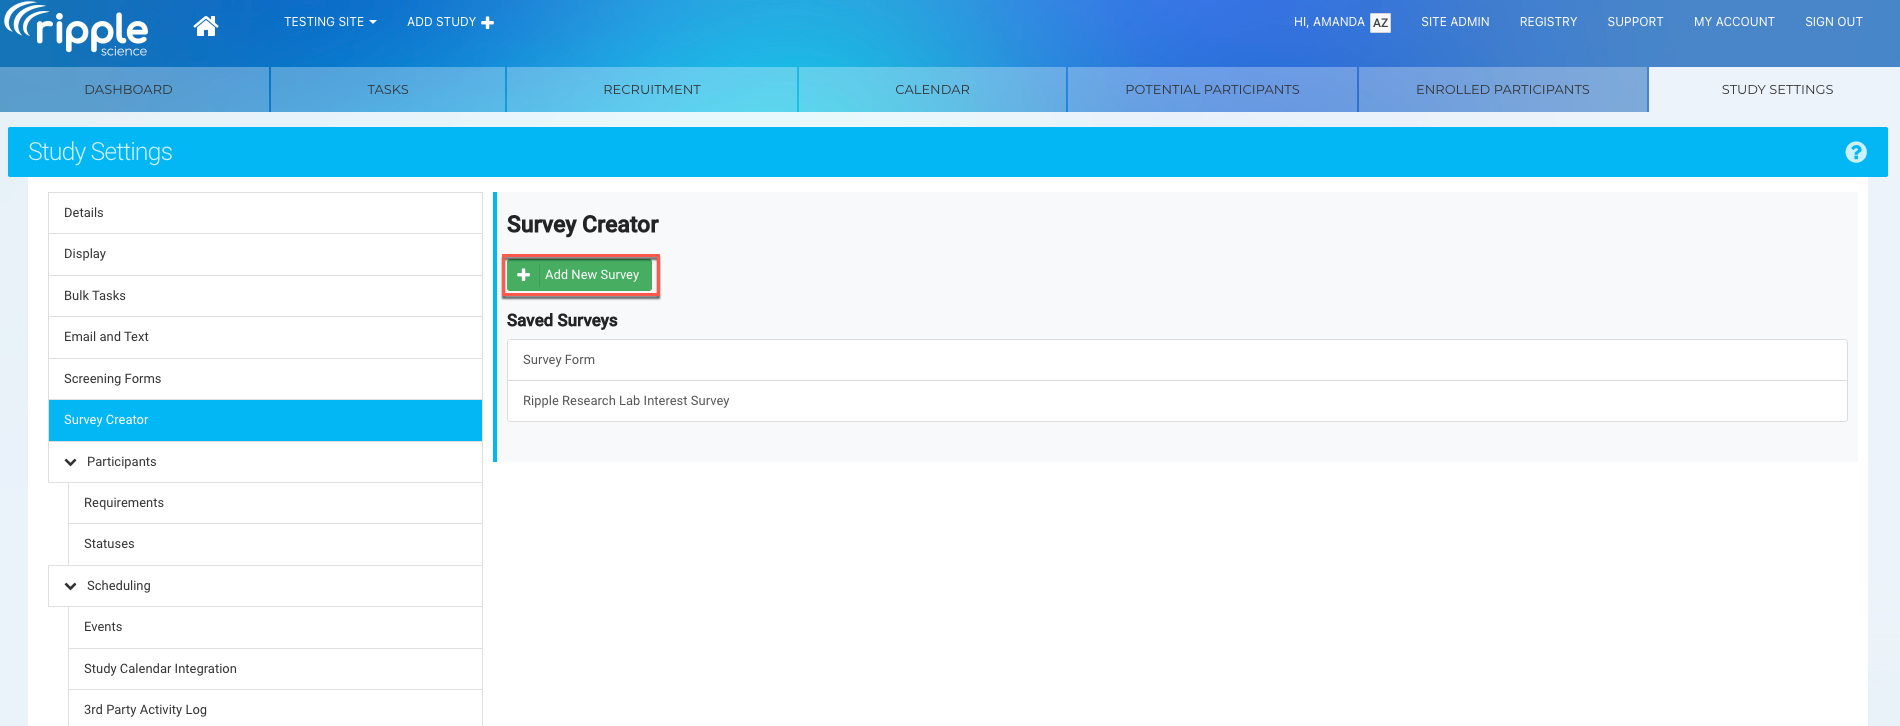
2. Create a New Survey
-
Click the "Add New Survey" button.
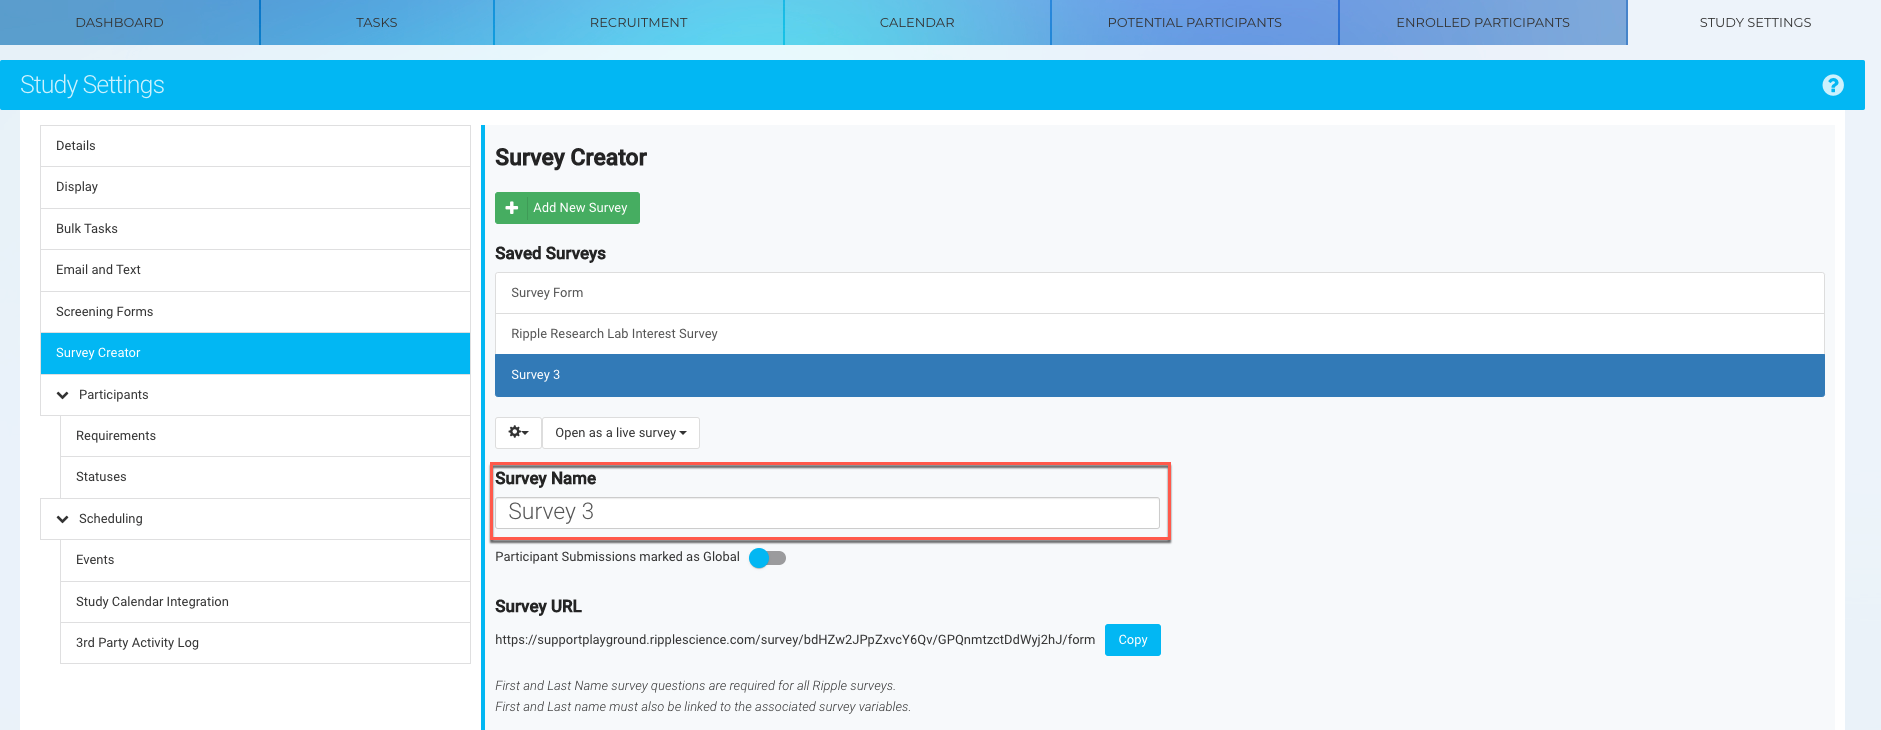
-
In the "Survey Name" box, enter a name for your survey.
Tip:
- You can duplicate an existing survey within the same study.
- You can also copy a survey from one study into another.
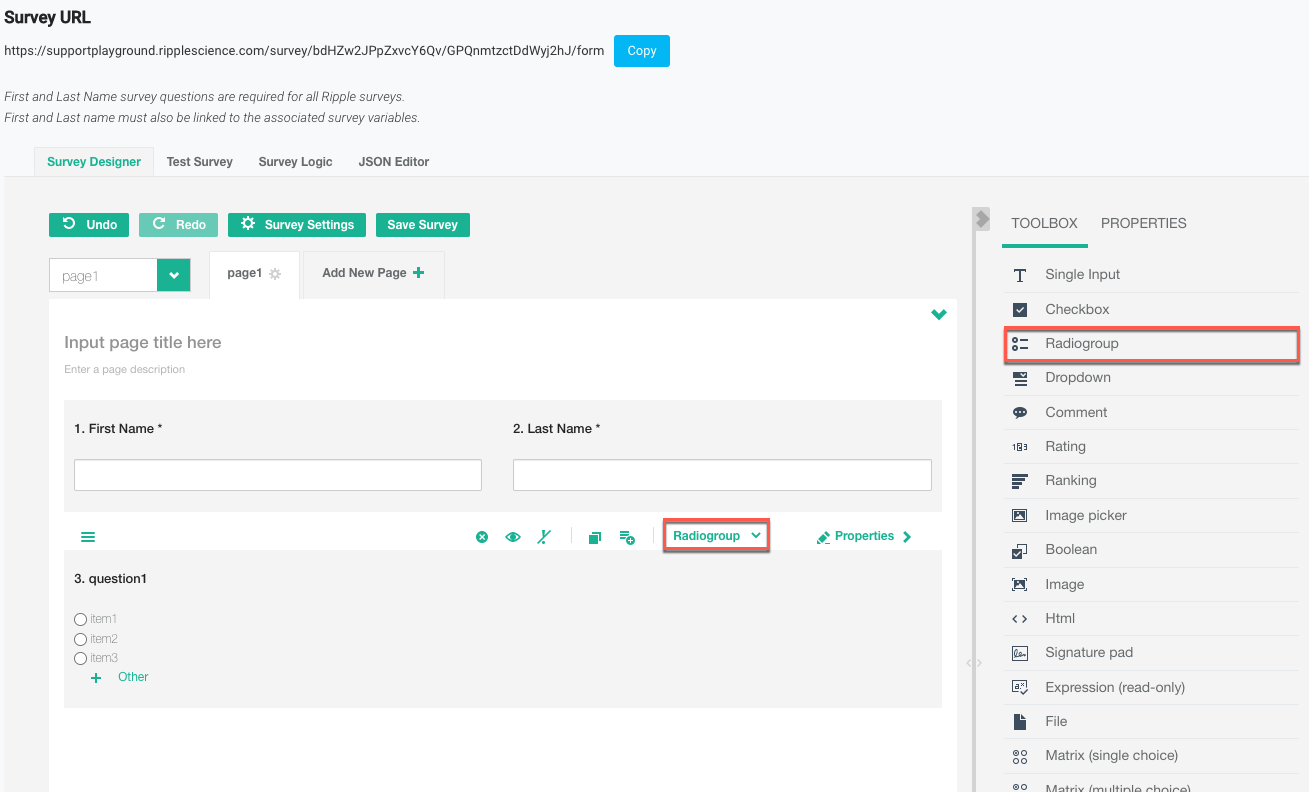
3. Start Designing Your Survey
-
Go to the Survey Designer tab (red).
Important Note:
- First Name and Last Name questions are automatically populated in your survey and linked to their respective participant variables.
- These fields are required and must be included in the final survey.

4. Add Questions to Your Survey
-
Open the "Toolbox" panel.
-
Select a question type to add to your survey. (For more details, refer to the Survey Question Types article.)
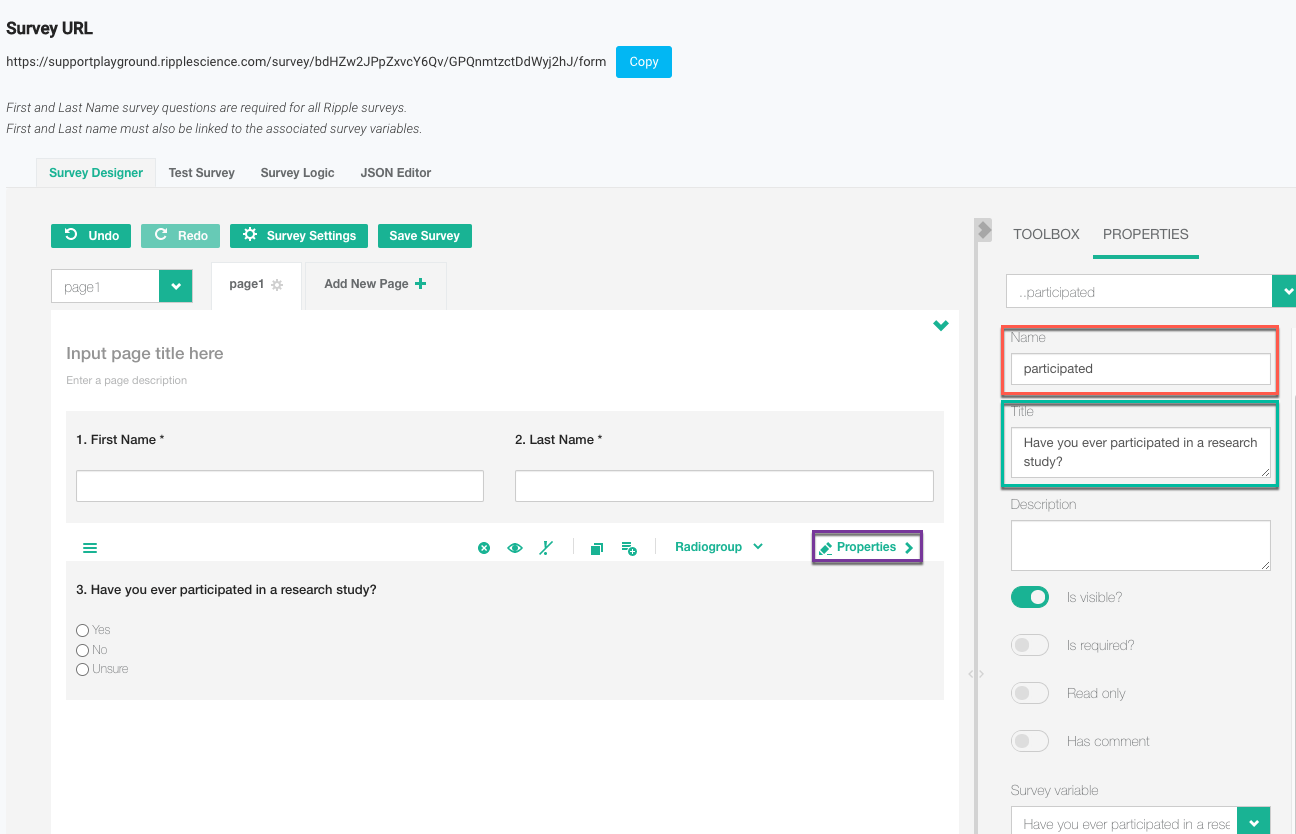
5. Edit Question Properties
-
Click on a question and open the "Properties" panel (purple).
-
Edit the following fields:
-
"Name" (red) → Internal reference for the question (used for logic and UTM codes).
-
"Title" (green) → The question text visible to participants (can also be edited directly in the survey).
-
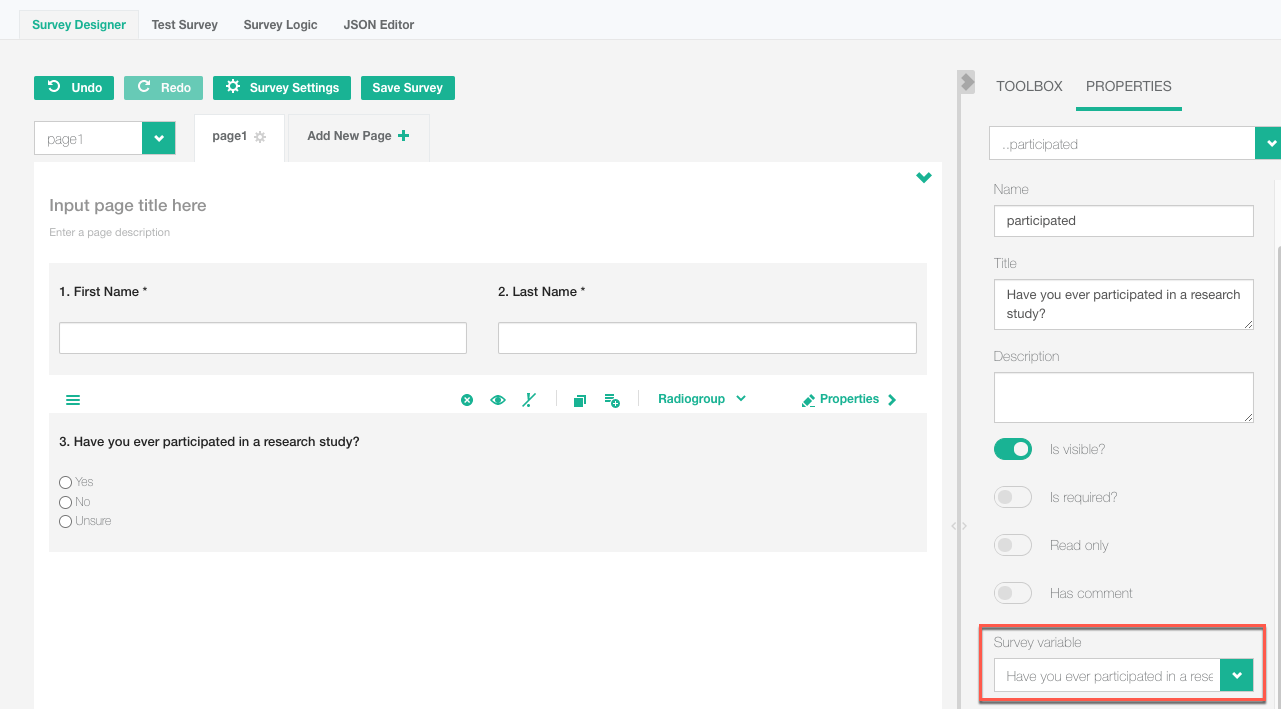
6. (Optional) Link Survey Variables
-
Choose a "Survey Variable" from the list of Ripple participant variables (e.g., demographics, contact info, custom variables).
-
Why link variables?
-
Responses will automatically populate participant profiles.
-
For external forms → You must include First Name and Last Name for a URL to generate.
-
For internal forms → At least one variable must be linked to a Ripple Survey Variable for the form to save.
-
7. Repeat Steps for Additional Questions
-
Continue adding and configuring survey questions as needed.
8. (Optional) Add Survey Logic
-
Use survey logic to customize behavior, appearance, and content based on participant responses.
9. (Optional) Style Your Survey
-
Customize your survey by:
-
Adding a logo or images
-
Adjusting navigation buttons
-
Creating customized thank-you messages
-
10. Save Your Survey
-
Click the "Save Survey" button in the Survey Designer tab.
-
This step is required to retain any changes.
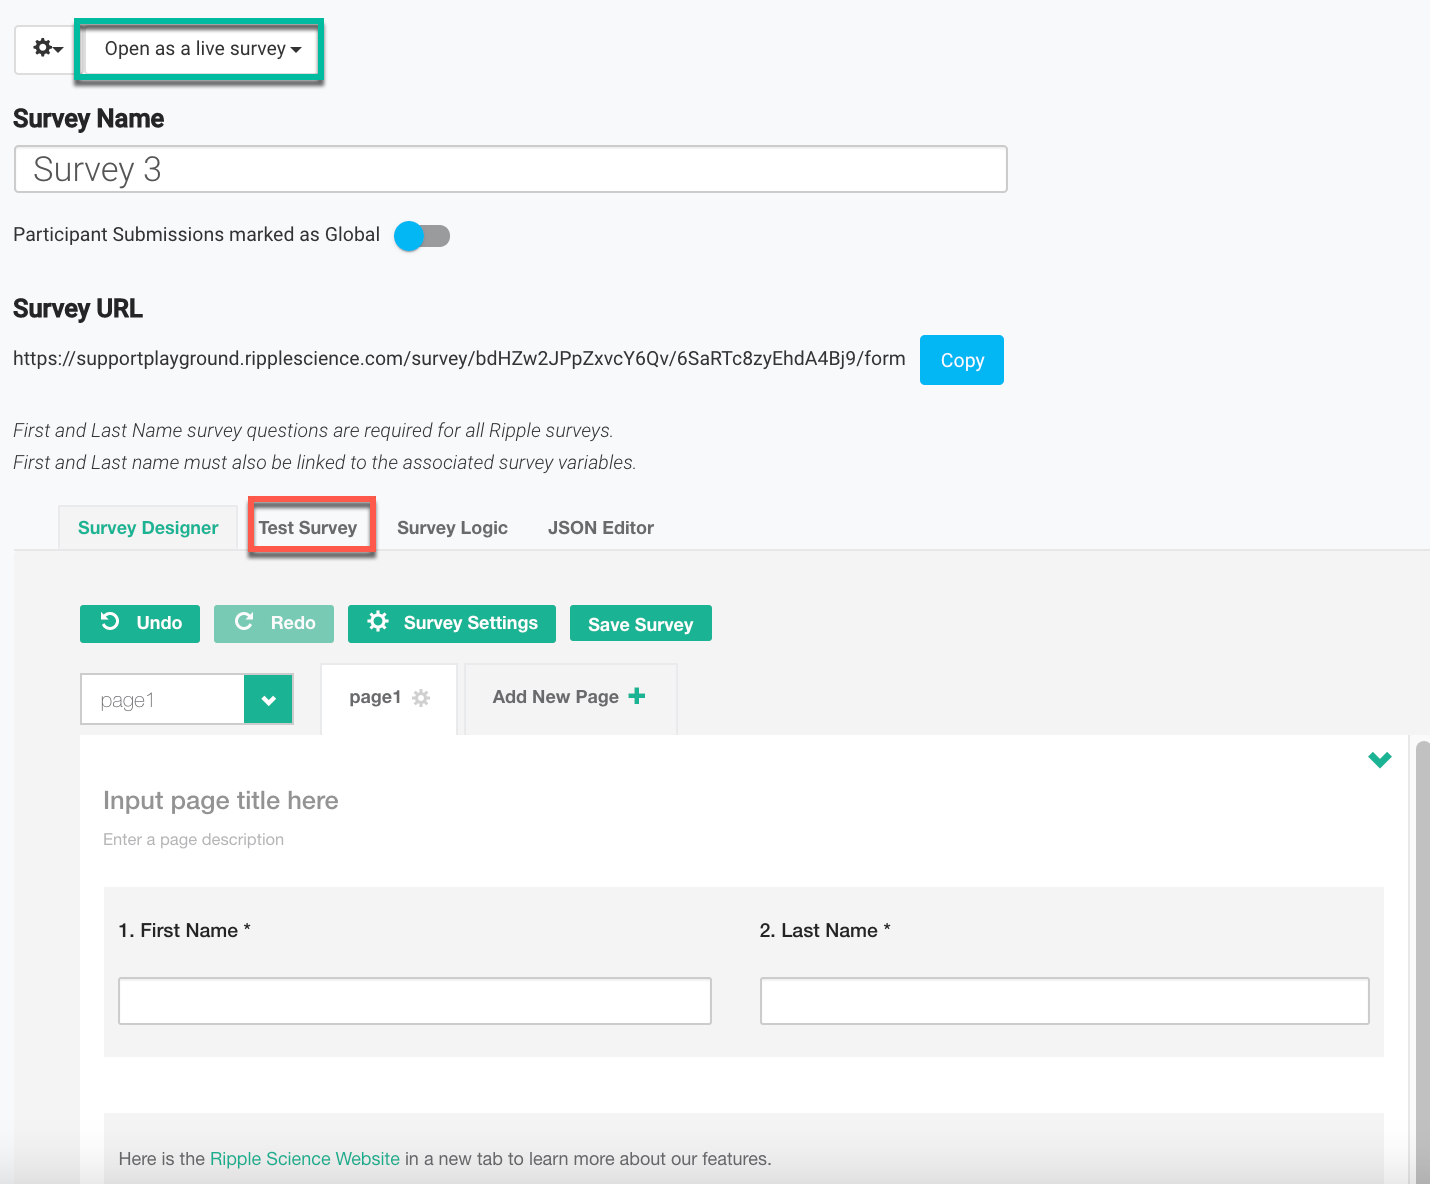
11. Test Your Survey
-
Click "Test Survey" (red) to preview how it works.
-
OR choose "Open as Live Survey" (green) to test it in real-time as an internal or external form.
12. Deploy Your Survey
- Once saved, your survey can be used as:
- An internal form (within Ripple).
- A publicly visible external survey (accessible via a shareable URL).
By following these steps, you can successfully build, customize, and deploy your survey in Ripple!