Customizing Survey Design
Enhance your survey experience by customizing the header, layout, media elements, and HTML formatting. Below are detailed steps to optimize your survey design.
Adding an Image to the Survey Header
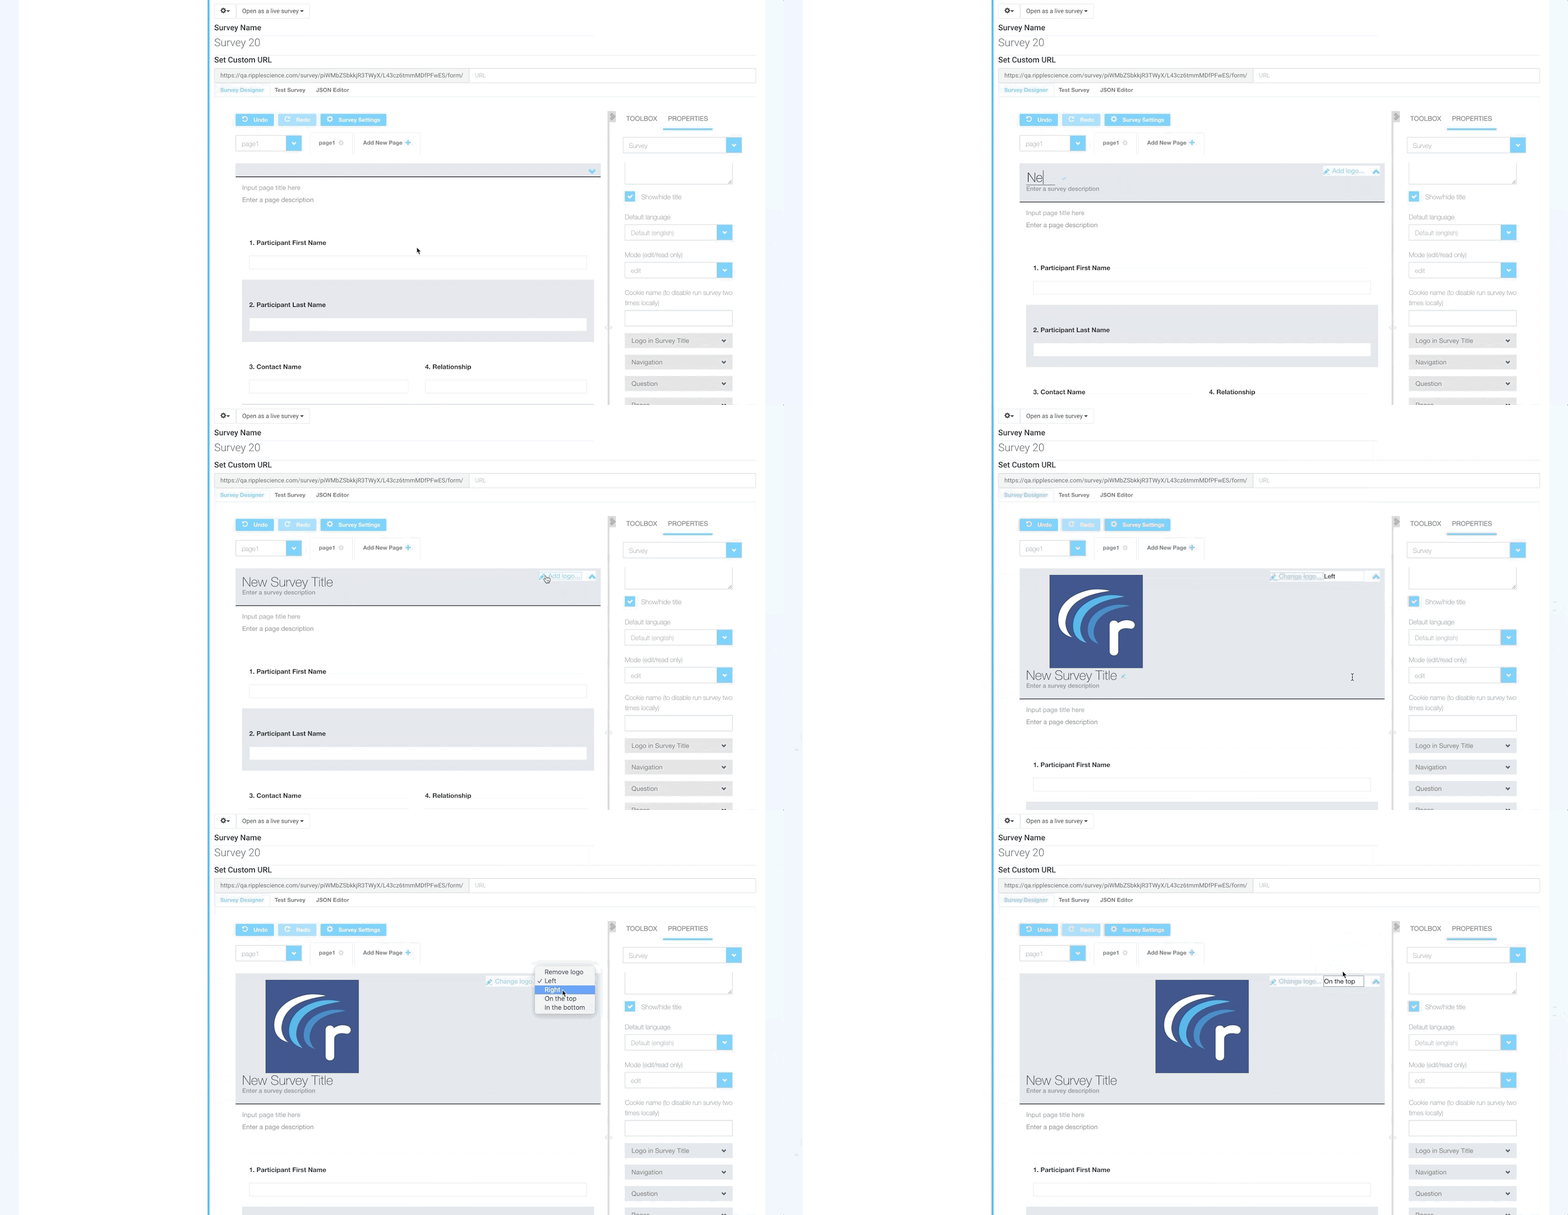
To personalize the survey header, follow these steps:
-
Access the Survey Header Settings
- Click the down arrow in the top-right corner of the survey creator.
-
Customize Header Content
- Enter a custom survey title and description.
-
Upload an Image
- Select an image from your computer to display across all survey pages.
This feature allows for clear branding and visual engagement throughout the survey.

Using Images Within the Survey
If you prefer to add images only on specific survey pages, use the "Image" widget from the toolkit:
- Select the "Image" Option from the survey toolbox.
- Upload an Image or Video from your device.
- Adjust Display Settings in the Properties Panel:
- Control image size and placement.
- To add a video, change the “Content Mode” to video in the properties panel.
This option is ideal for visual instructions, branding, or multimedia-rich surveys.
Displaying Multiple Questions on a Single Line
To improve survey layout and readability, you can arrange related questions on the same line:
- Select a Question that should align with another.
- Open the Properties Panel.
- Find the "Layout" Option.
- Uncheck "Start with New Line".
Now, the selected question will align naturally with the one above it, creating a cleaner and more structured survey format.
Adding HTML Elements for Customization
For advanced customization, use the HTML option from the toolbox:
- Select the "HTML" Option in the survey toolbox.
- Insert Custom Content, such as:
- Instructional text
- Hyperlinks
- Tables and formatted content
- Other graphical elements
