Email templates enable Study Admins to maintain consistent communication with participants while streamlining the messaging process. Templates can be used for a variety of purposes, including reminders for upcoming visits, birthday greetings, newsletters, and more. Follow these steps to create an email template for your study.
Steps to Create an Email Template
-
Access the Email Template Feature:
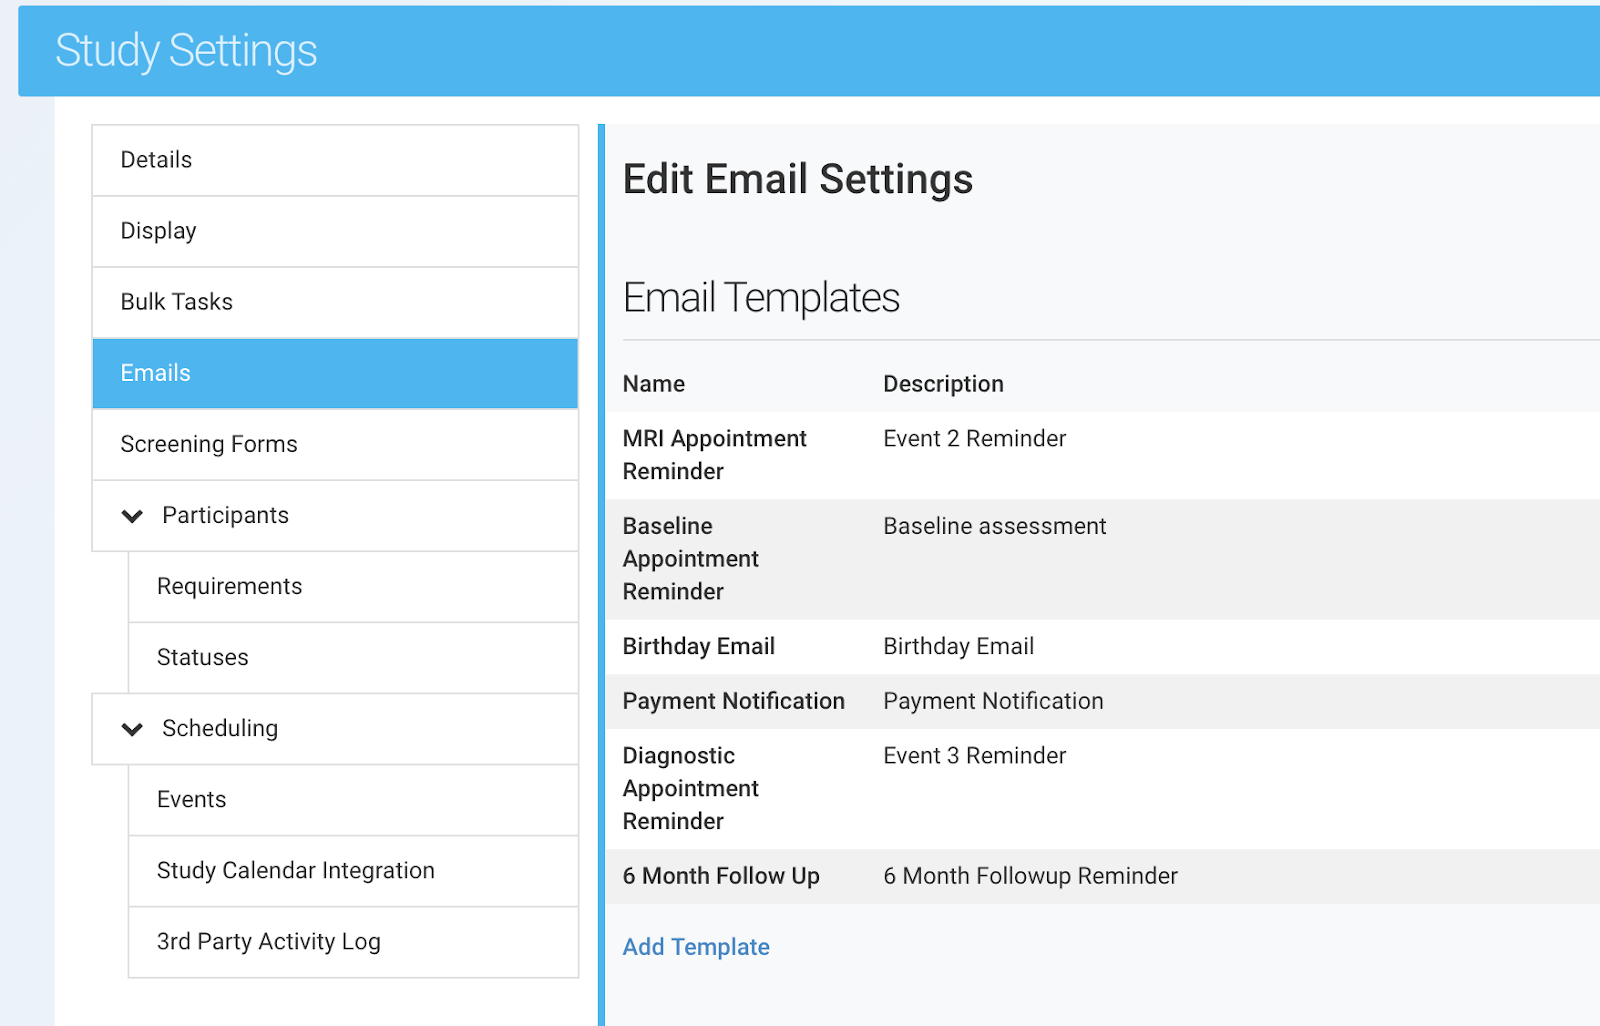
- Navigate to Study Settings tab. Click Email and Text

- Navigate to Study Settings tab. Click Email and Text
2. Click "Add Template":
-
-
- Select the Add Template under Email Templates to open a new template form.
-
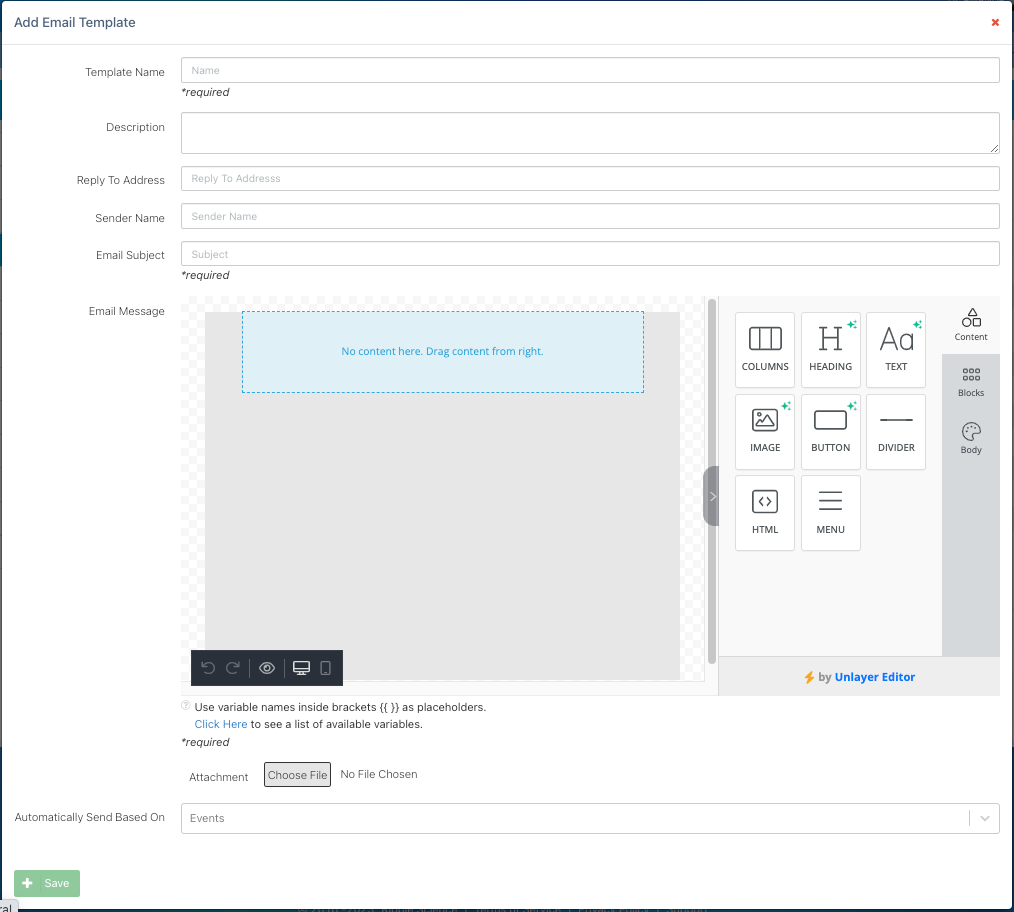
3. Fill in the Email Details:
-
-
-
Template Name (required):
- Enter a name for the template that your team will see in the email template list.
- Use a descriptive name, such as "Visit Reminder" or "Study Newsletter."
- Note: Participants will not see this name.
-
Description:
- Provide additional details about the email's purpose, such as:
- When the template should be used.
- The intended recipient group.
- Timing or special instructions.
- Participants will not see this description.
- Provide additional details about the email's purpose, such as:
-
-
-
-
-
Reply to Address:
- Specify the email address where participant replies should be sent for follow-up communication.
-
Sender Name:
- Input your team’s name to display as the sender instead of Ripple’s default email address.
-
Email Subject (required):
- Create a subject line that participants will see when they receive the email.
- Example: “Reminder: Your Upcoming Study Appointment.”
-
Email Message (required):
- Write the main body of the email.
- Use Ripple’s dynamic placeholders (e.g.,
,) to personalize the message for each recipient. - Example: “Hi , your next appointment is scheduled for at .”
- Ripple will pull the data into the email.
-
Attachment (Optional):
- Attach a relevant document, such as a visit checklist or study instructions, up to 10 MB in size.
-
Automatically Send Based On (Optional):
- Configure the email to send automatically based on specific triggers, such as:
- An event being scheduled.
- An event being completed.
- Configure the email to send automatically based on specific triggers, such as:
-
-
Steps to Finalize and Use Your Email Template
-
Save the Template:
- Once all required fields (e.g., template name, subject, email body) are filled out, click Save.
- Your template will be stored in the Emails section along with any other templates you’ve created.
-
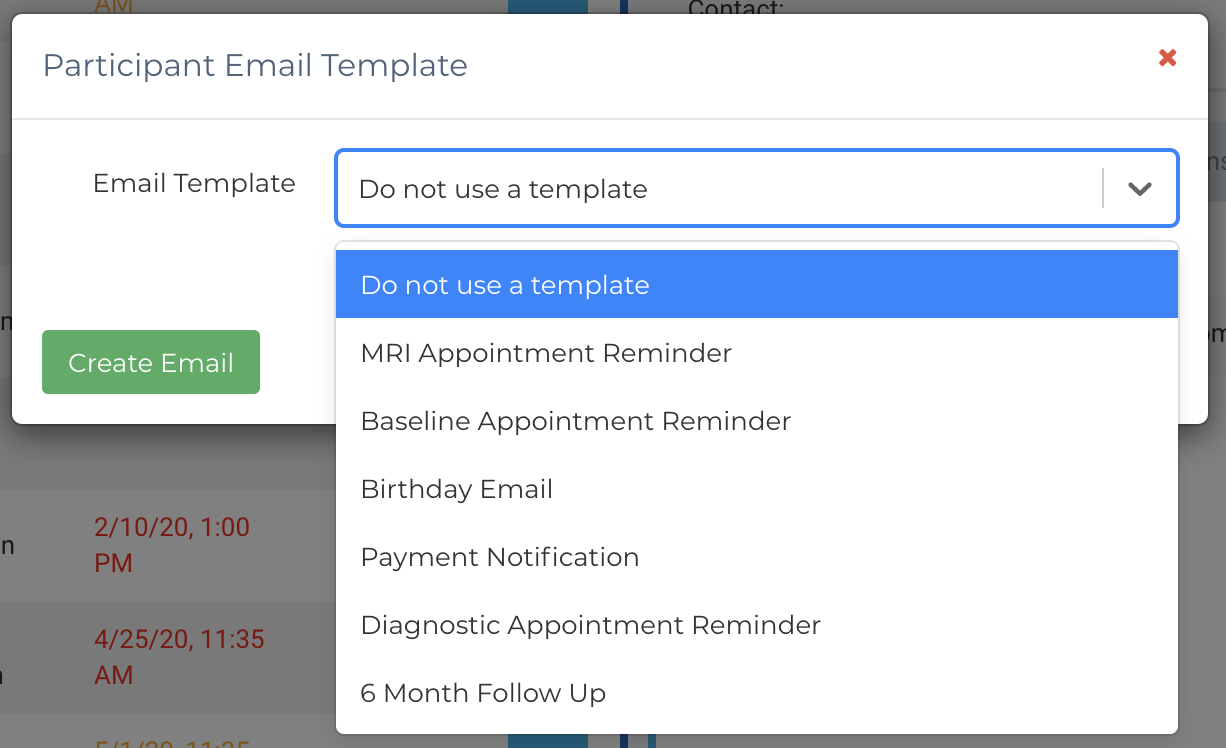
Send an Email to a Participant:
- When sending an email, an Email Template window will appear.
- You will be prompted to choose one of your existing templates or opt to write a custom email by selecting “Do not use a template.”
-
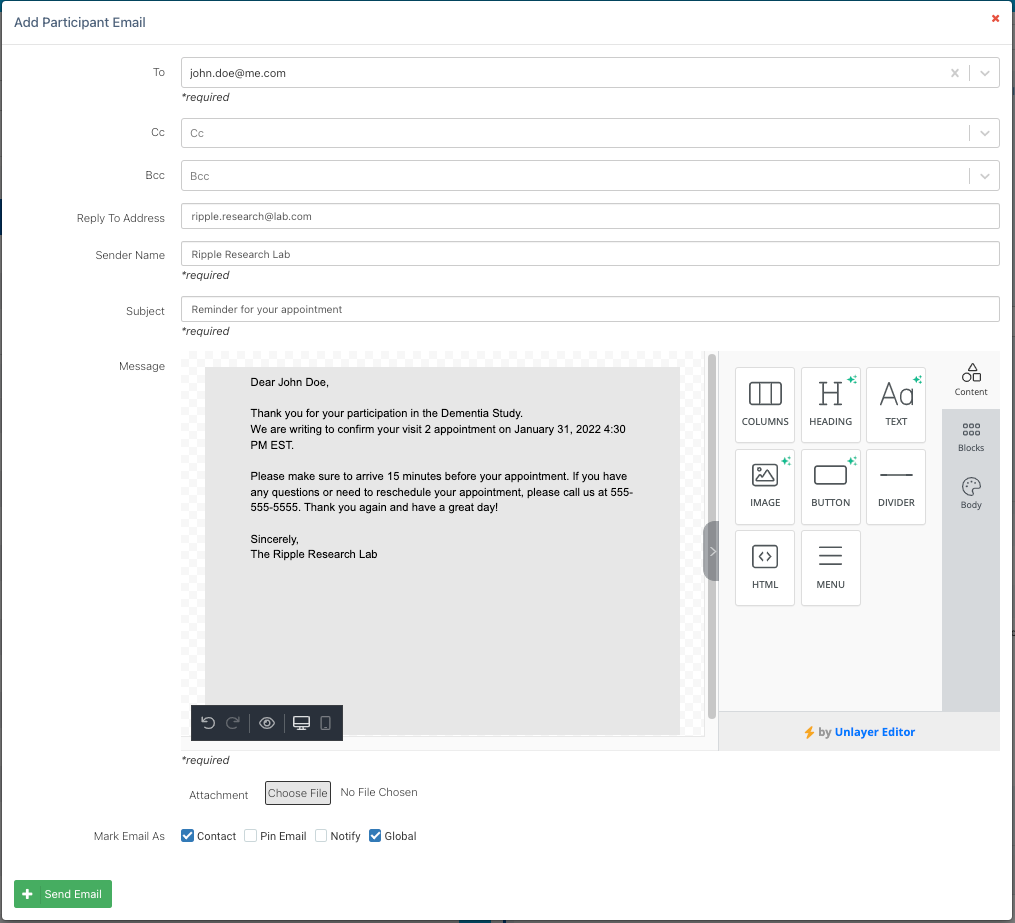
Populate the Email with Template Information:
- After selecting a template, the email will automatically populate with the template's content.
- Dynamic Placeholders: Ripple will replace placeholders like
,, andwith the participant’s specific details
NOTE: If you do not see the email template options in your study, contact Ripple Support by emailing help@ripplescience.com to discuss enabling this feature and the costs associated with using this feature.