You can use surveys to collect Google-verified addresses from participants, ensuring accuracy and consistency.
How It Works:
- Survey respondents start typing an address, and a dropdown list of Google-verified addresses appears.
- They select the correct address, and the survey automatically fills in the remaining address fields based on the chosen address.
Benefits:
✅ Ensures valid, standardized addresses for accurate data collection.
✅ Helps prevent address entry errors.
✅ Supports mailing accuracy for materials or correspondence.
✅ Facilitates meeting participants at the correct location for remote visits.
Using Google-verified addresses helps your team save time and improve data accuracy for various study-related needs.
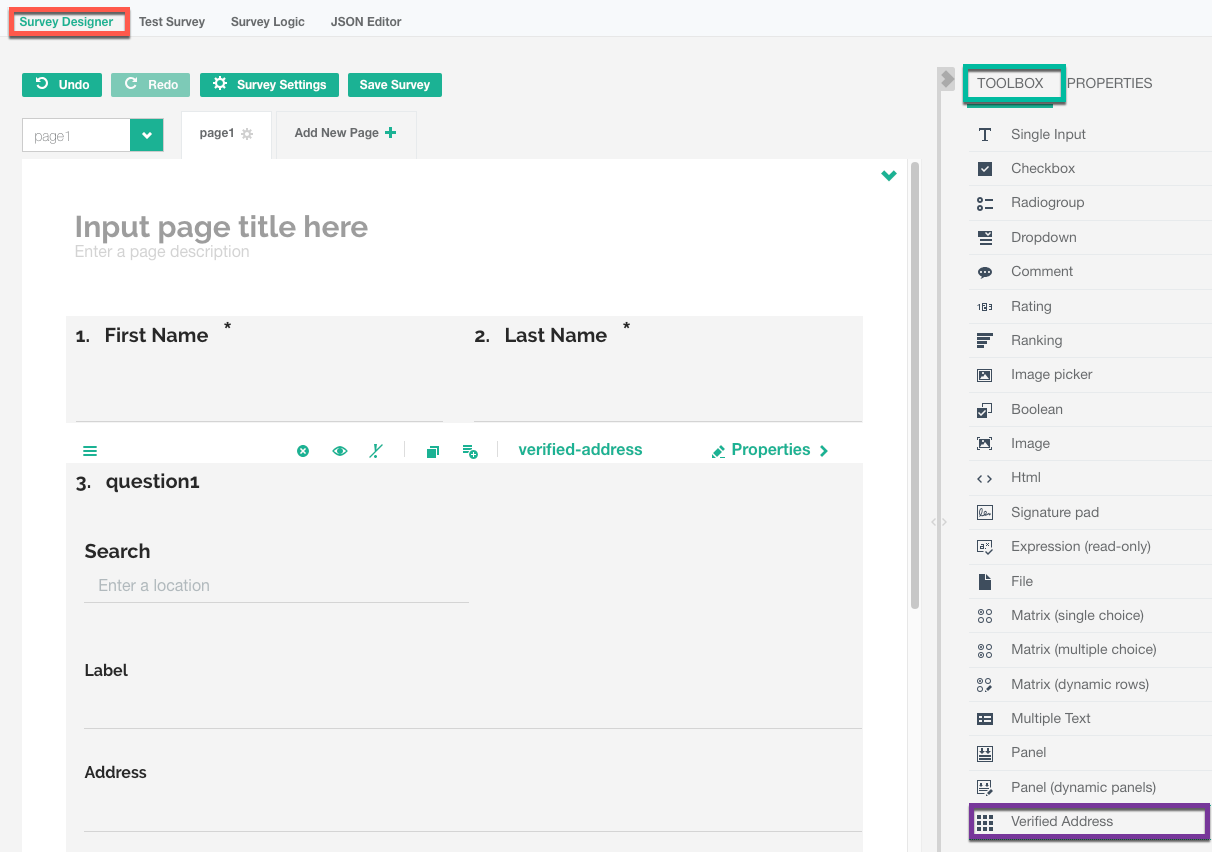
How to Add an Address Question in a Survey
To collect Google-verified addresses, follow these steps to add a Verified Address question to your survey:
Step 1: Access the Survey Designer
- Open the Survey Designer (red) in your study.
Step 2: Add the Verified Address Field
- Go to the Toolbox (green) – This contains different question types.
- Select the Verified Address Question Type (purple).
- Drag and Drop the Verified Address field into the survey designer.
Once added, participants will be able to type in their address, select a Google-verified result, and have the remaining address fields auto-filled for accuracy.
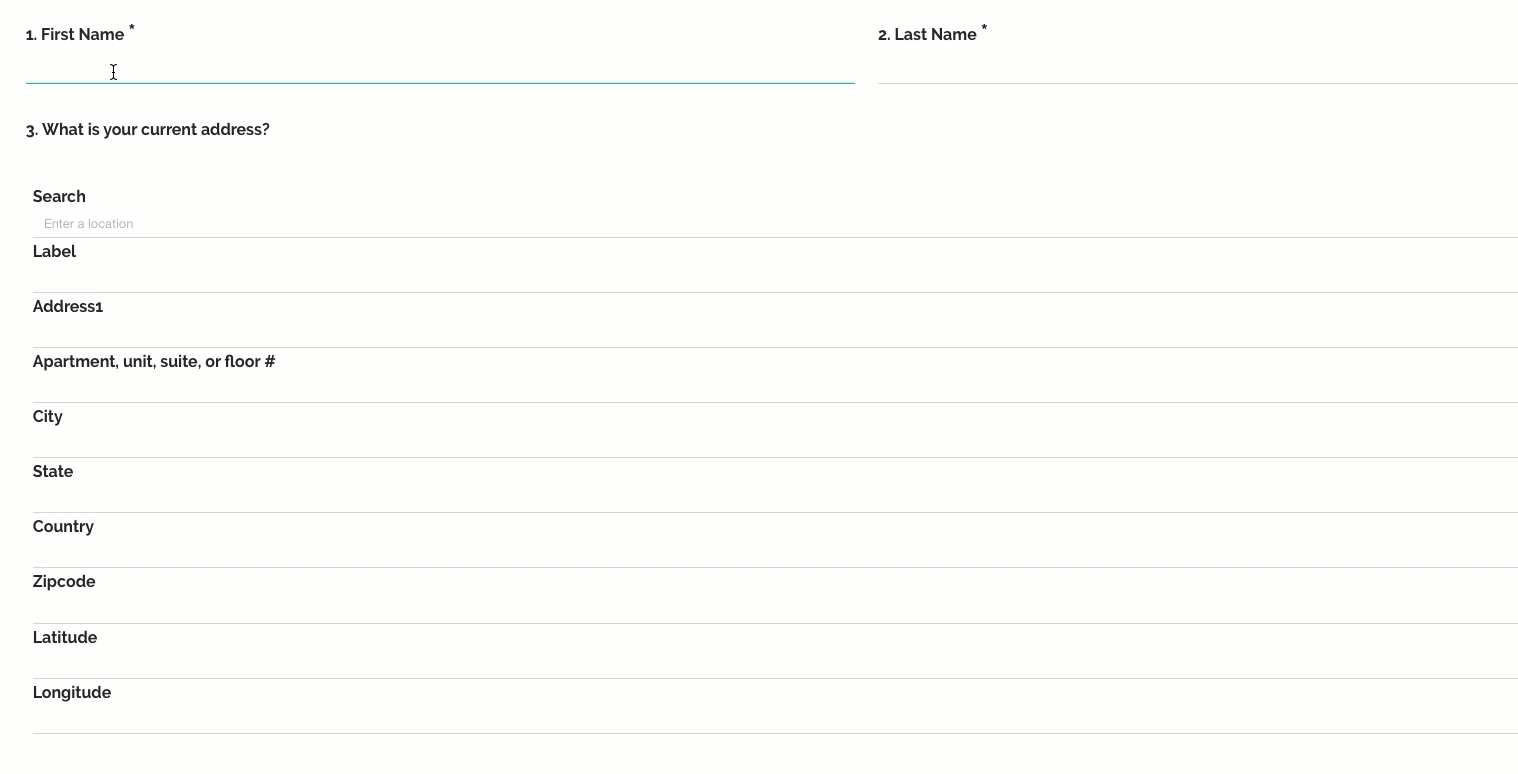
Components of the Verified Address
When you add a Verified Address question to a survey, it automatically includes the following fields:
Standard Address Fields:
- Search – Where respondents type the address and select the correct option.
- Label – Populates if the address has a business name.
- Address – Street address of the location.
- Apartment, Unit, Suite, or Floor # – Additional address details.
- City – The city name.
- State – The state or region.
- Country – The country name.
- Zip Code – The postal code.
Geolocation Fields:
- Latitude – The geographical latitude of the address.
- Longitude – The geographical longitude of the address.
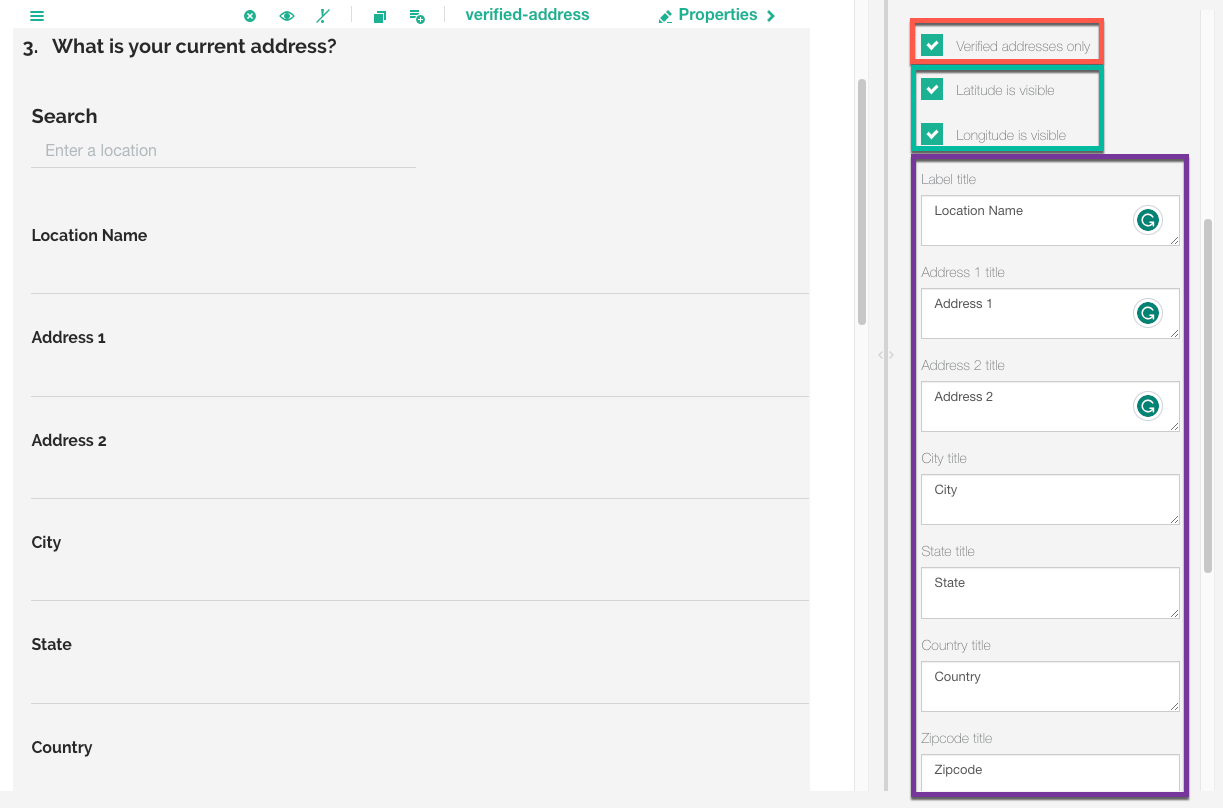
📌 Note: While you cannot add or remove fields, you can make the latitude and longitude fields invisible if needed.
Special Properties of the Verified Address Question
The Verified Address question has unique properties that allow you to modify its behavior and appearance. While it shares Logic, Layout, Data, and Validation settings with a Single Input question, it also includes features specific to address validation.
General Properties
You can control:
✅ The internal and external name of the question
✅ Visibility and whether the question is required
✅ Whether only verified addresses are accepted
Many of these settings are standard across other question types. Read this article for more information about standard types.
Unique Properties of the Verified Address Question
1. Verified Addresses Only (🔴 Red)
- Prevents manual address edits after an address is auto-filled.
- By default, once a participant selects an address, all fields auto-populate.
- ✅ Checked: Participants cannot edit individual address fields (except for the "Label" field).
- ❌ Unchecked: Participants can manually modify the address fields after they are auto-populated.
2. Latitude and Longitude Visibility (🟢 Green)
- You can show or hide the latitude and longitude fields.
- ✅ Checked (default): Participants see the latitude/longitude fields.
- ❌ Unchecked: Participants do not see these fields.
3. Address Field Titles (🟣 Purple)
- You can rename address field labels to make them clearer.
- Example:
- Default "Label" → Renamed "Location Name"
- Default "Apartment, Unit, Suite" → Renamed "Building/Unit Number"
Customizing field titles ensures participants understand what information to enter.
Key Takeaways:
✅ Control if addresses must be fully verified
✅ Decide whether latitude/longitude should be visible
✅ Customize field names for clarity
Variables in the Verified Address Question
The Variables section allows you to control where the Verified Address data is stored on a participant’s profile. You can decide whether each address component is linked to a Contact Method variable or a Custom Variable.
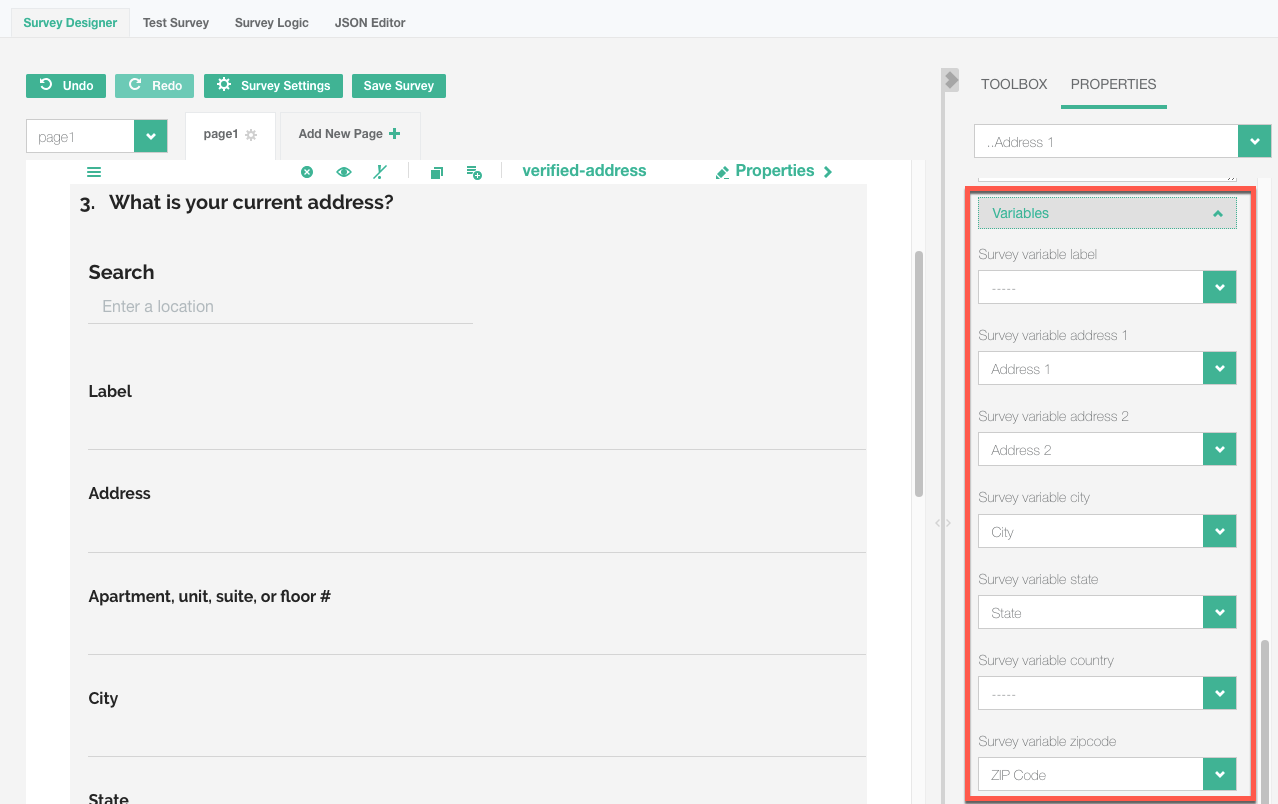
Collecting Multiple Verified Addresses
If you need to collect multiple verified addresses from a participant, keep in mind the following:
- Only one address can be linked to the Contact Methods card at a time.
- If you link multiple address sets to the Contact Methods card, only the last collected address will be saved there.
Removing or Replacing a Verified Address
If a participant selects the wrong address, they can either clear it out or replace it with a new one using the following steps:
To Clear an Address:
- Go back to the search bar.
- Erase the current address.
- Press "Enter" to remove the selected address.
To Replace an Address:
- Go back to the search bar.
- Type in the new address.
- Select the correct address from the dropdown list.
This ensures that participants can correct mistakes and enter the right address without complications.